How To Use Invite A Friend Feature
Do you need more users? Do you want your current users to be able to invite their friends to use your app? You have come to the right place. Our “invite a friend” feature works because people tend to trust recommendations from someone they know. Based on this trust, the “invite a friend” feature helps to spread the word about your app. Kindly follow the steps below to set up the “Invite a friend feature” for your app now. You can watch our youtube tutorial. It helps to simplify this.
Step 1:
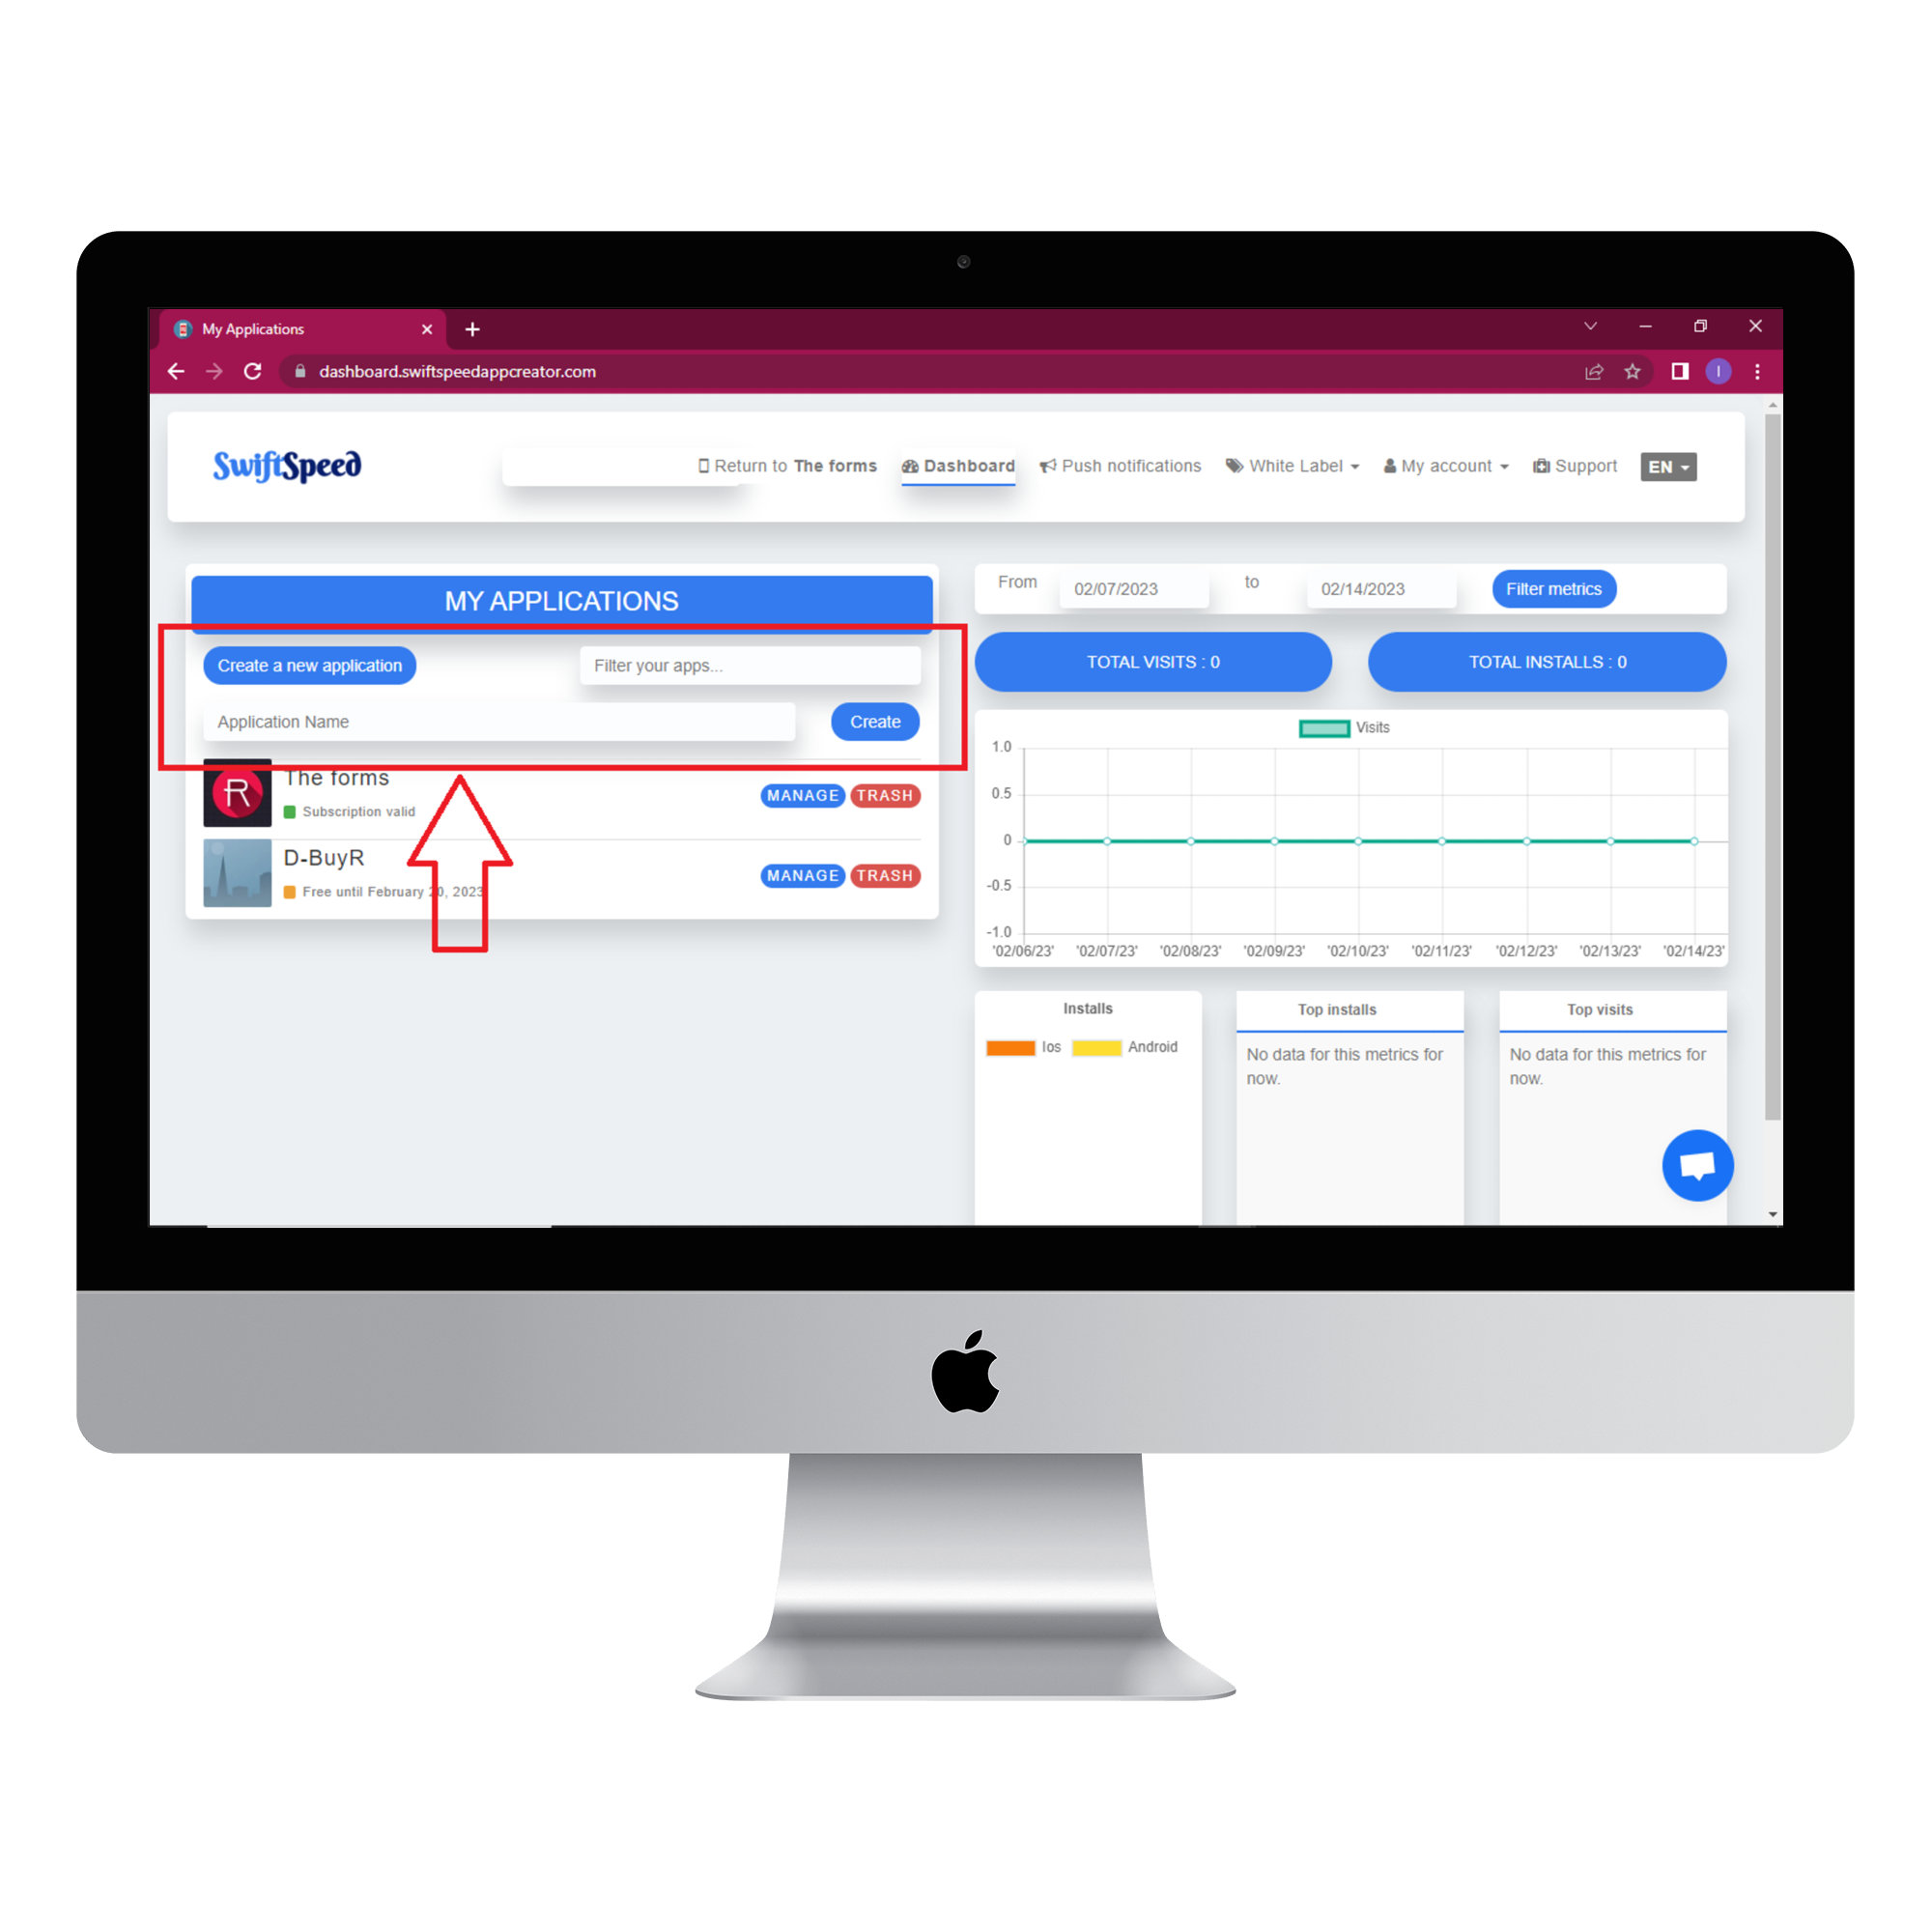
Visit the Swiftspeed homepage, log in, and you will be taken to the app creator dashboard. Click on “create a new application” or select a pre-existing app ( if you have one ). If you selected “Create a new application”, you will have to type in the name of your app and click “Create”. If you are not familiar with the app creation process, please read our article on creating an app on our platform.
Step 2:
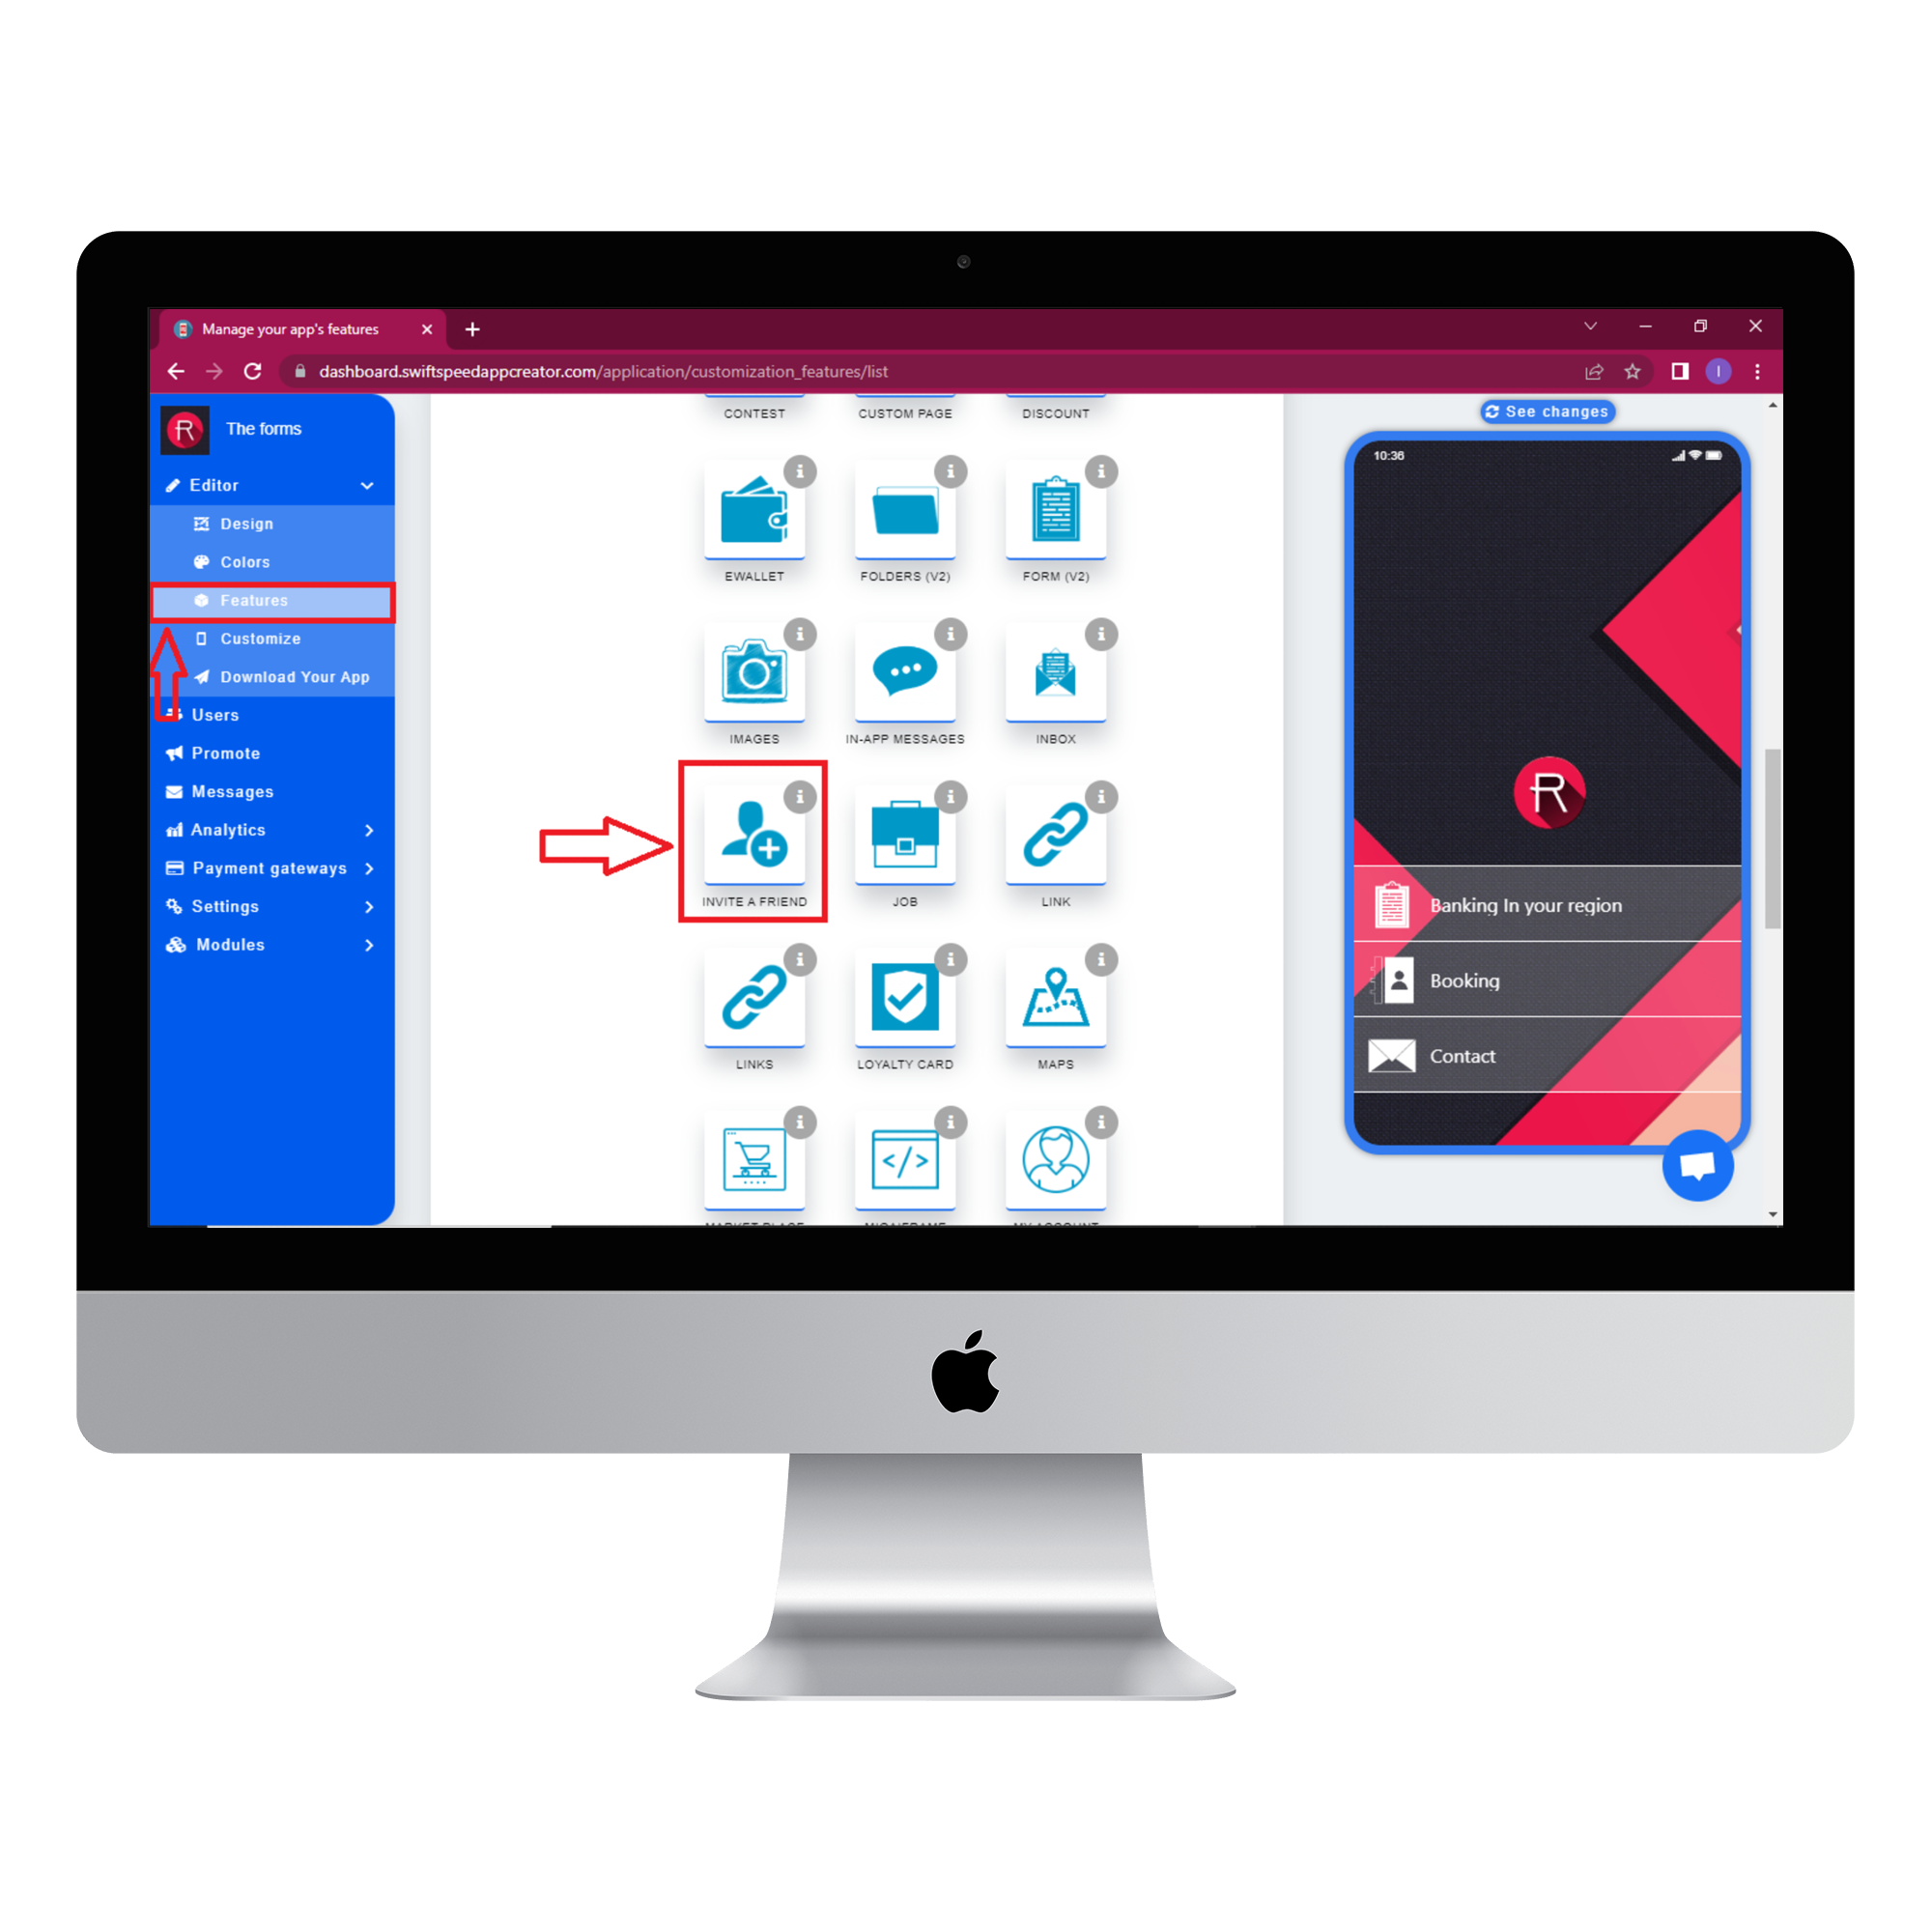
Select “Features” from the side menu to the left of your screen. Choose the “Invite a friend” feature from the list of features and click on “Add feature” when the popup window appears. If you find it challenging to locate the “Invite a friend” feature, you can use the search box to find it. Just type in “Invite” and press “Enter” on your keyboard.
Step 3:
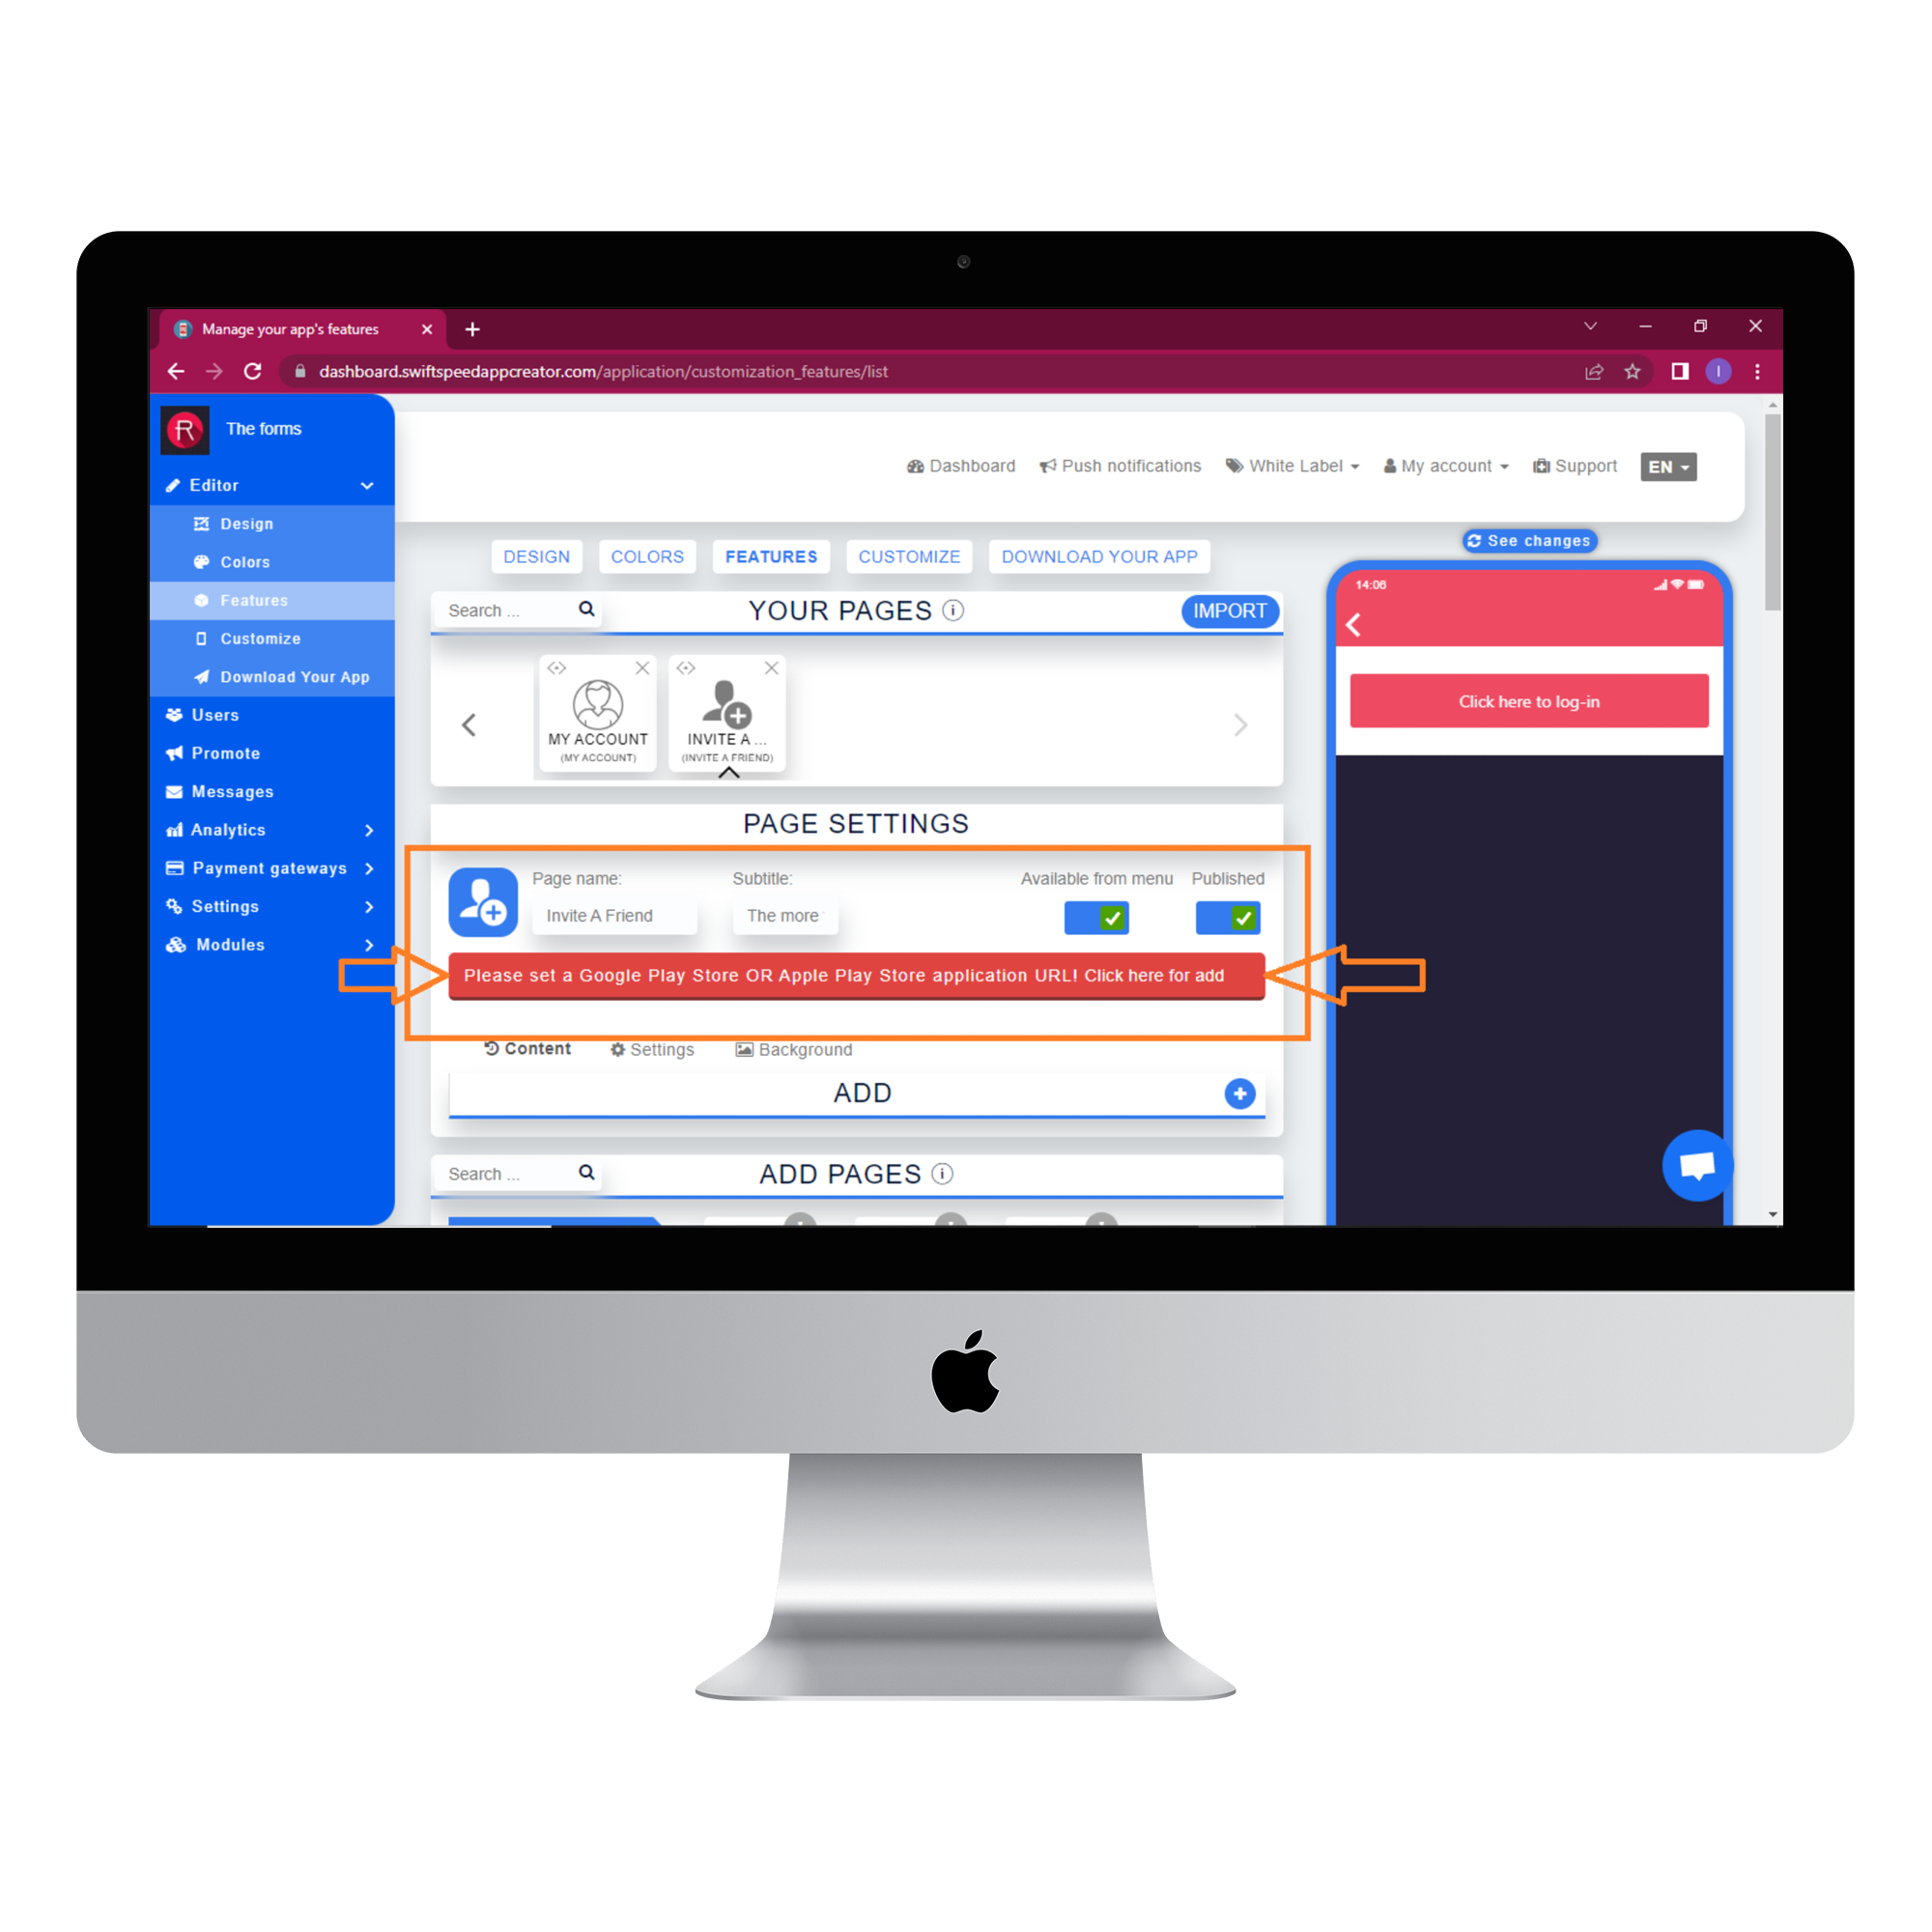
In the Page settings section, you can change the feature icon by clicking on the image button to the left of the “Page name” label. Choose your new feature icon, and it will be saved automatically.
Step 4:
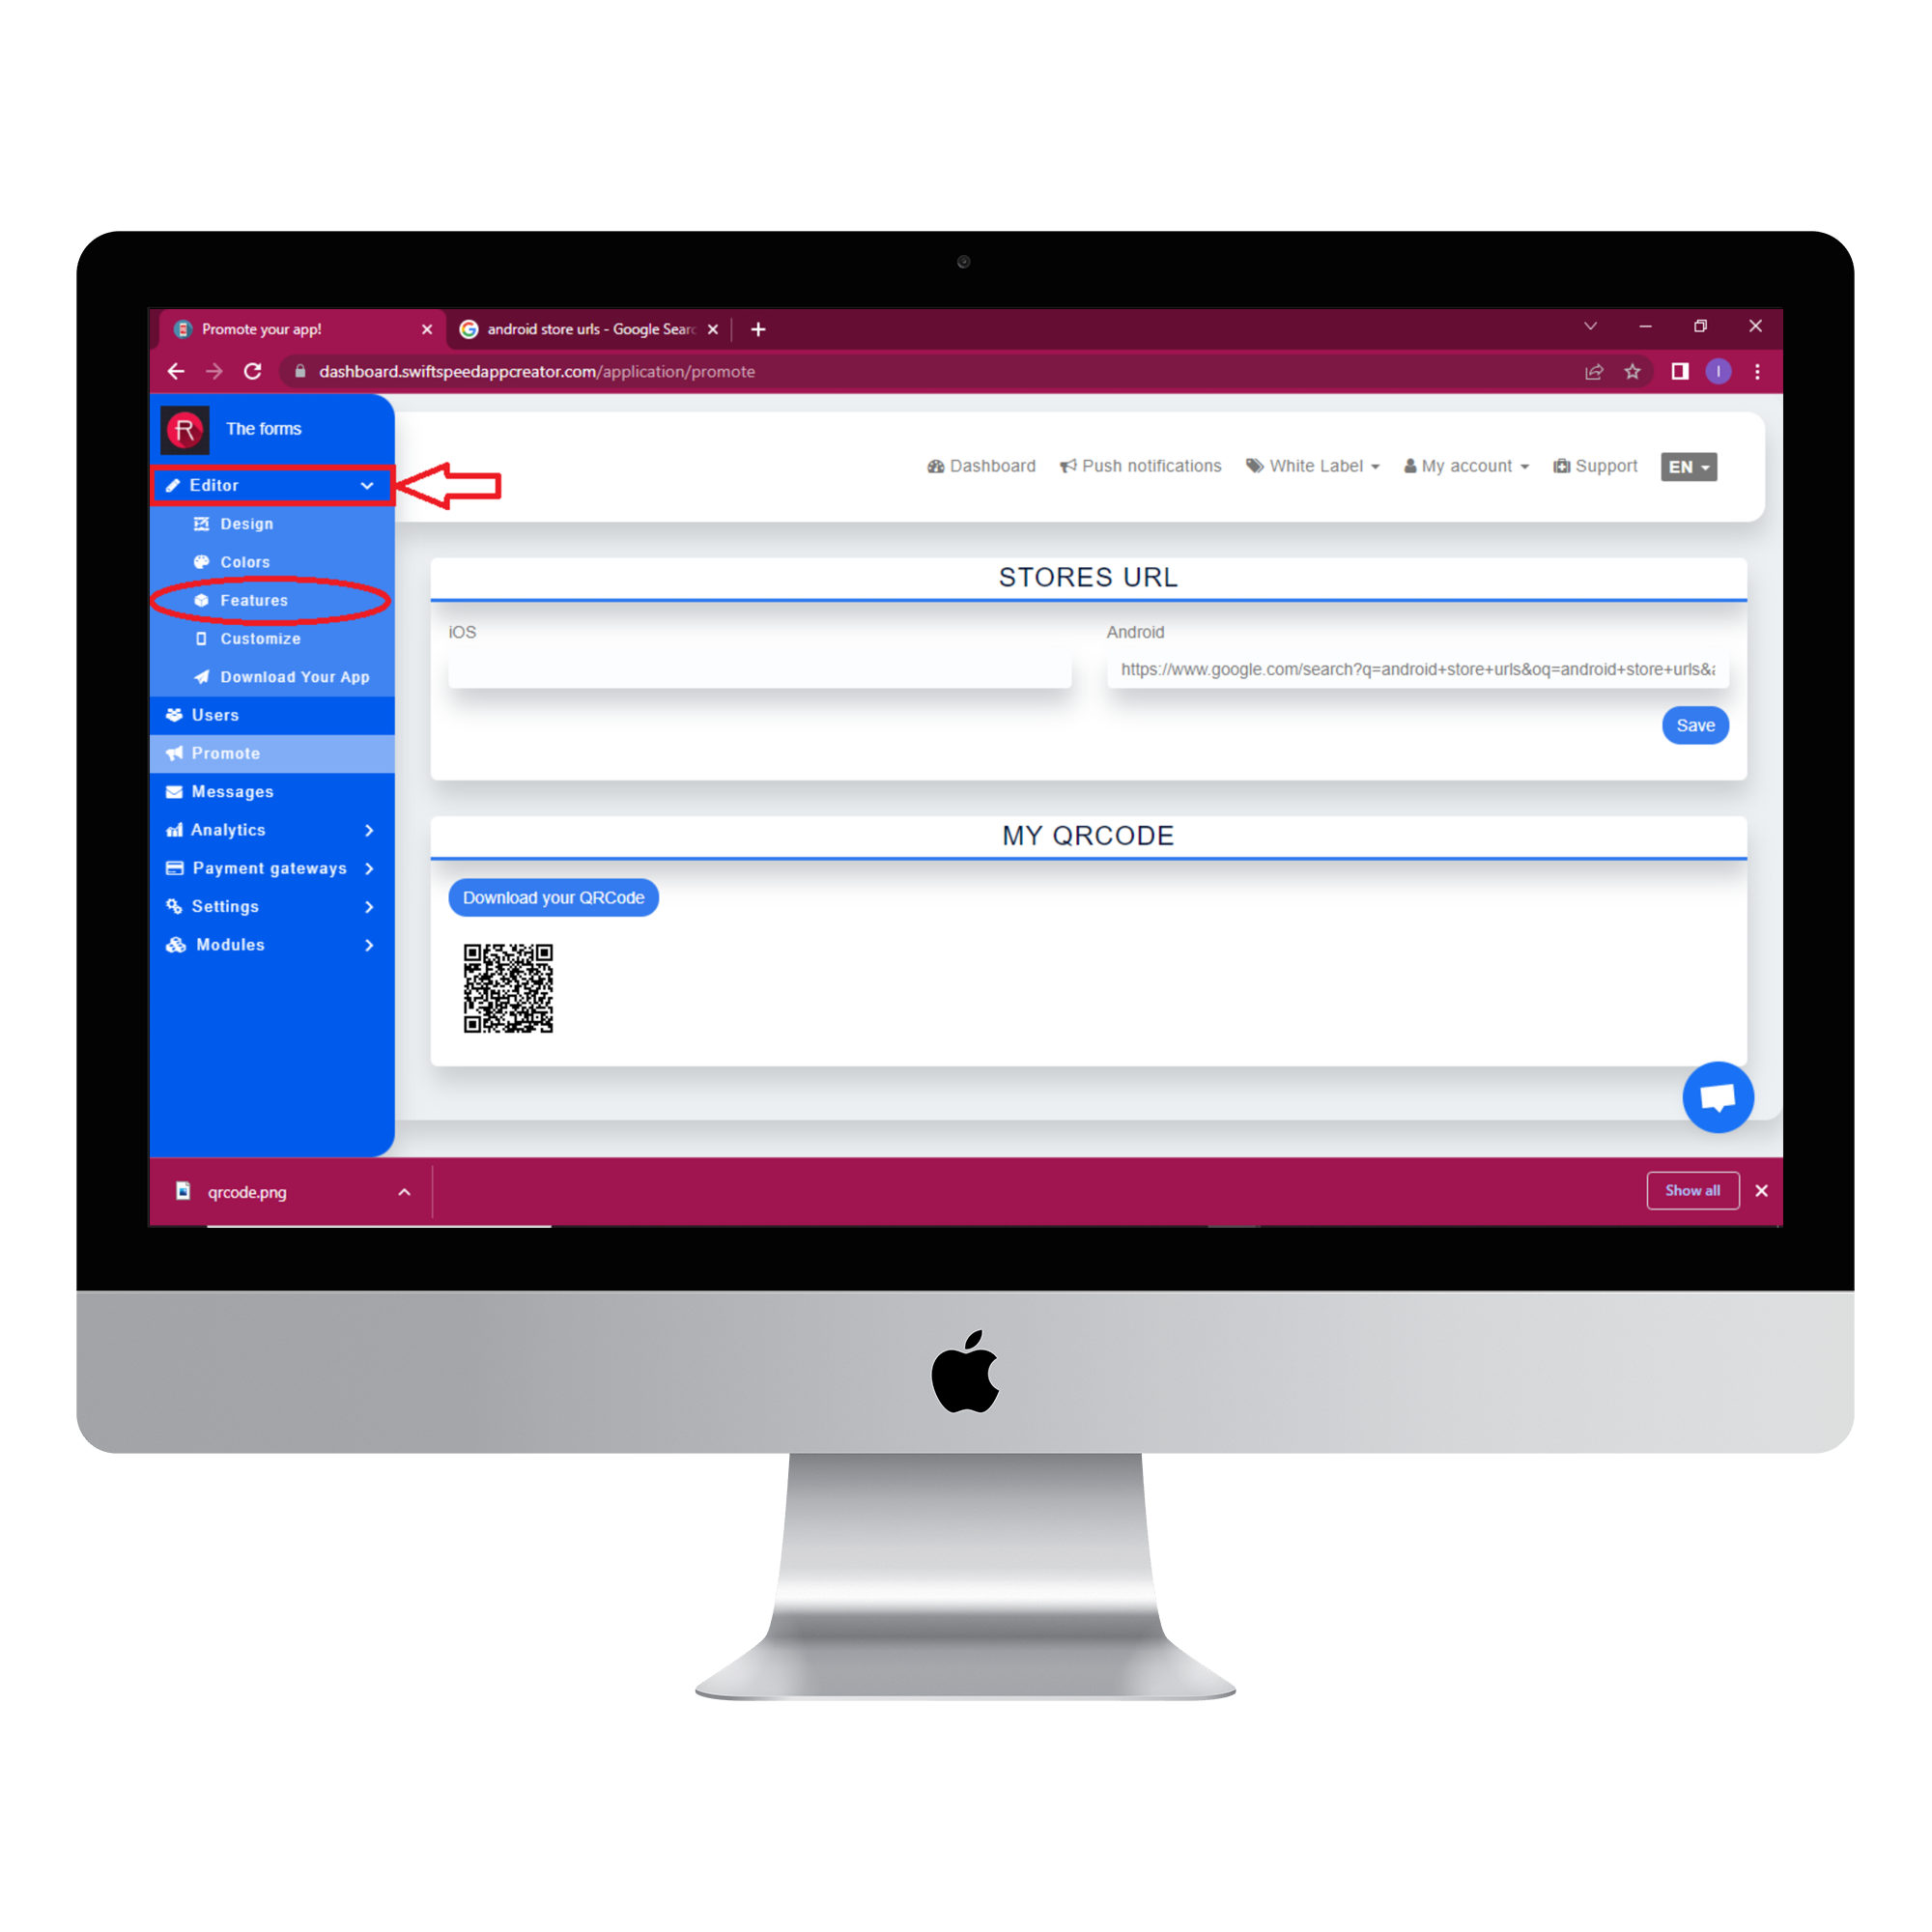
Click on the red label to add the apple or google play store url for the application you want to promote.
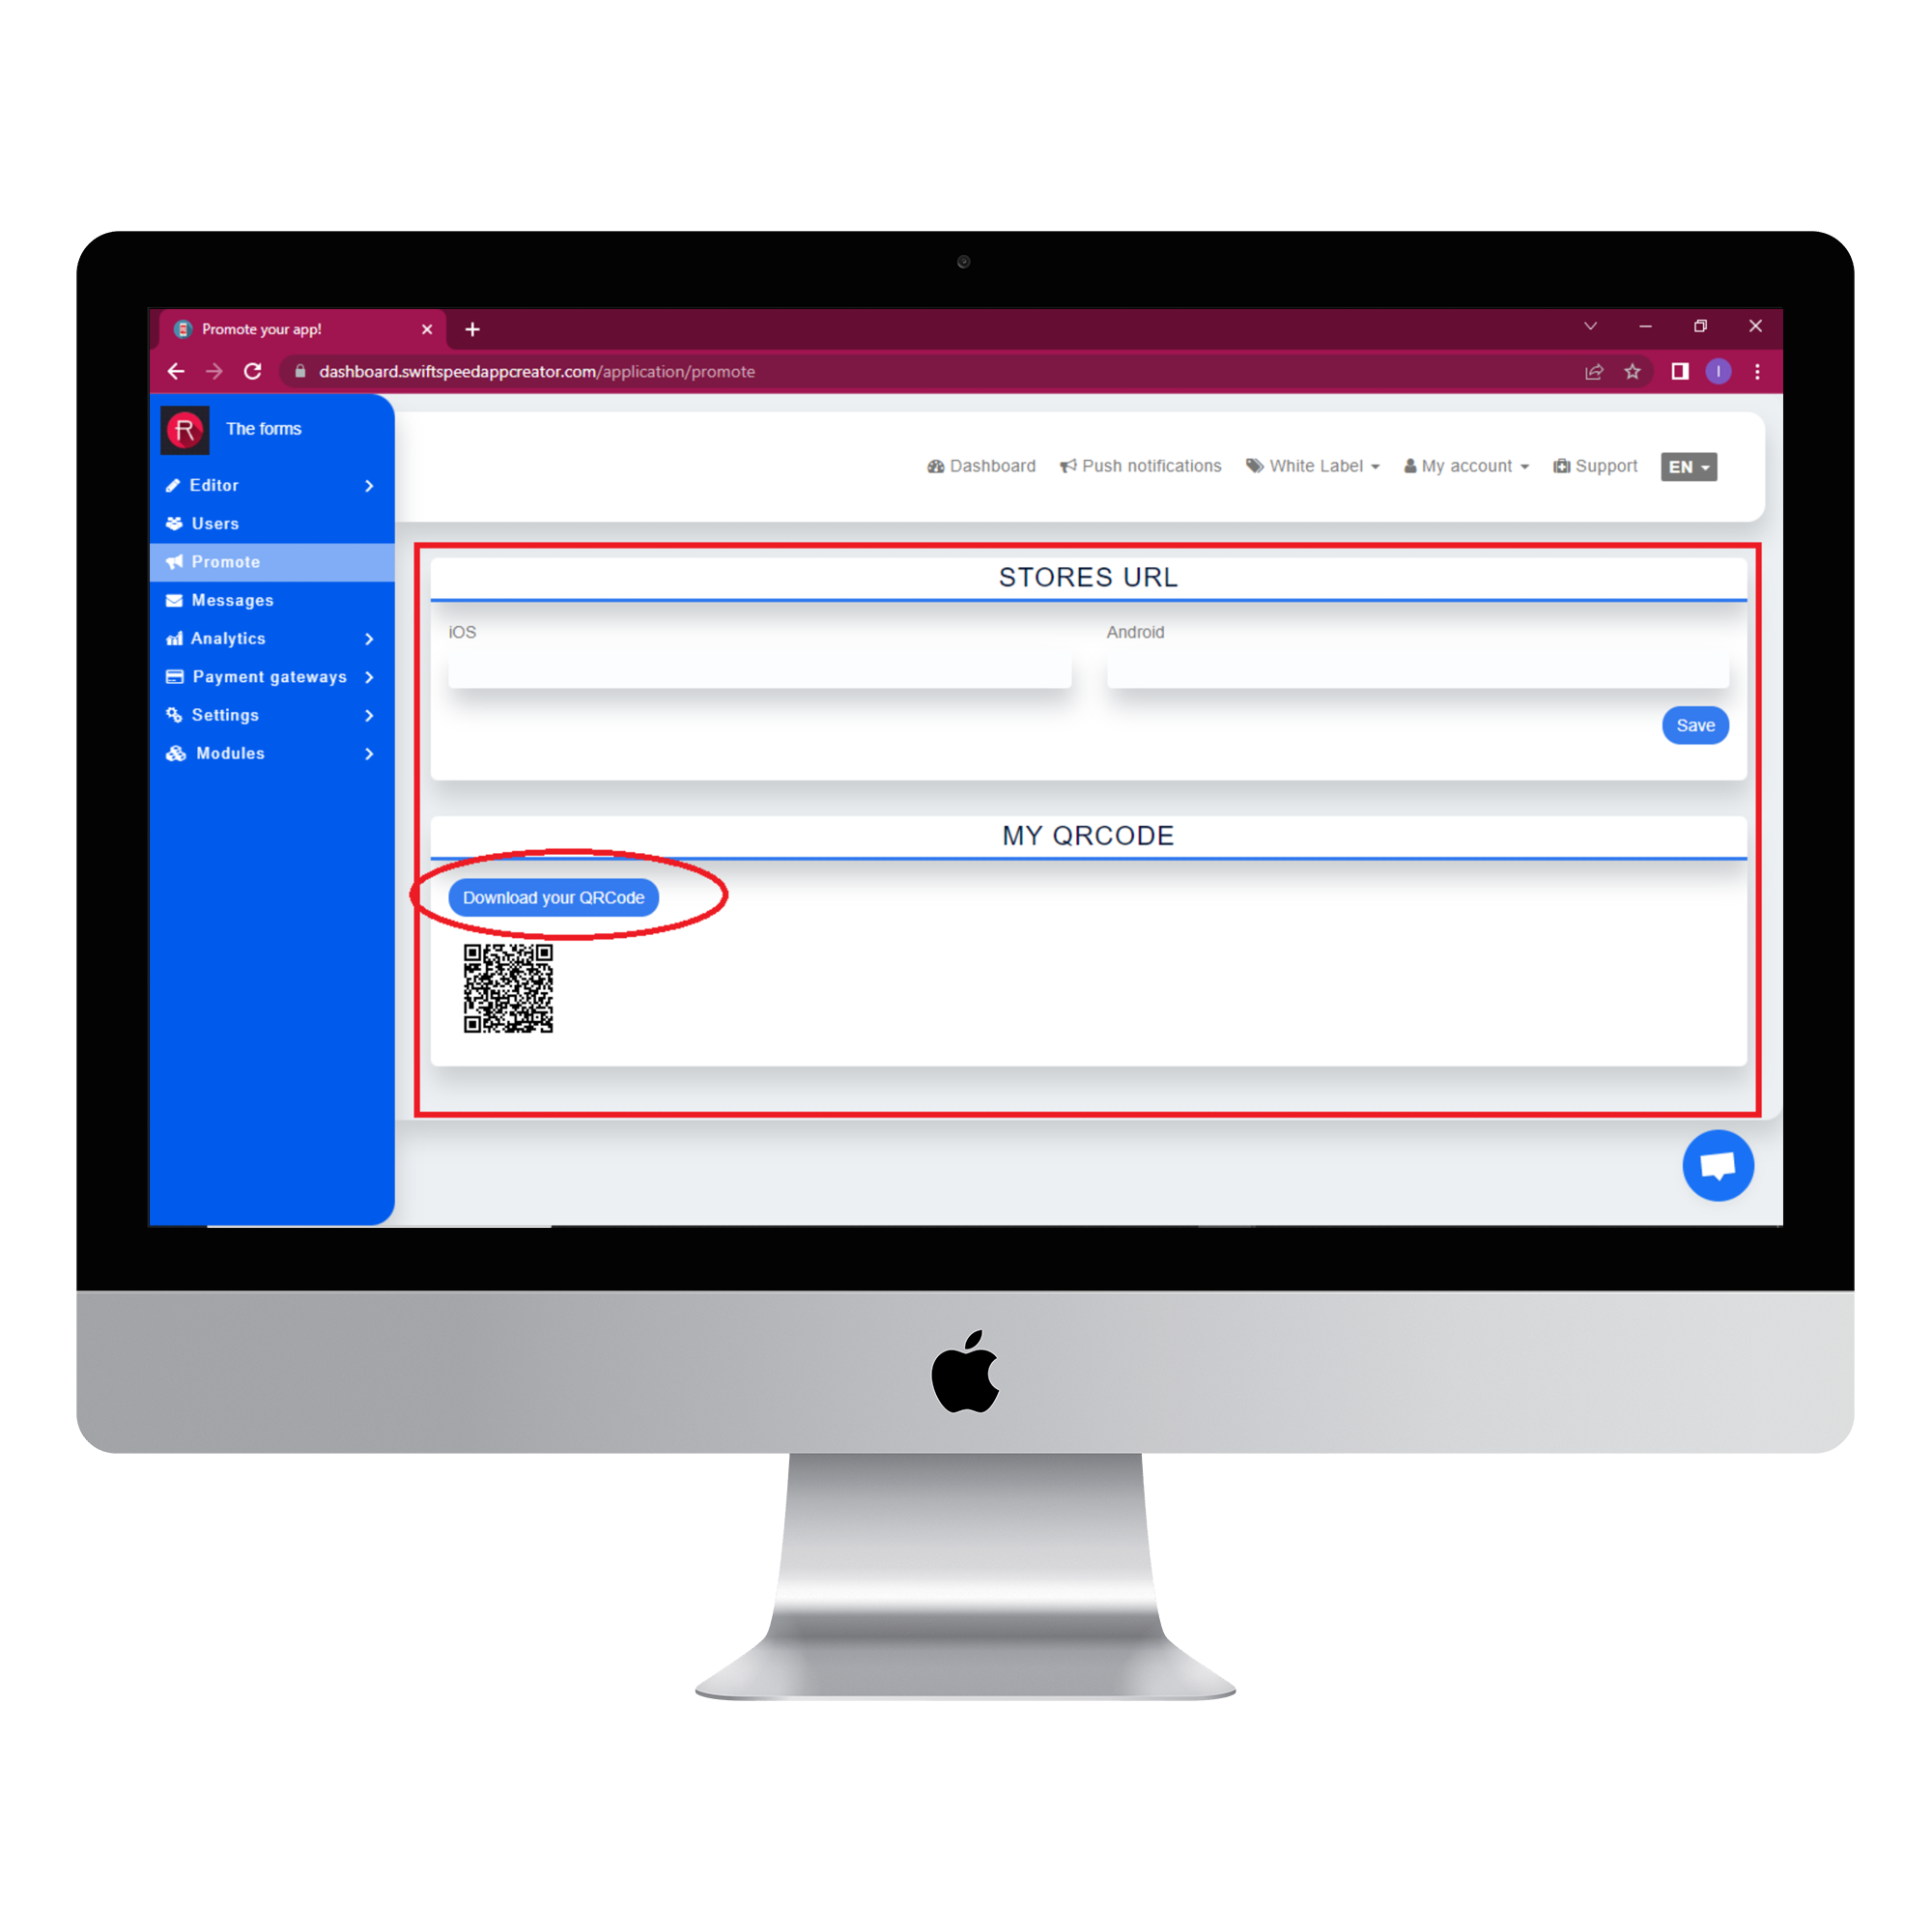
You will be directed to the page shown in the image below; type in the required information, then download your QR code and click save. You can share the QR code with your friends on social media.
Step 5:
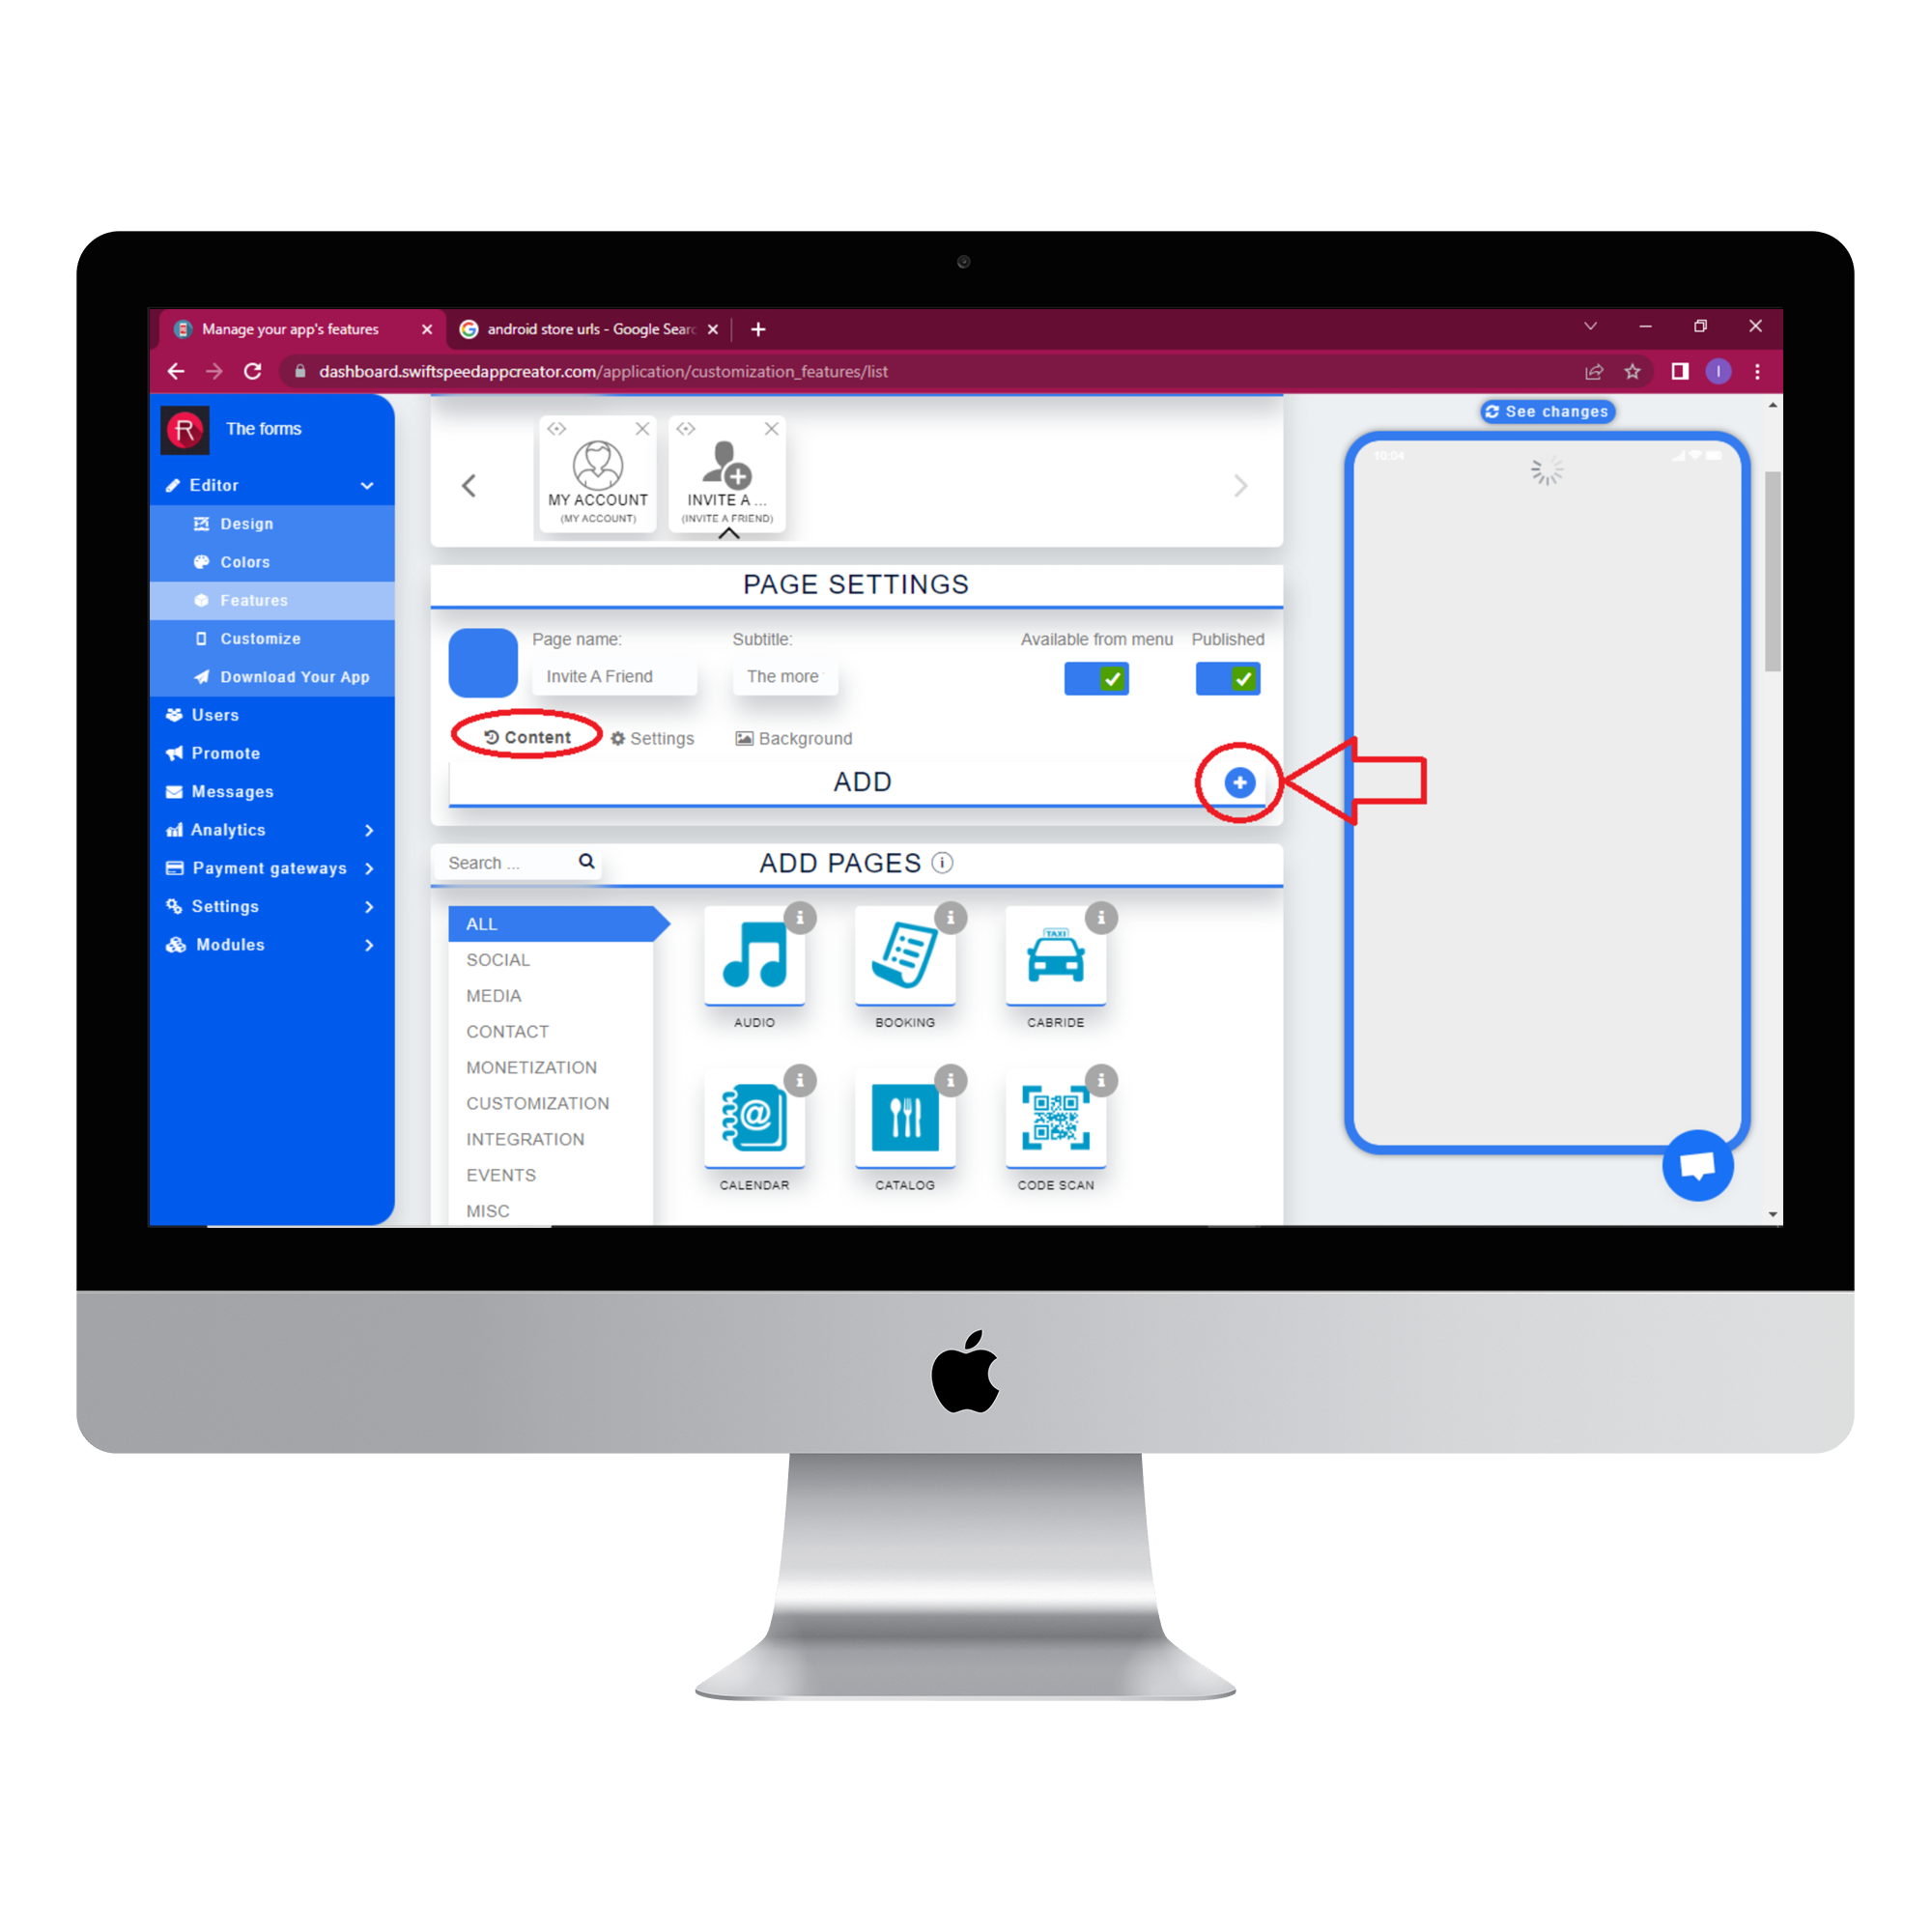
Go back to the “features” page by clicking on “Editor” in the side menu and selecting “features”.
Click on the “invite a friend” feature, select the content tab and click on the (+) button in the “ADD” section to add promotional content.
Step 6:
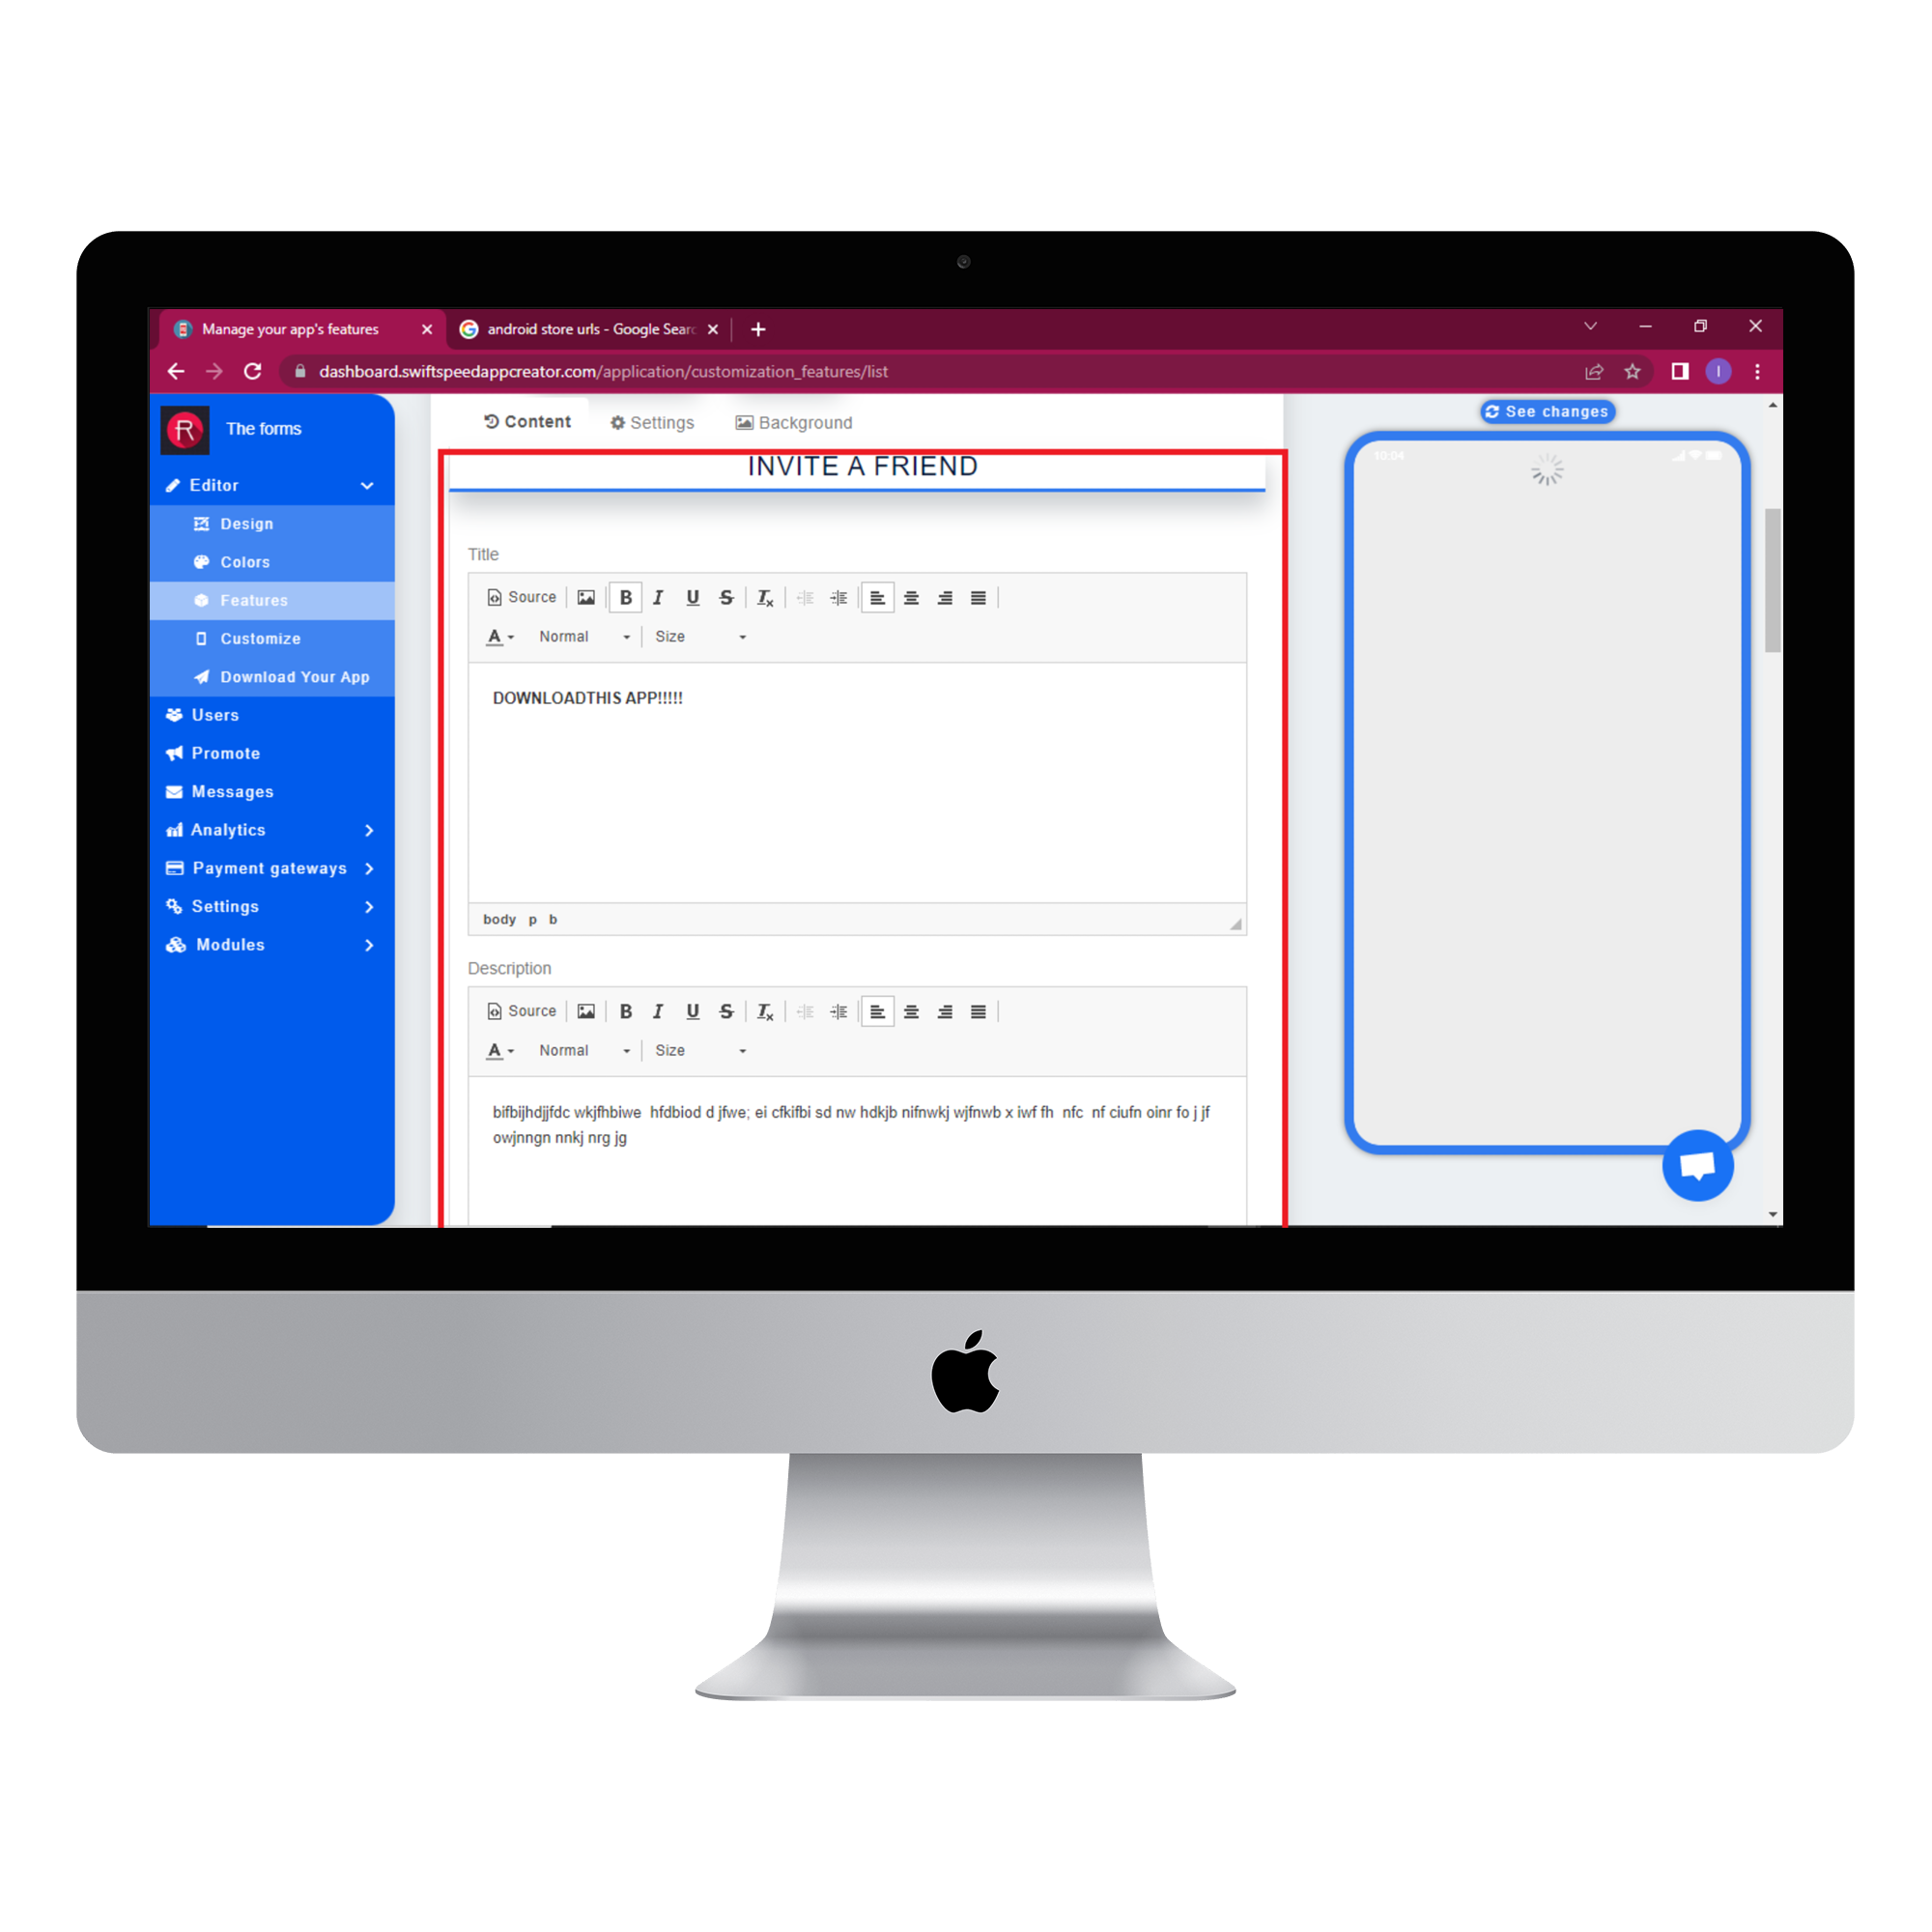
After clicking on the (+) button, you will be taken to the “invite a friend” section, where you will be required to fill out some information about your app promotion. The “sharing text” will be displayed to your users when they click on the share button, so it is recommended that you write a message that will attract the user’s attention here. Scroll down and click on submit.
Step 7:
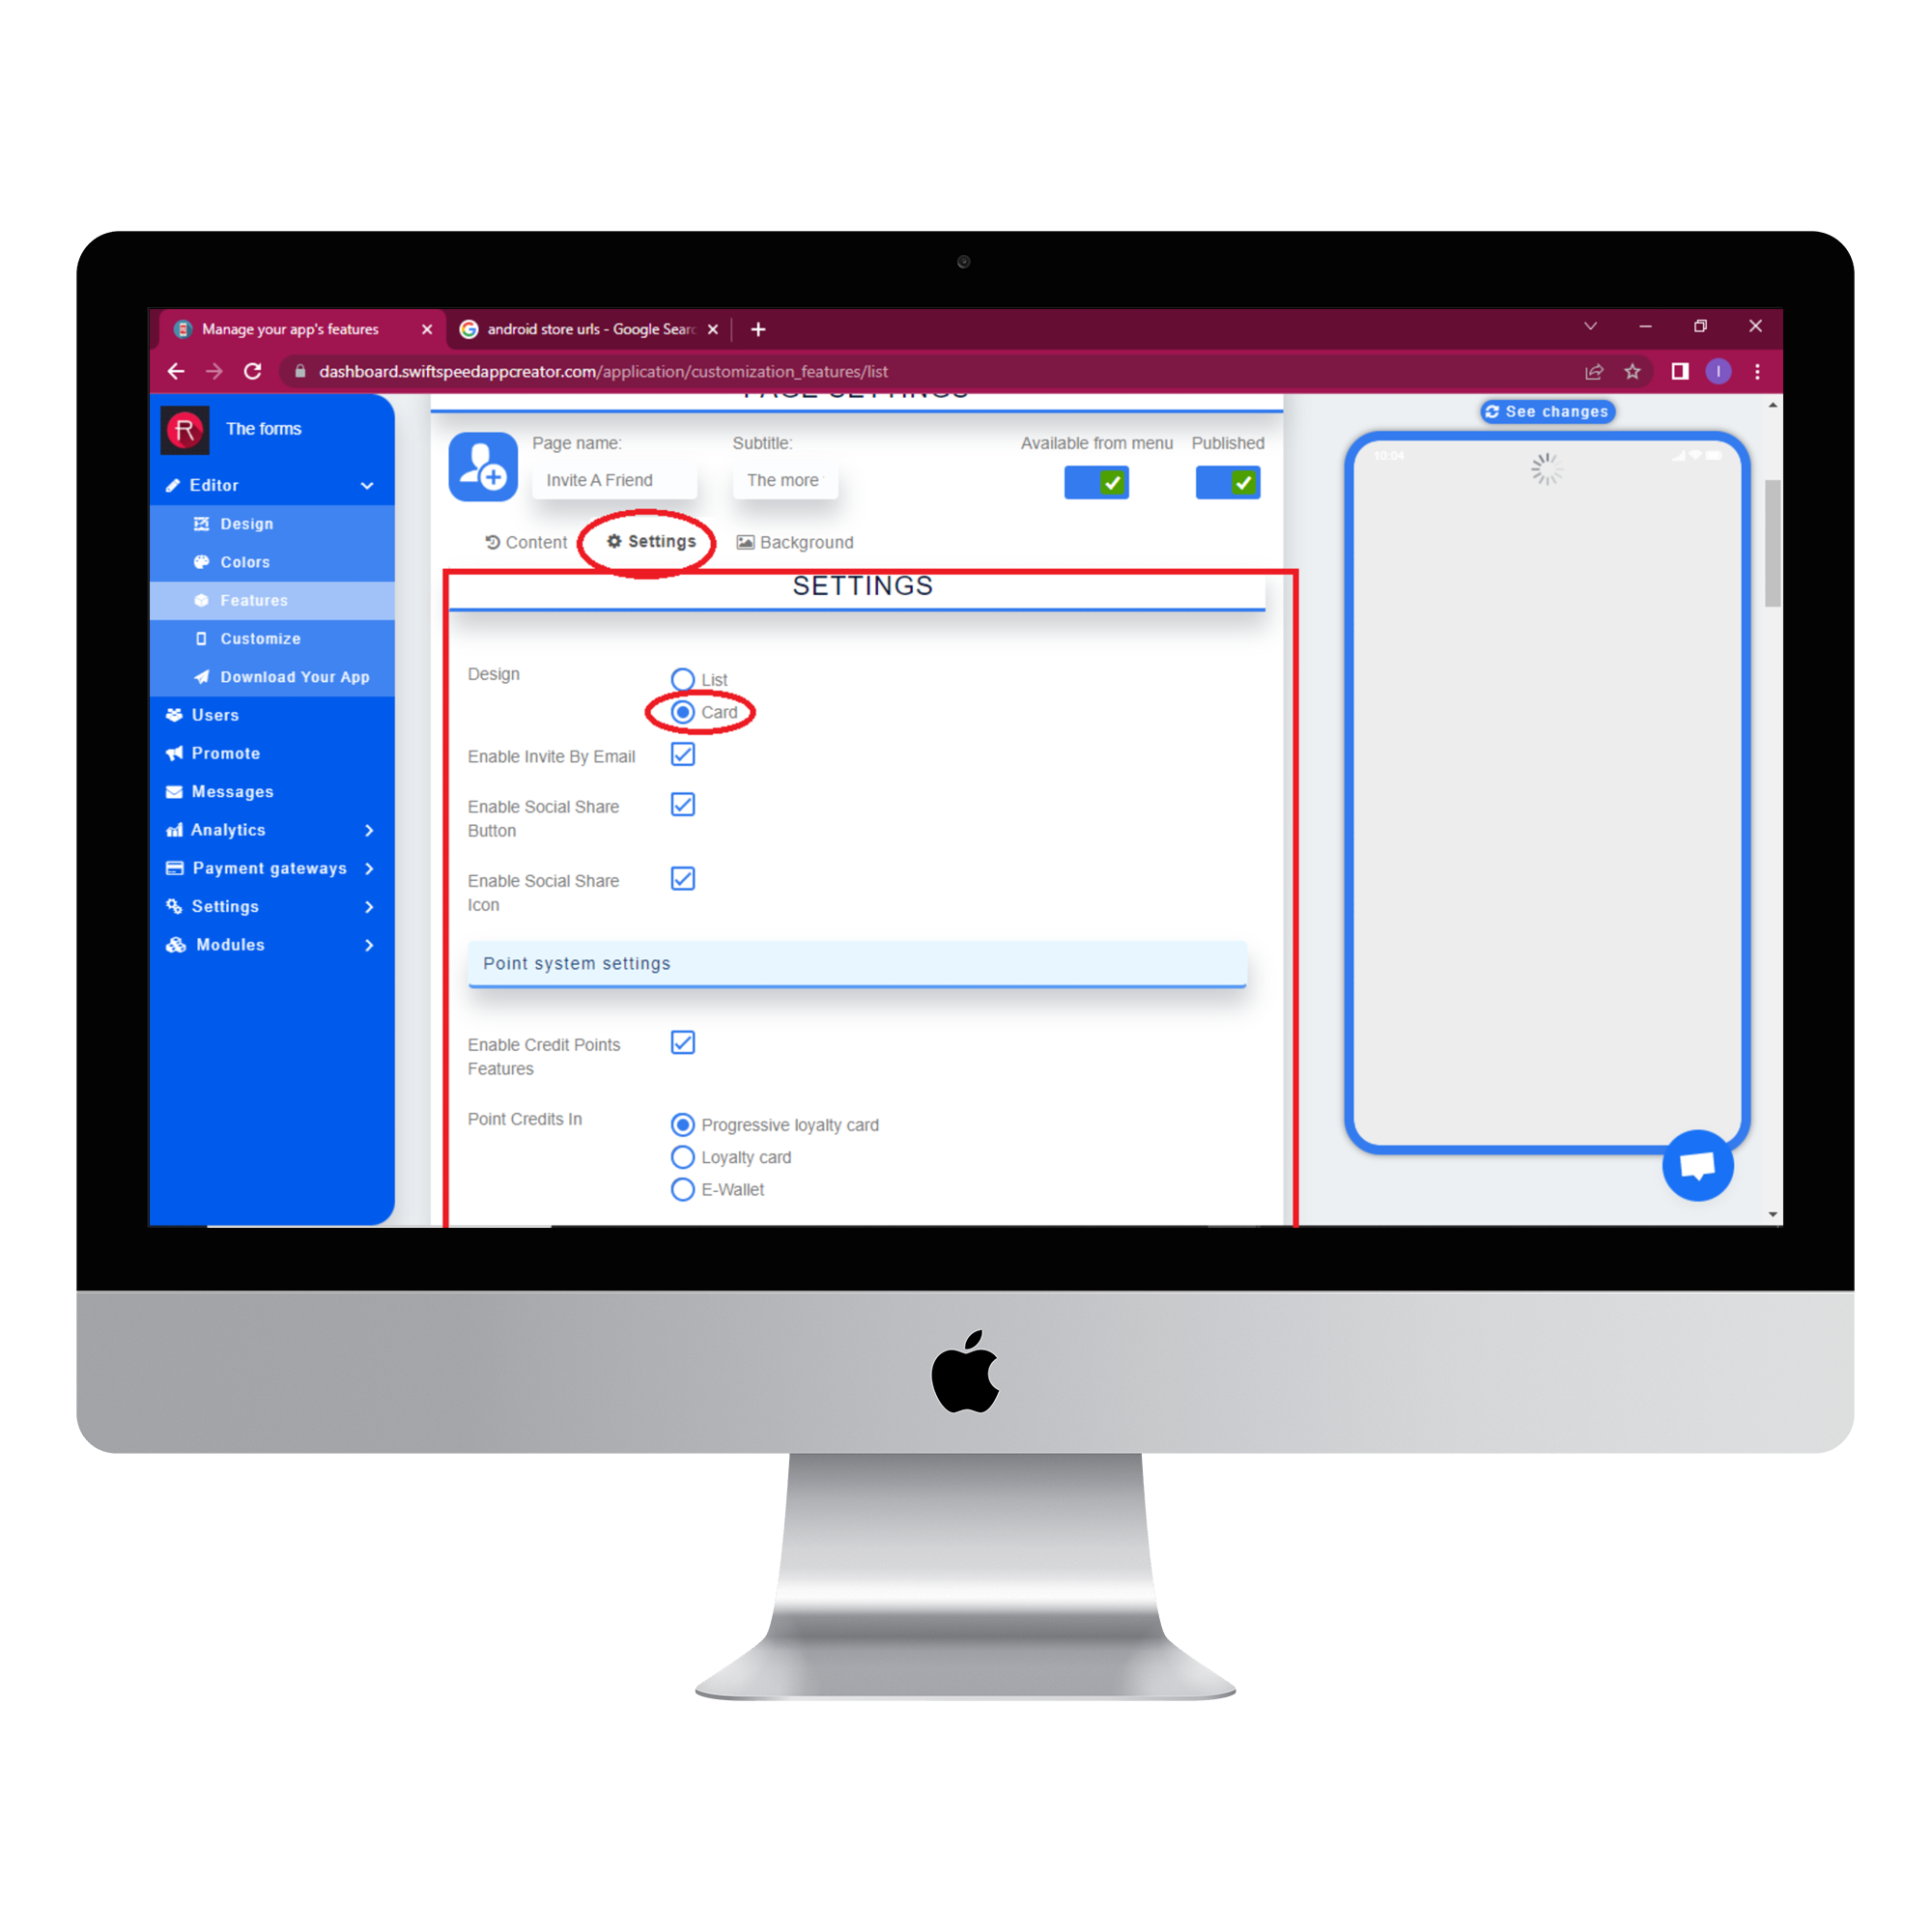
Select the settings tab and choose “card” as your design type. Enable invite by email to allow users to share your app by email. Enable social share icons to use our beautiful social icons in your app. Fill out the other information as you see fit, then scroll down and click on submit.
Step 8:
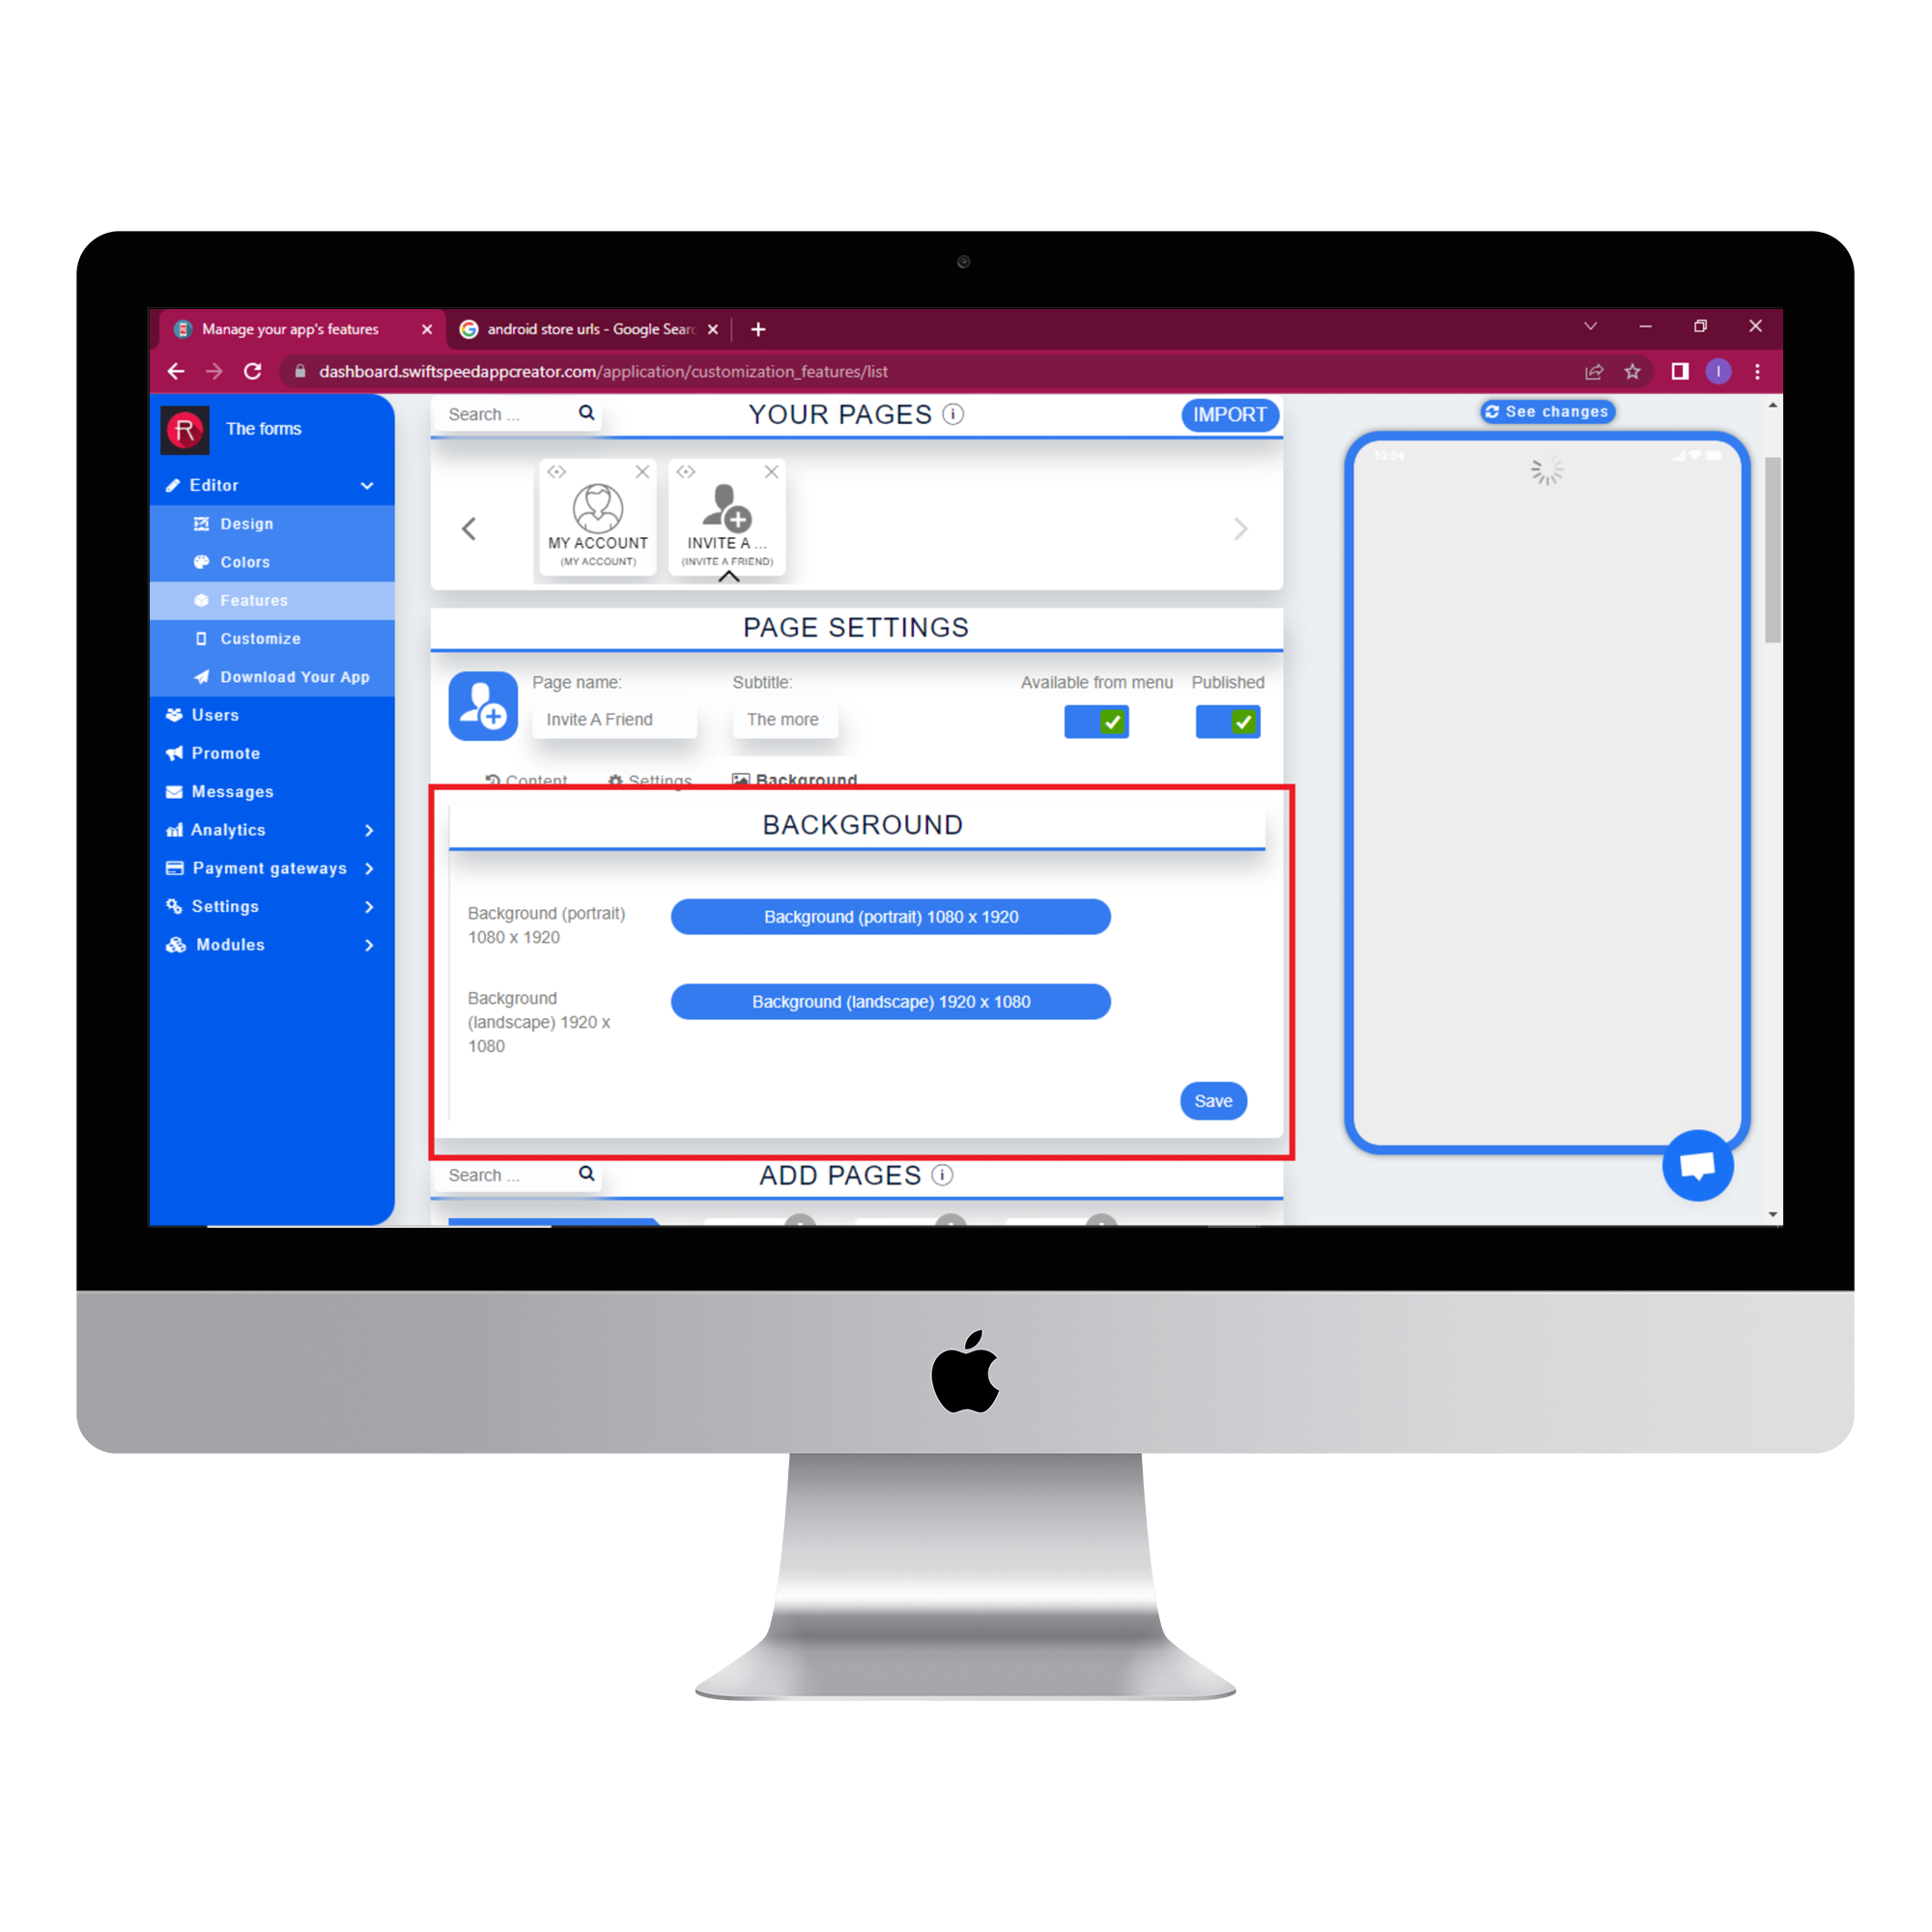
Click on the “Background” tab to use a custom image as the background in your app. you can use a separate background for portrait and landscape mode. Click “save” when you have chosen the image. You can skip this step if you prefer our default background.
Step 9:
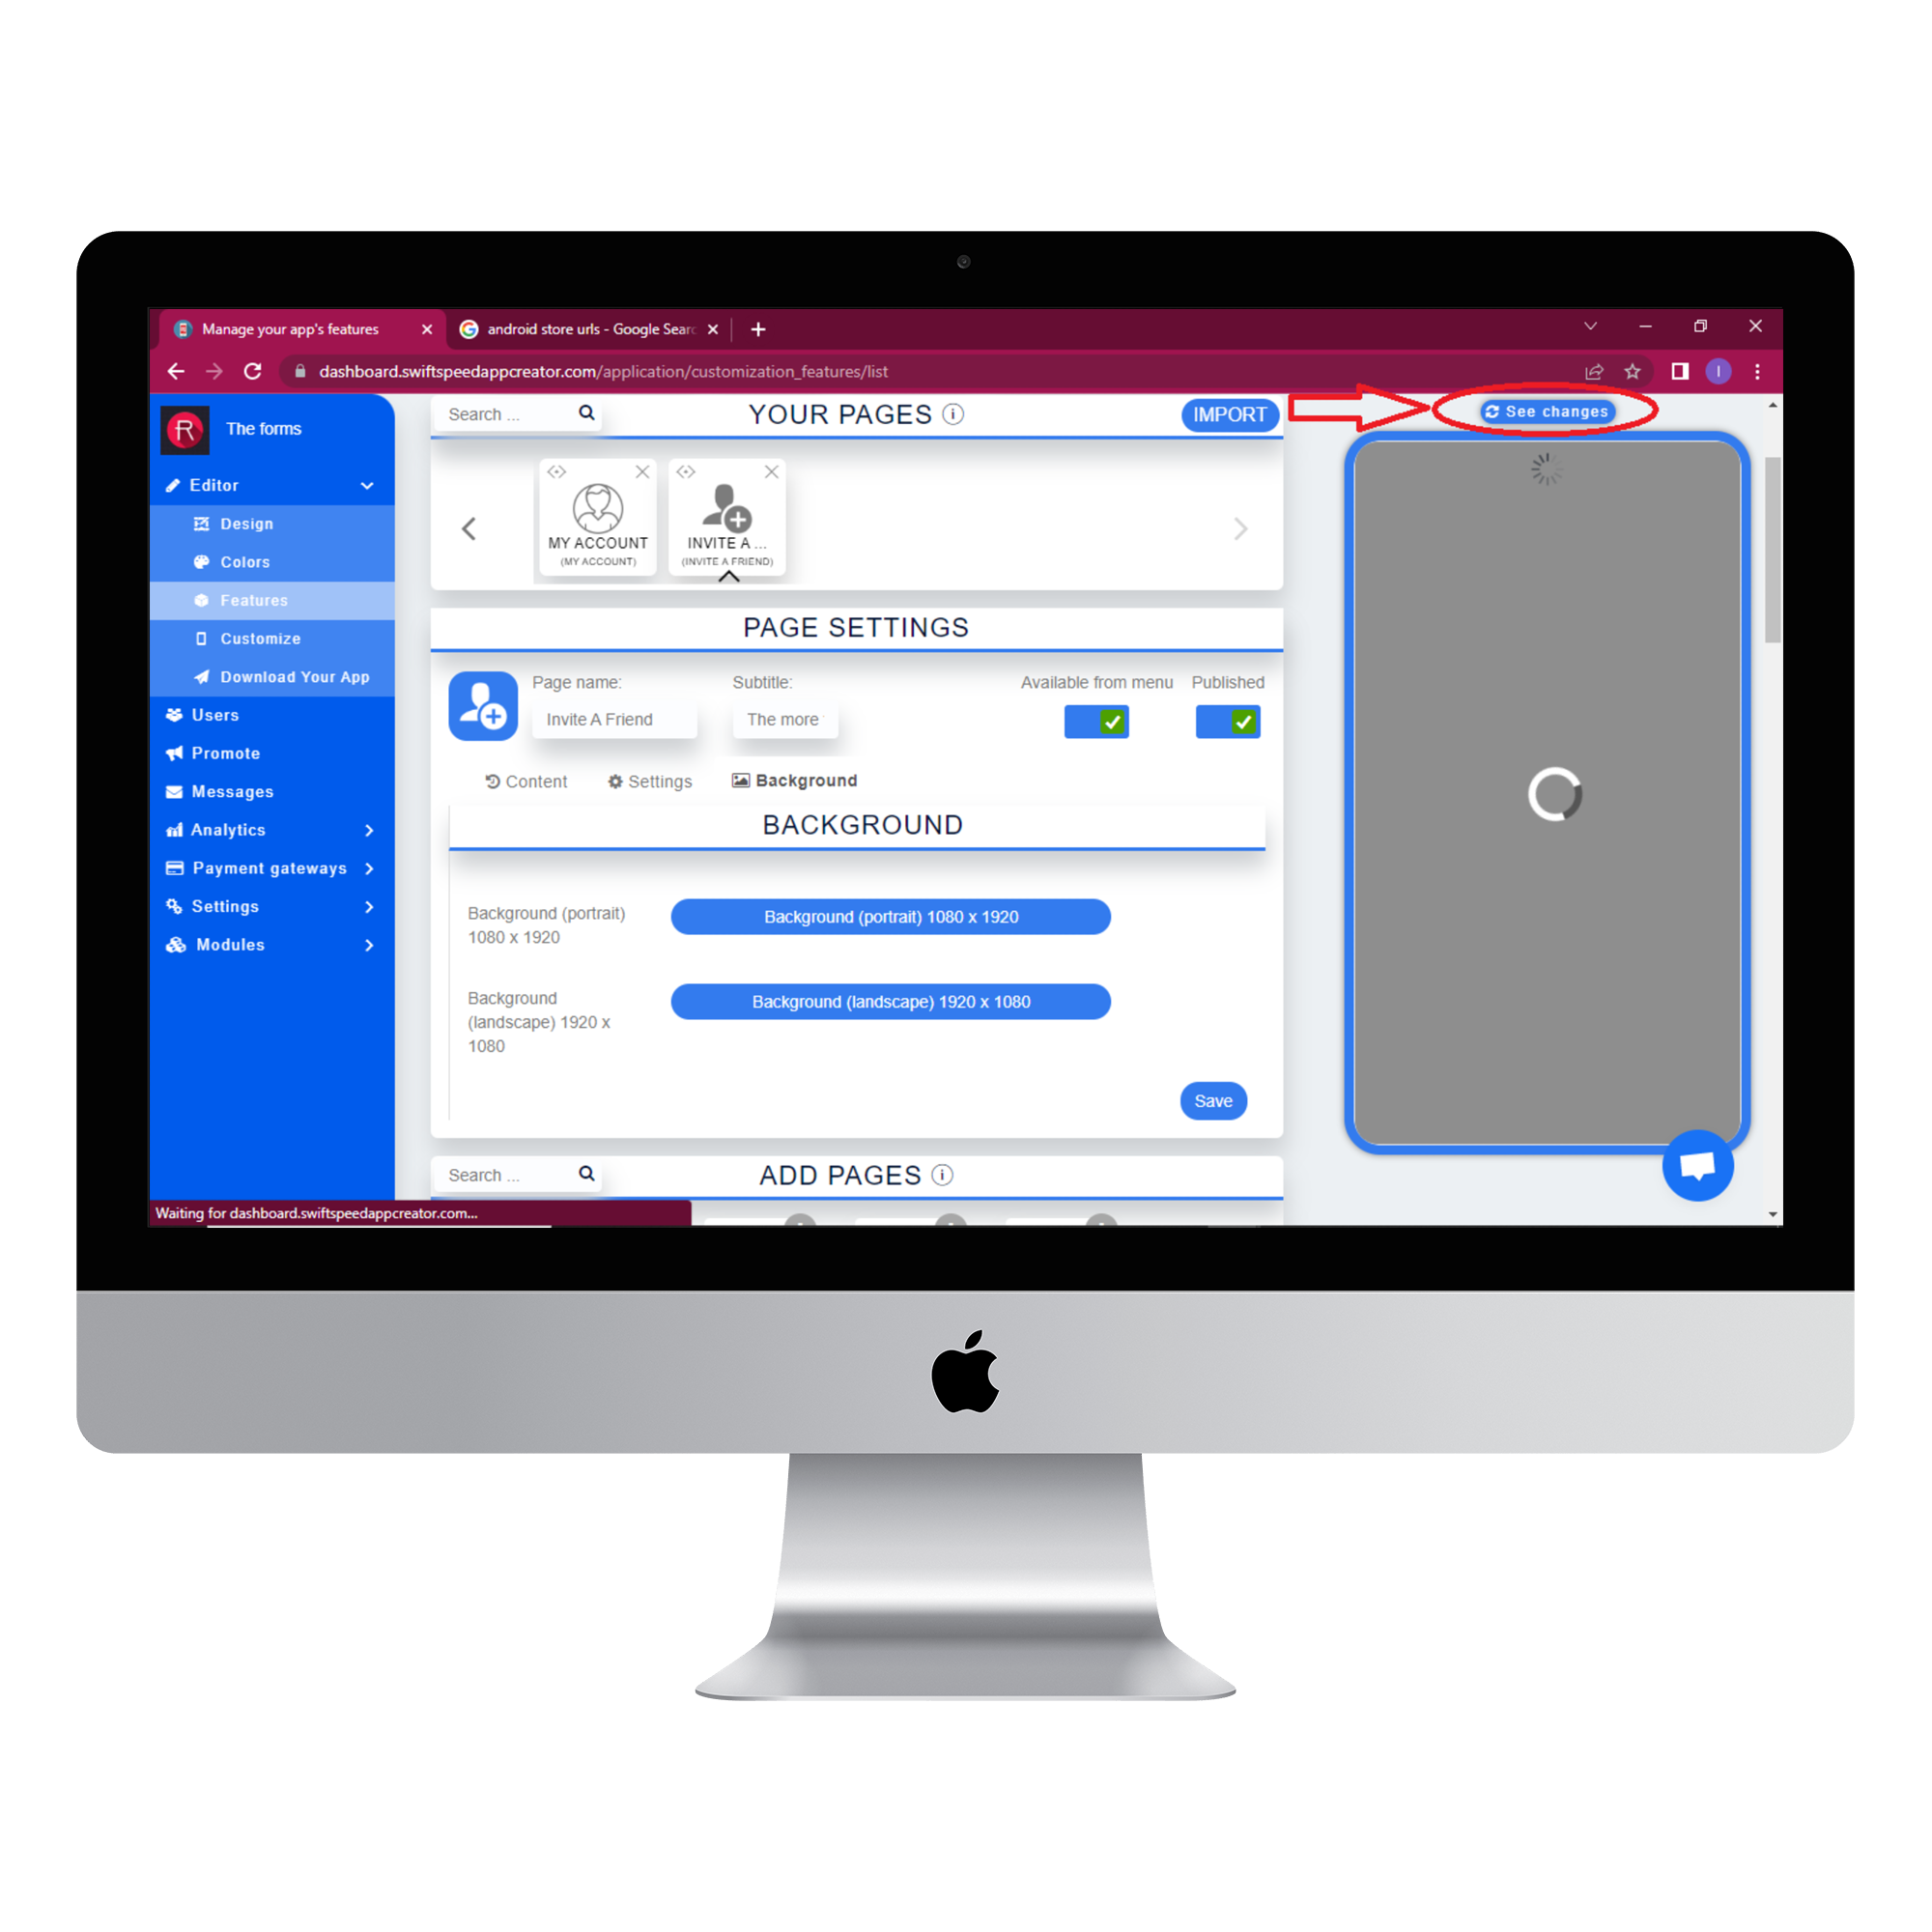
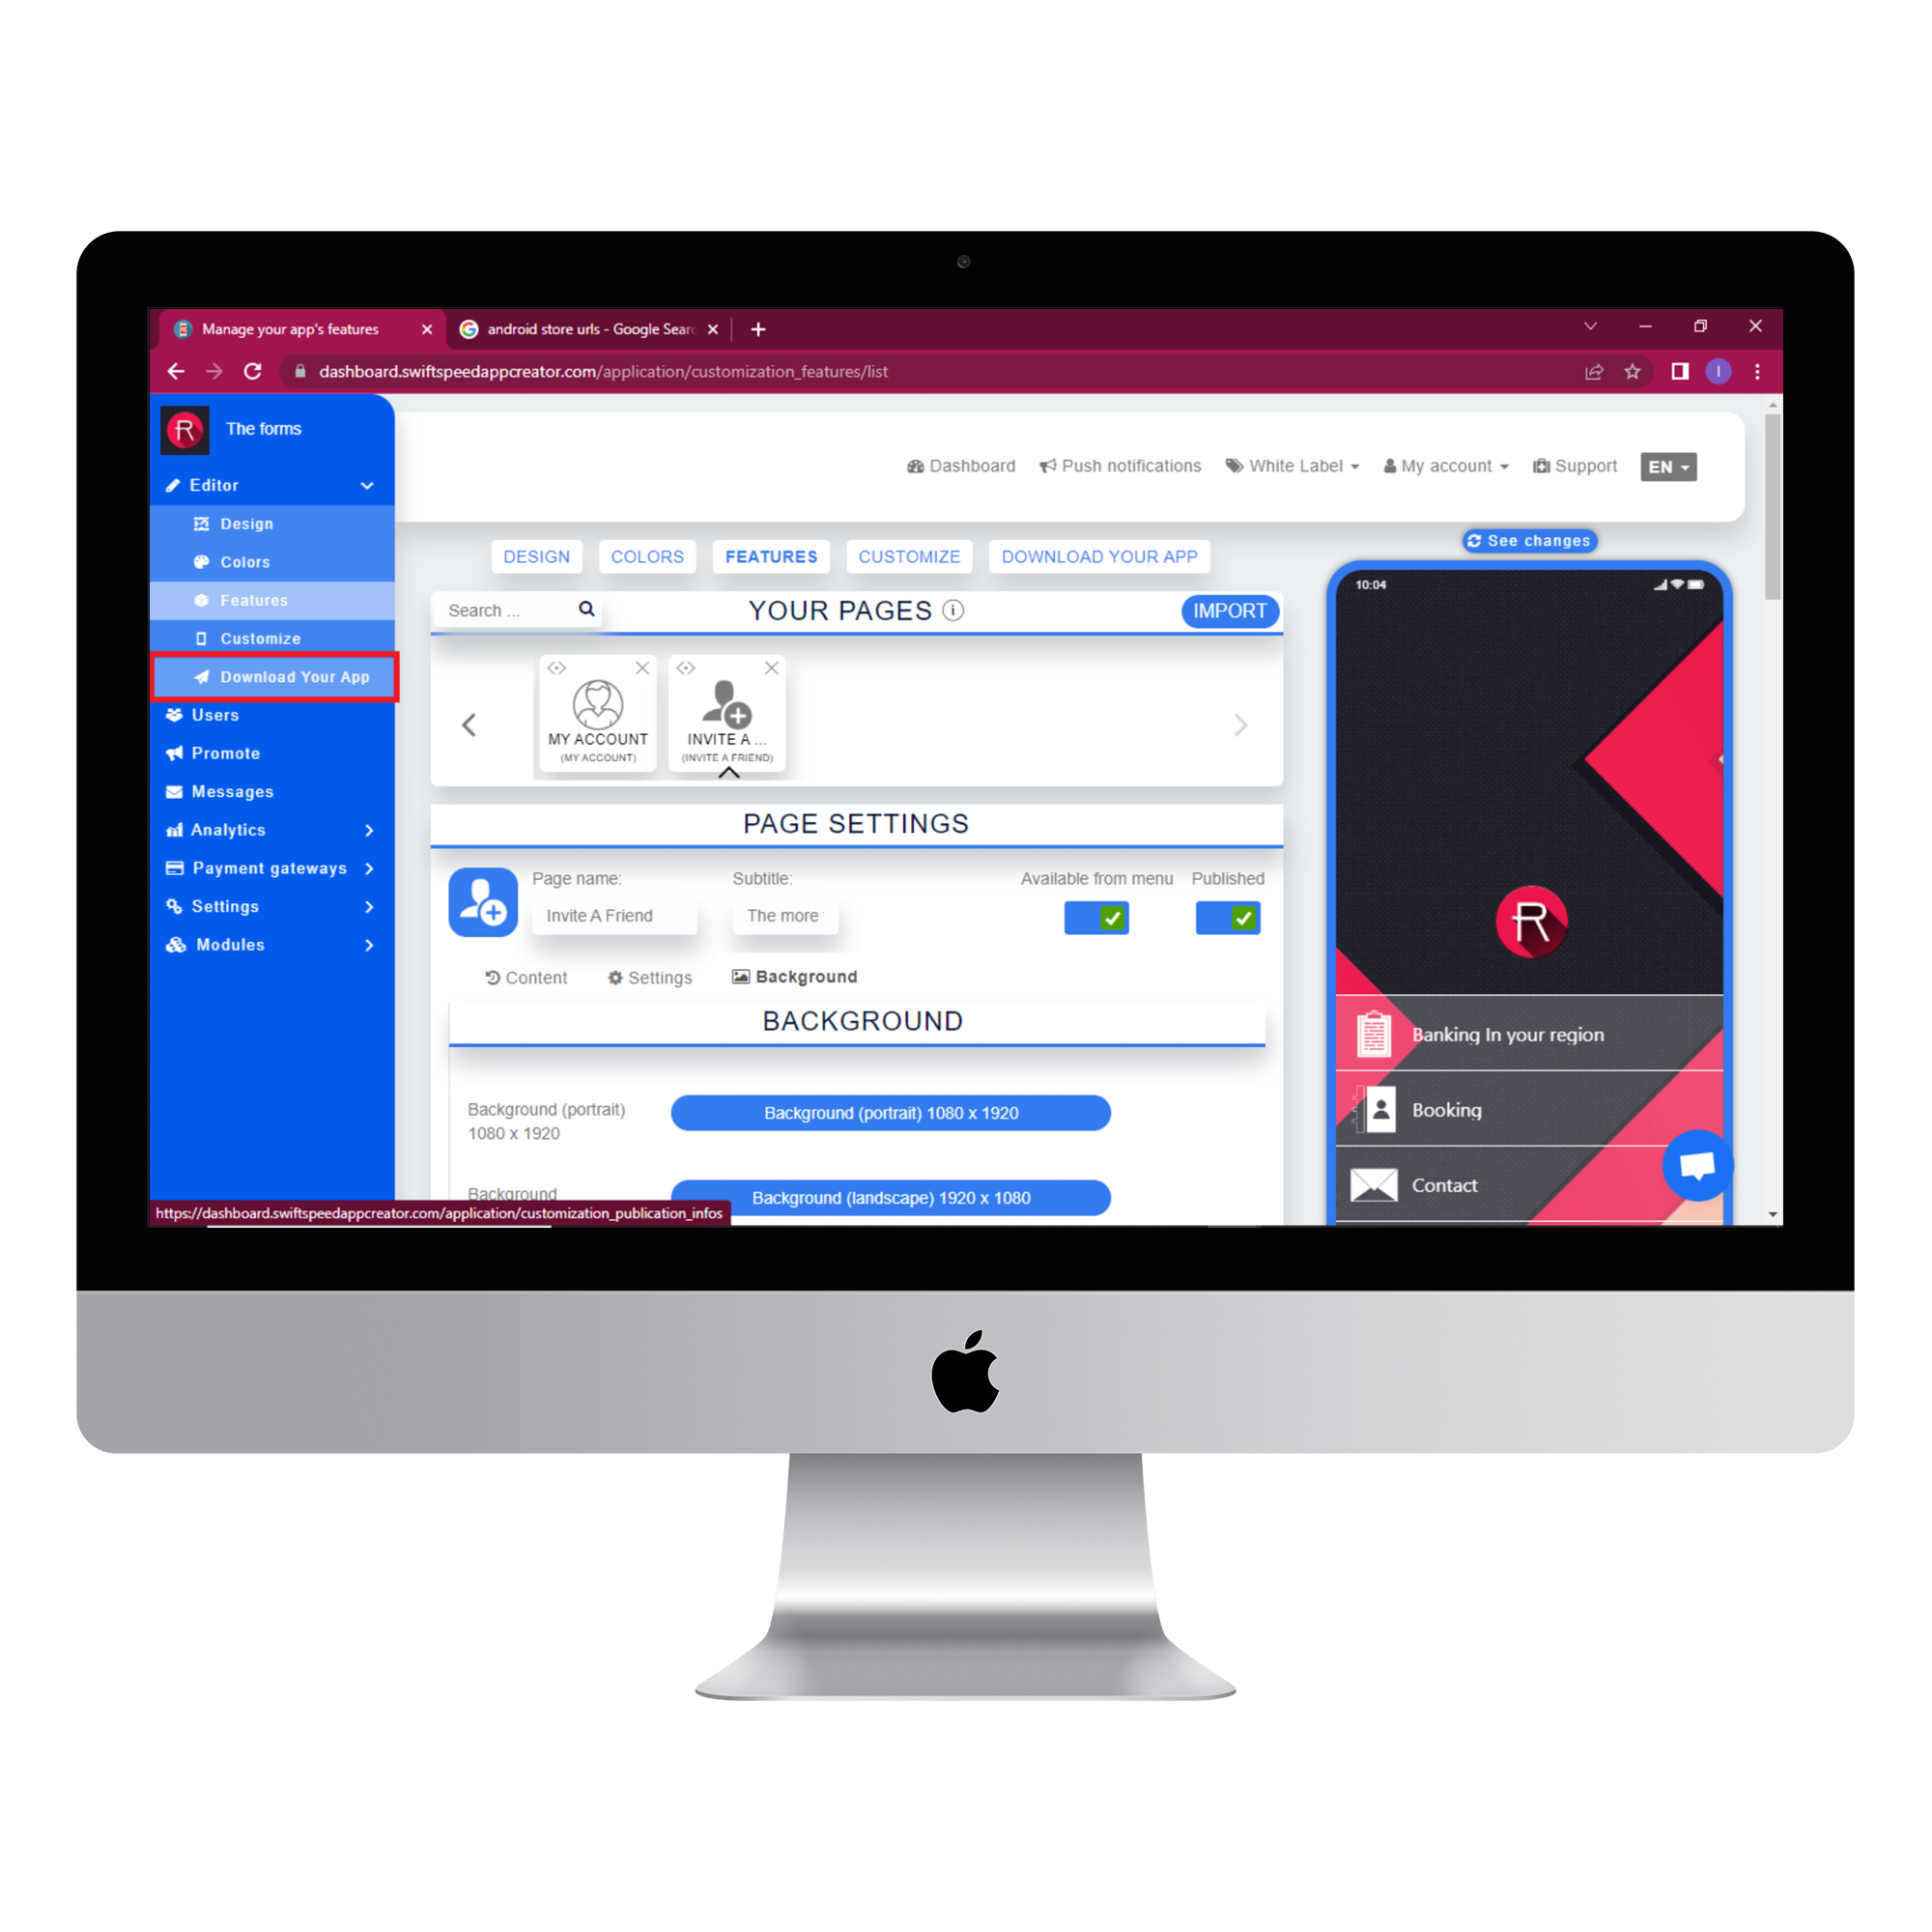
Click on the “see changes” button above the virtual device to see what your app would look like on an actual device. To generate an Apk of your app, click on “Download your app” from the side menu, scroll down and click on “Generate Apk.” Choose a subscription plan, and the Apk will be sent to your email address when the build is complete. Here is an example of what your “invite a friend” app would look like.
Great job! You have successfully set up the “Invite a friend” feature. Your friends and acquaintances can now promote your app and grow your user base with the click of a button.

