How To Use Social Wall Feature – Make A Social Media App
In this article, we will learn how to use the Social wall feature on the Swiftspeed app creator platform to create an app that works like a social network where users can come together to interact with one another, post, like and comment. With this feature, you can create a Twitter-Like or Facebook-like Social Network and increase your app engagement while building your own user base. Kindly follow the steps below to get started. You can watch the Youtube tutorial for this article here. Remember to like, subscribe and click the bell button to get notified when we upload more tutorials.
Step 1:
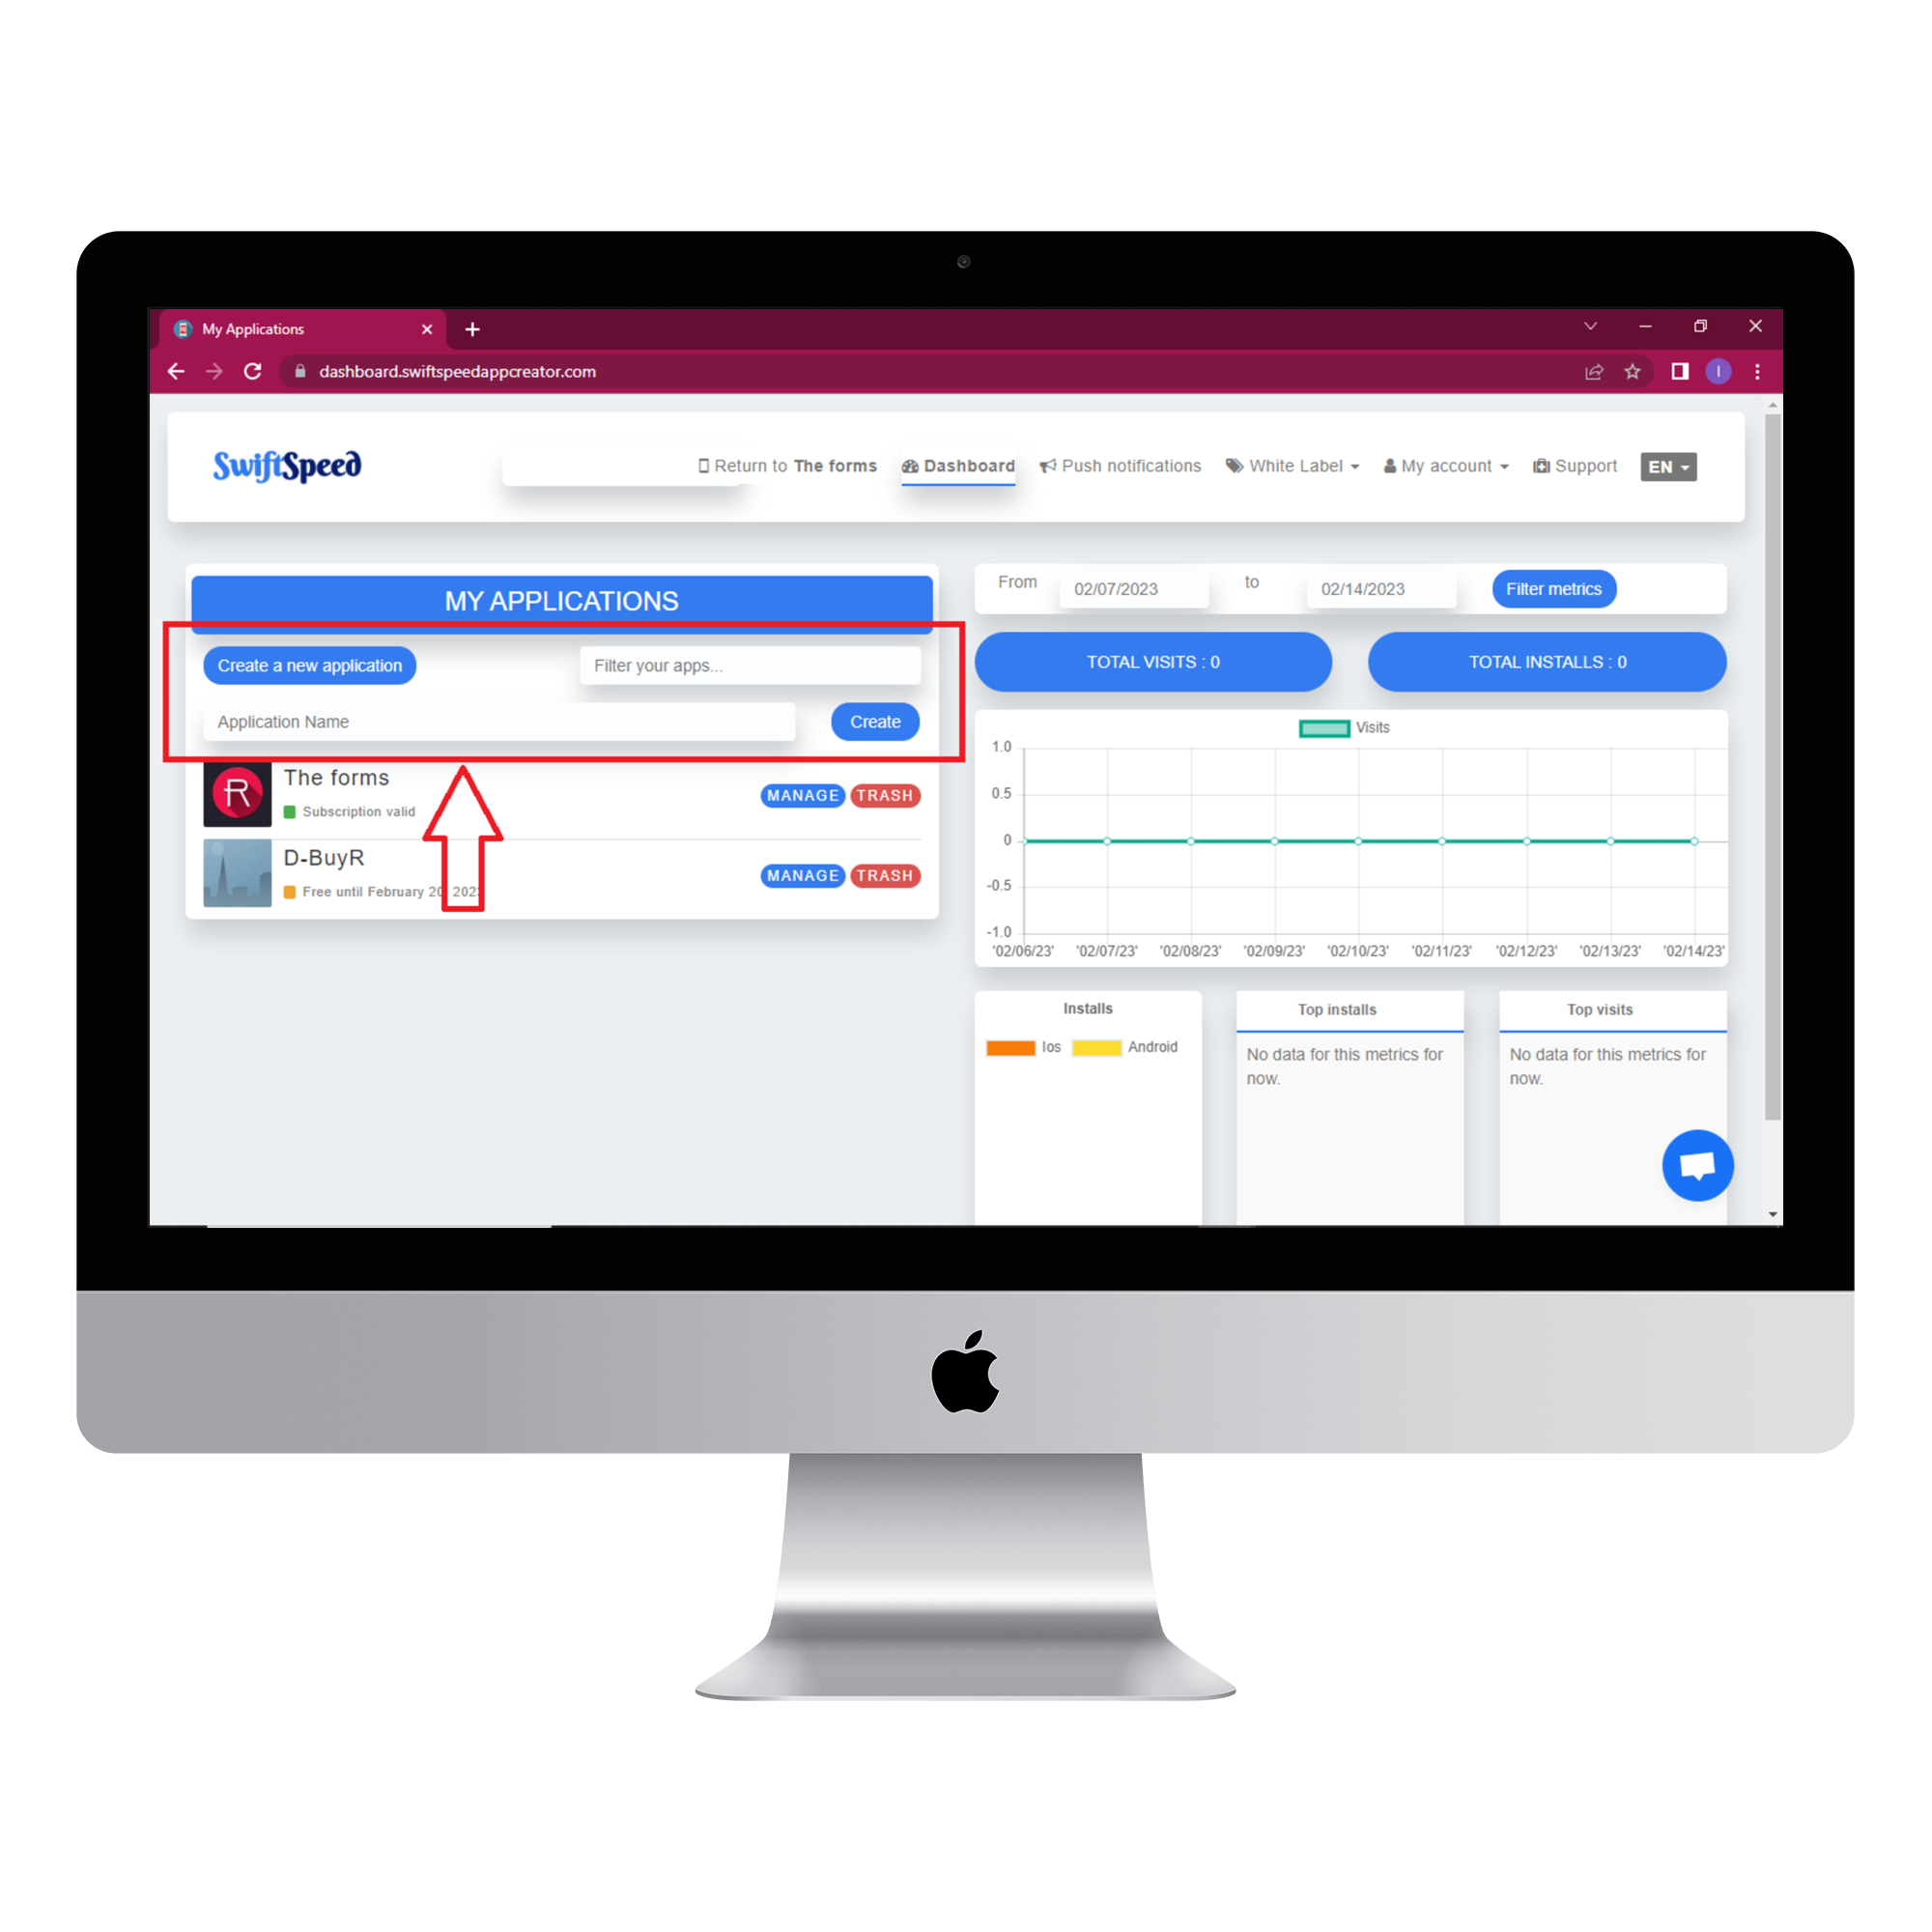
Go to the Swiftspeed homepage, log in, and you will be taken to the app creator dashboard. Click on “create a new application” or select a pre-existing app ( if you have one ). If you selected “Create a new application”, you will have to type in the name of your app and click “Create”. If you are not familiar with the app creation process, please read our article on creating an app on our platform.
Step 2:
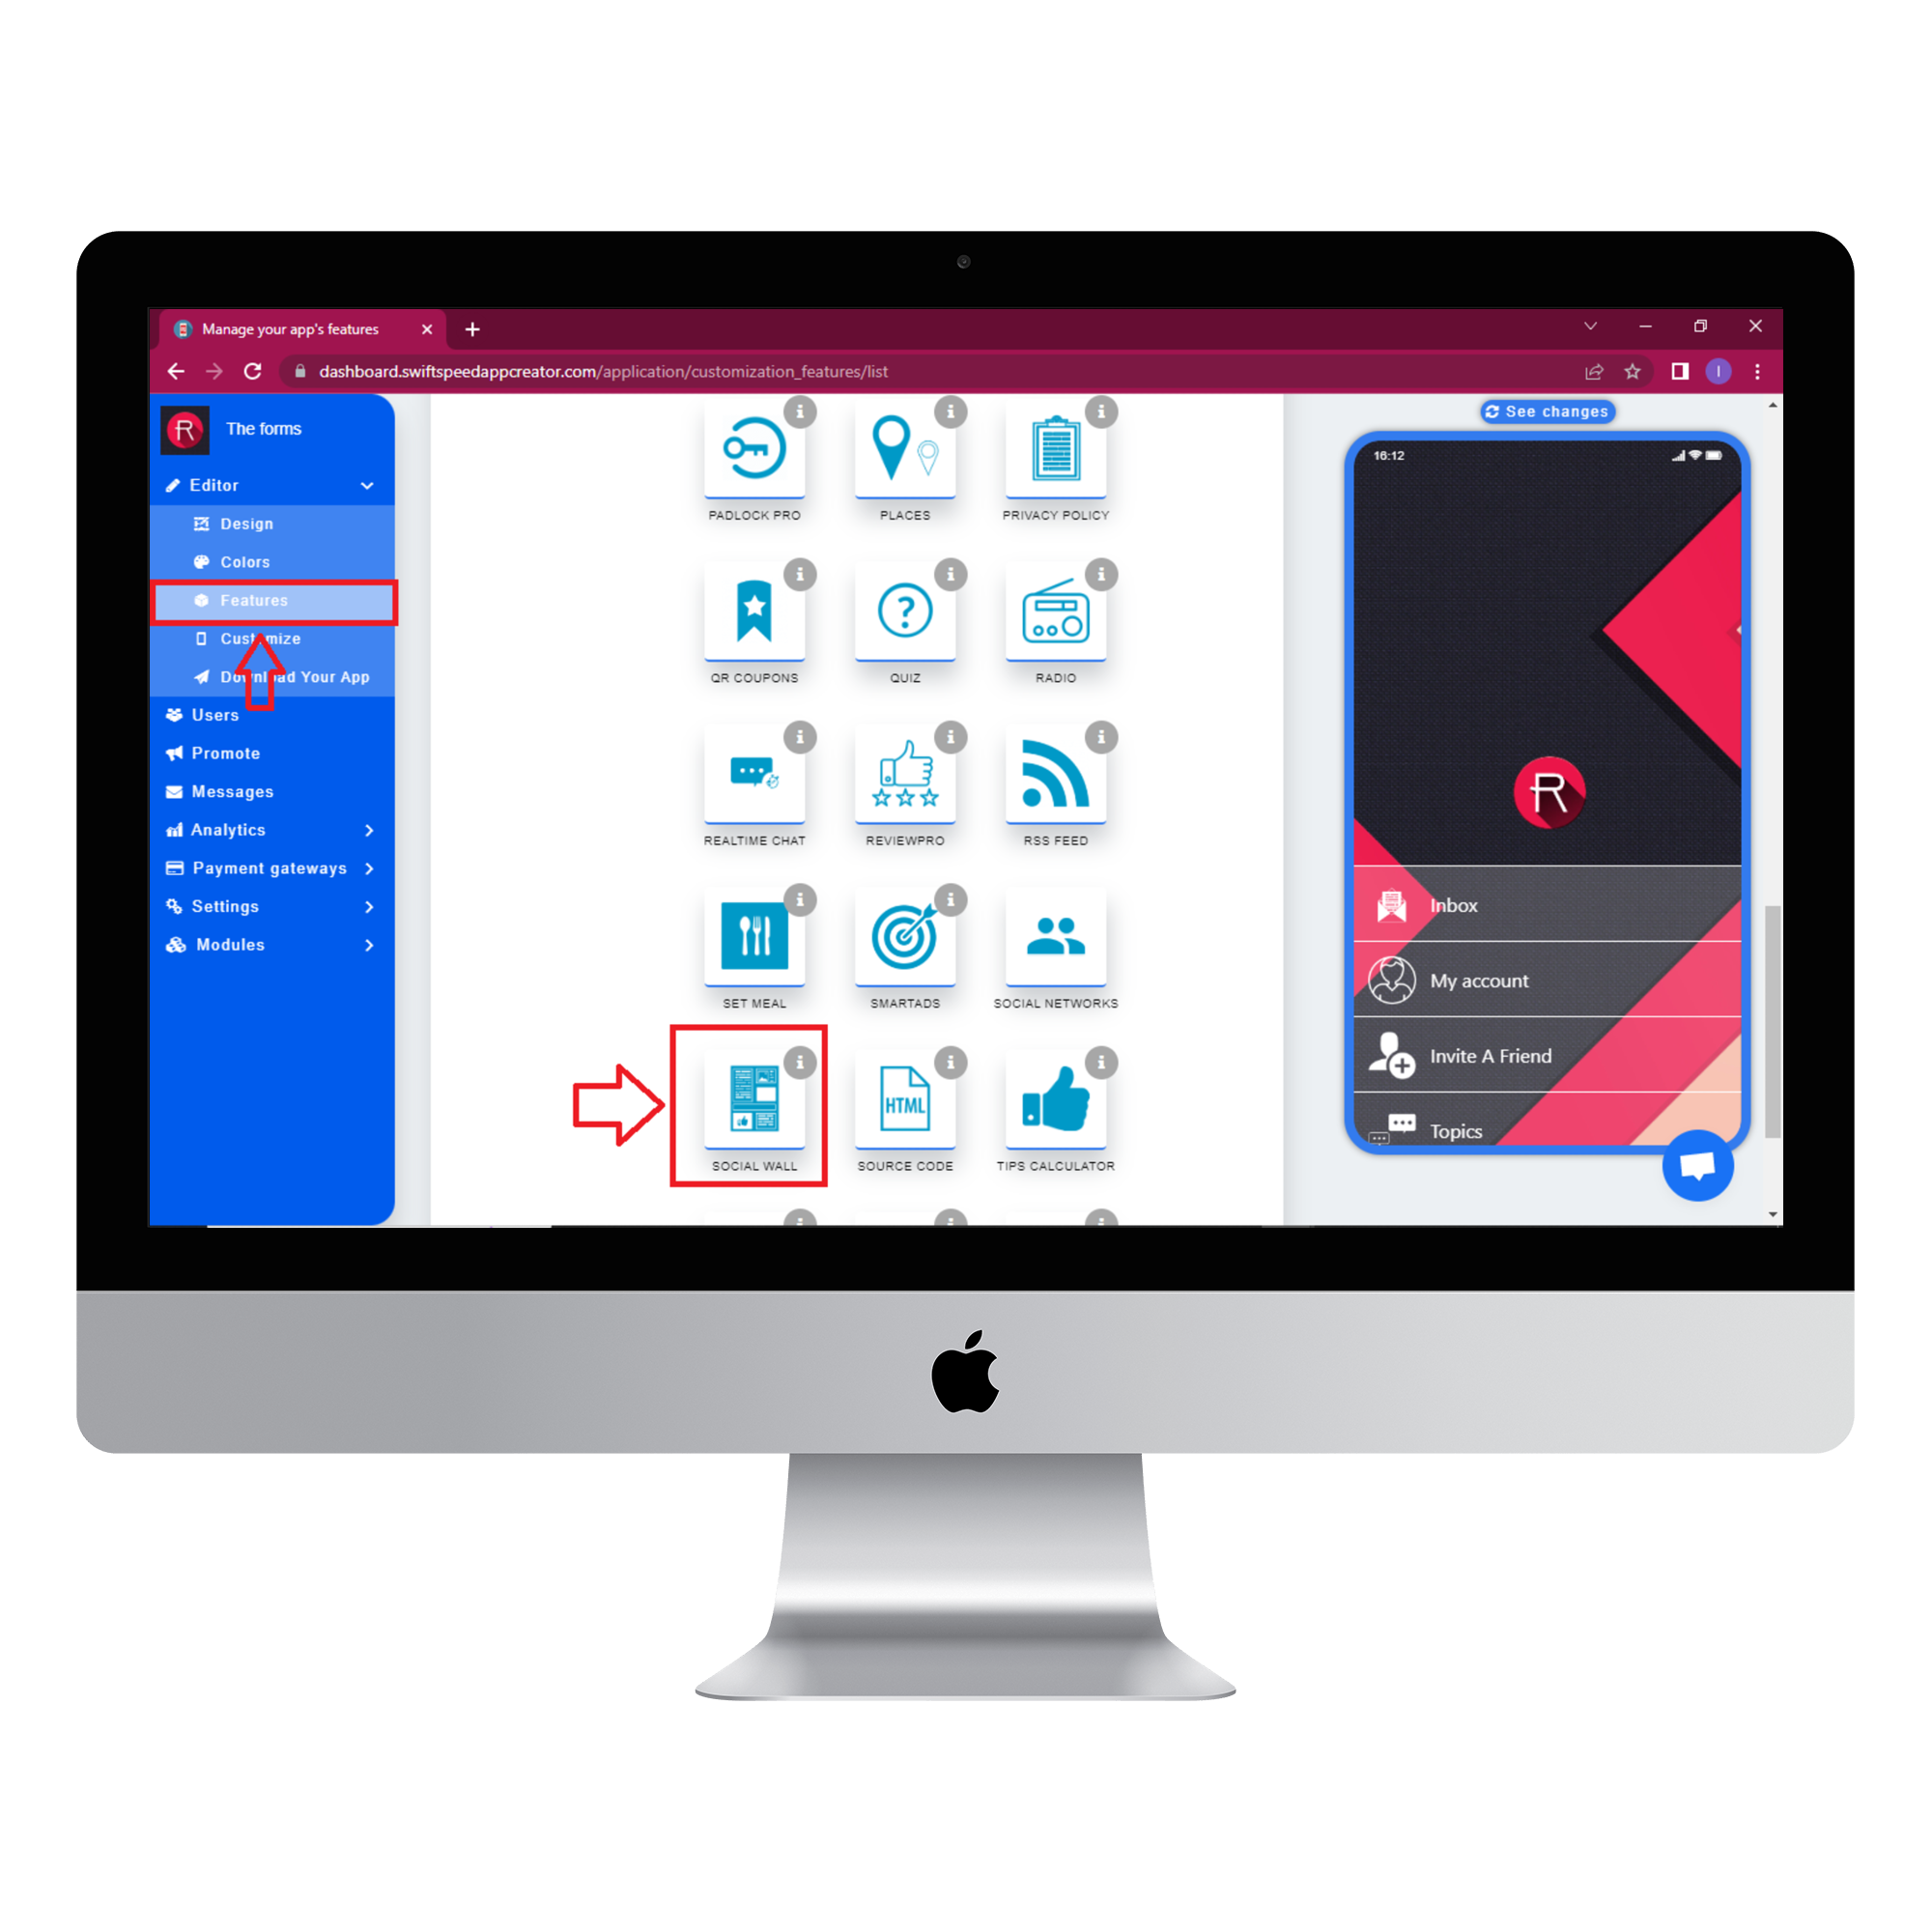
Select “Features” from the side menu on the left side of your screen. Choose the “Social wall” feature from the list of features and click on “Add feature” when the popup window appears. If you find it challenging to locate the “Social wall” feature, you can use the search box to find it. Just type in “Social wall” and press “Enter” on your keyboard.
Step 3:
In the Page settings section, you can change the feature icon by clicking on the image button to the left of the “Page name” label. Choose your new feature icon, and it will be saved automatically.
Step 4:
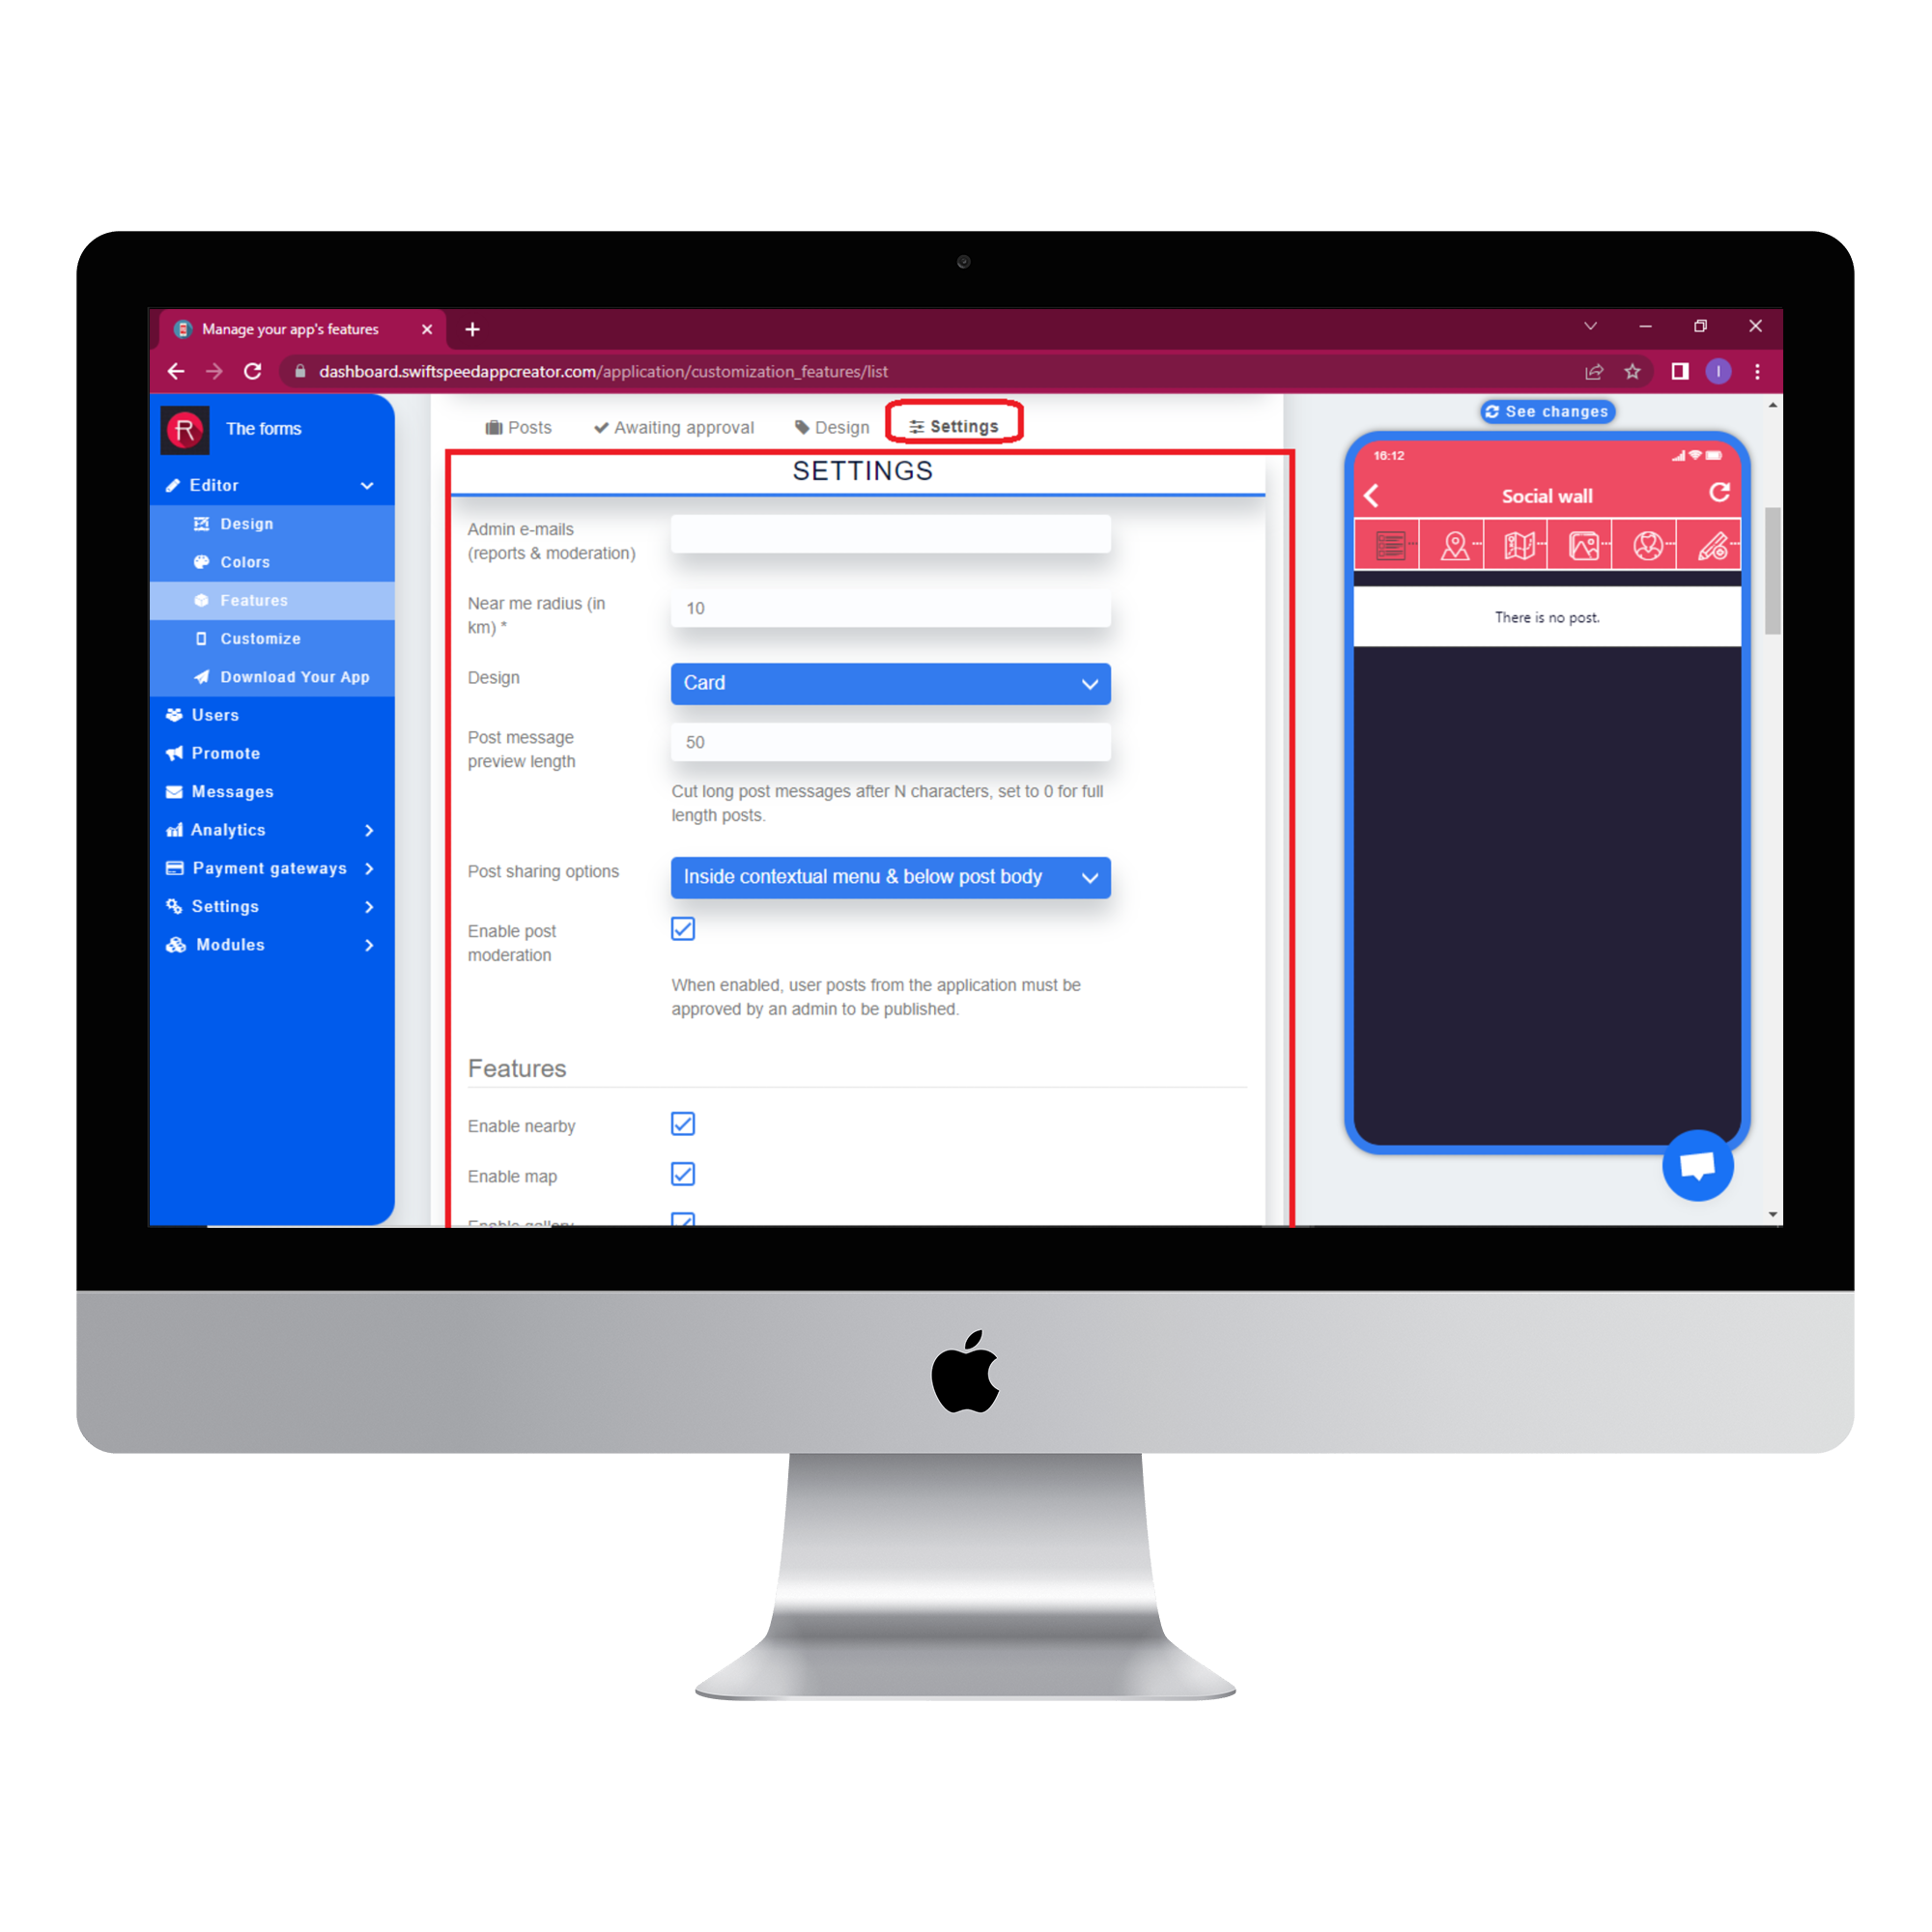
Select the settings tab and type in your email address as the admin email. All reports from your users will be sent to this email. Select “card” from the design drop list because it looks better; you can choose “list” if you prefer it. Set the message preview length to “50”, so any message longer than 50 characters will be abbreviated. You can increase or decrease this number as you see fit. Set post-sharing options to “inside contextual menu & below post body”. Enabling post moderation would mean that all posts made on the social wall will have to be approved by an admin to be published. Posts that are awaiting your approval will be visible in the “Awaiting approval” tab. Click “save” to save all the changes you have made.
Step 5:
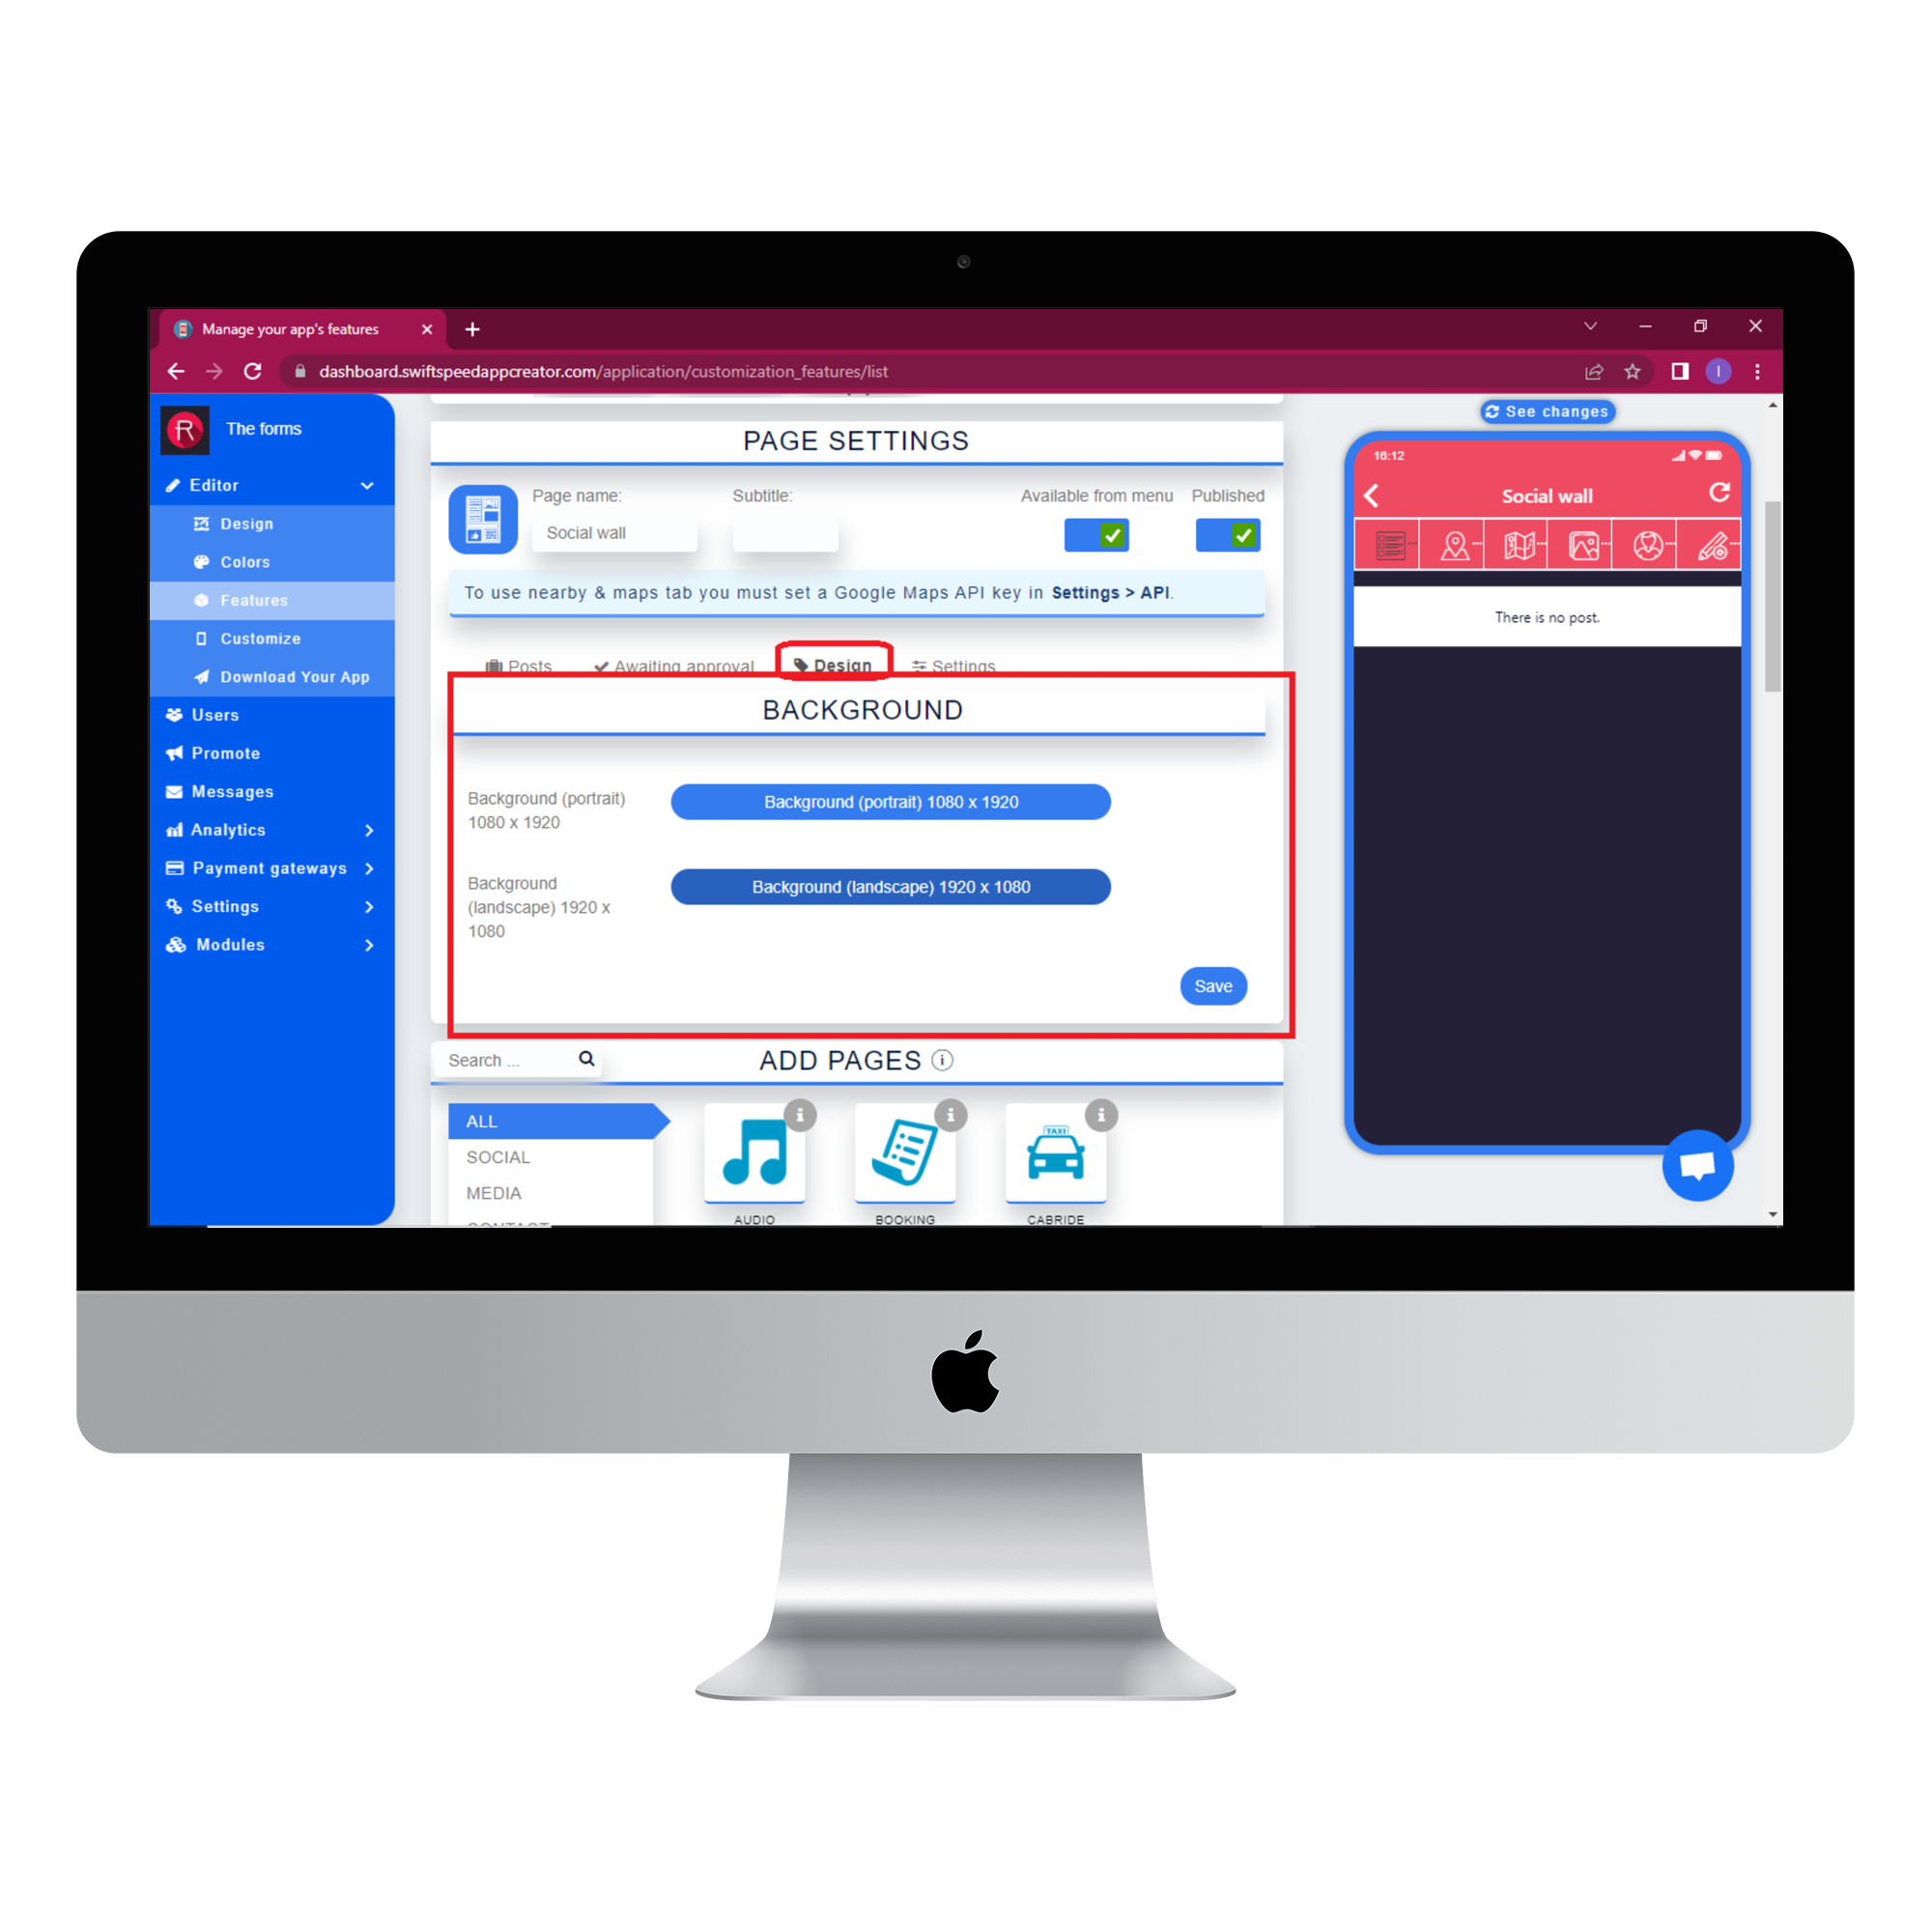
Select the design tab if you want to use your own image as the background for your app. Different images can be used as the background for portrait and landscape modes. Click “save” when you have chosen the image. You can skip this step if you prefer our default white background.
Step 6:
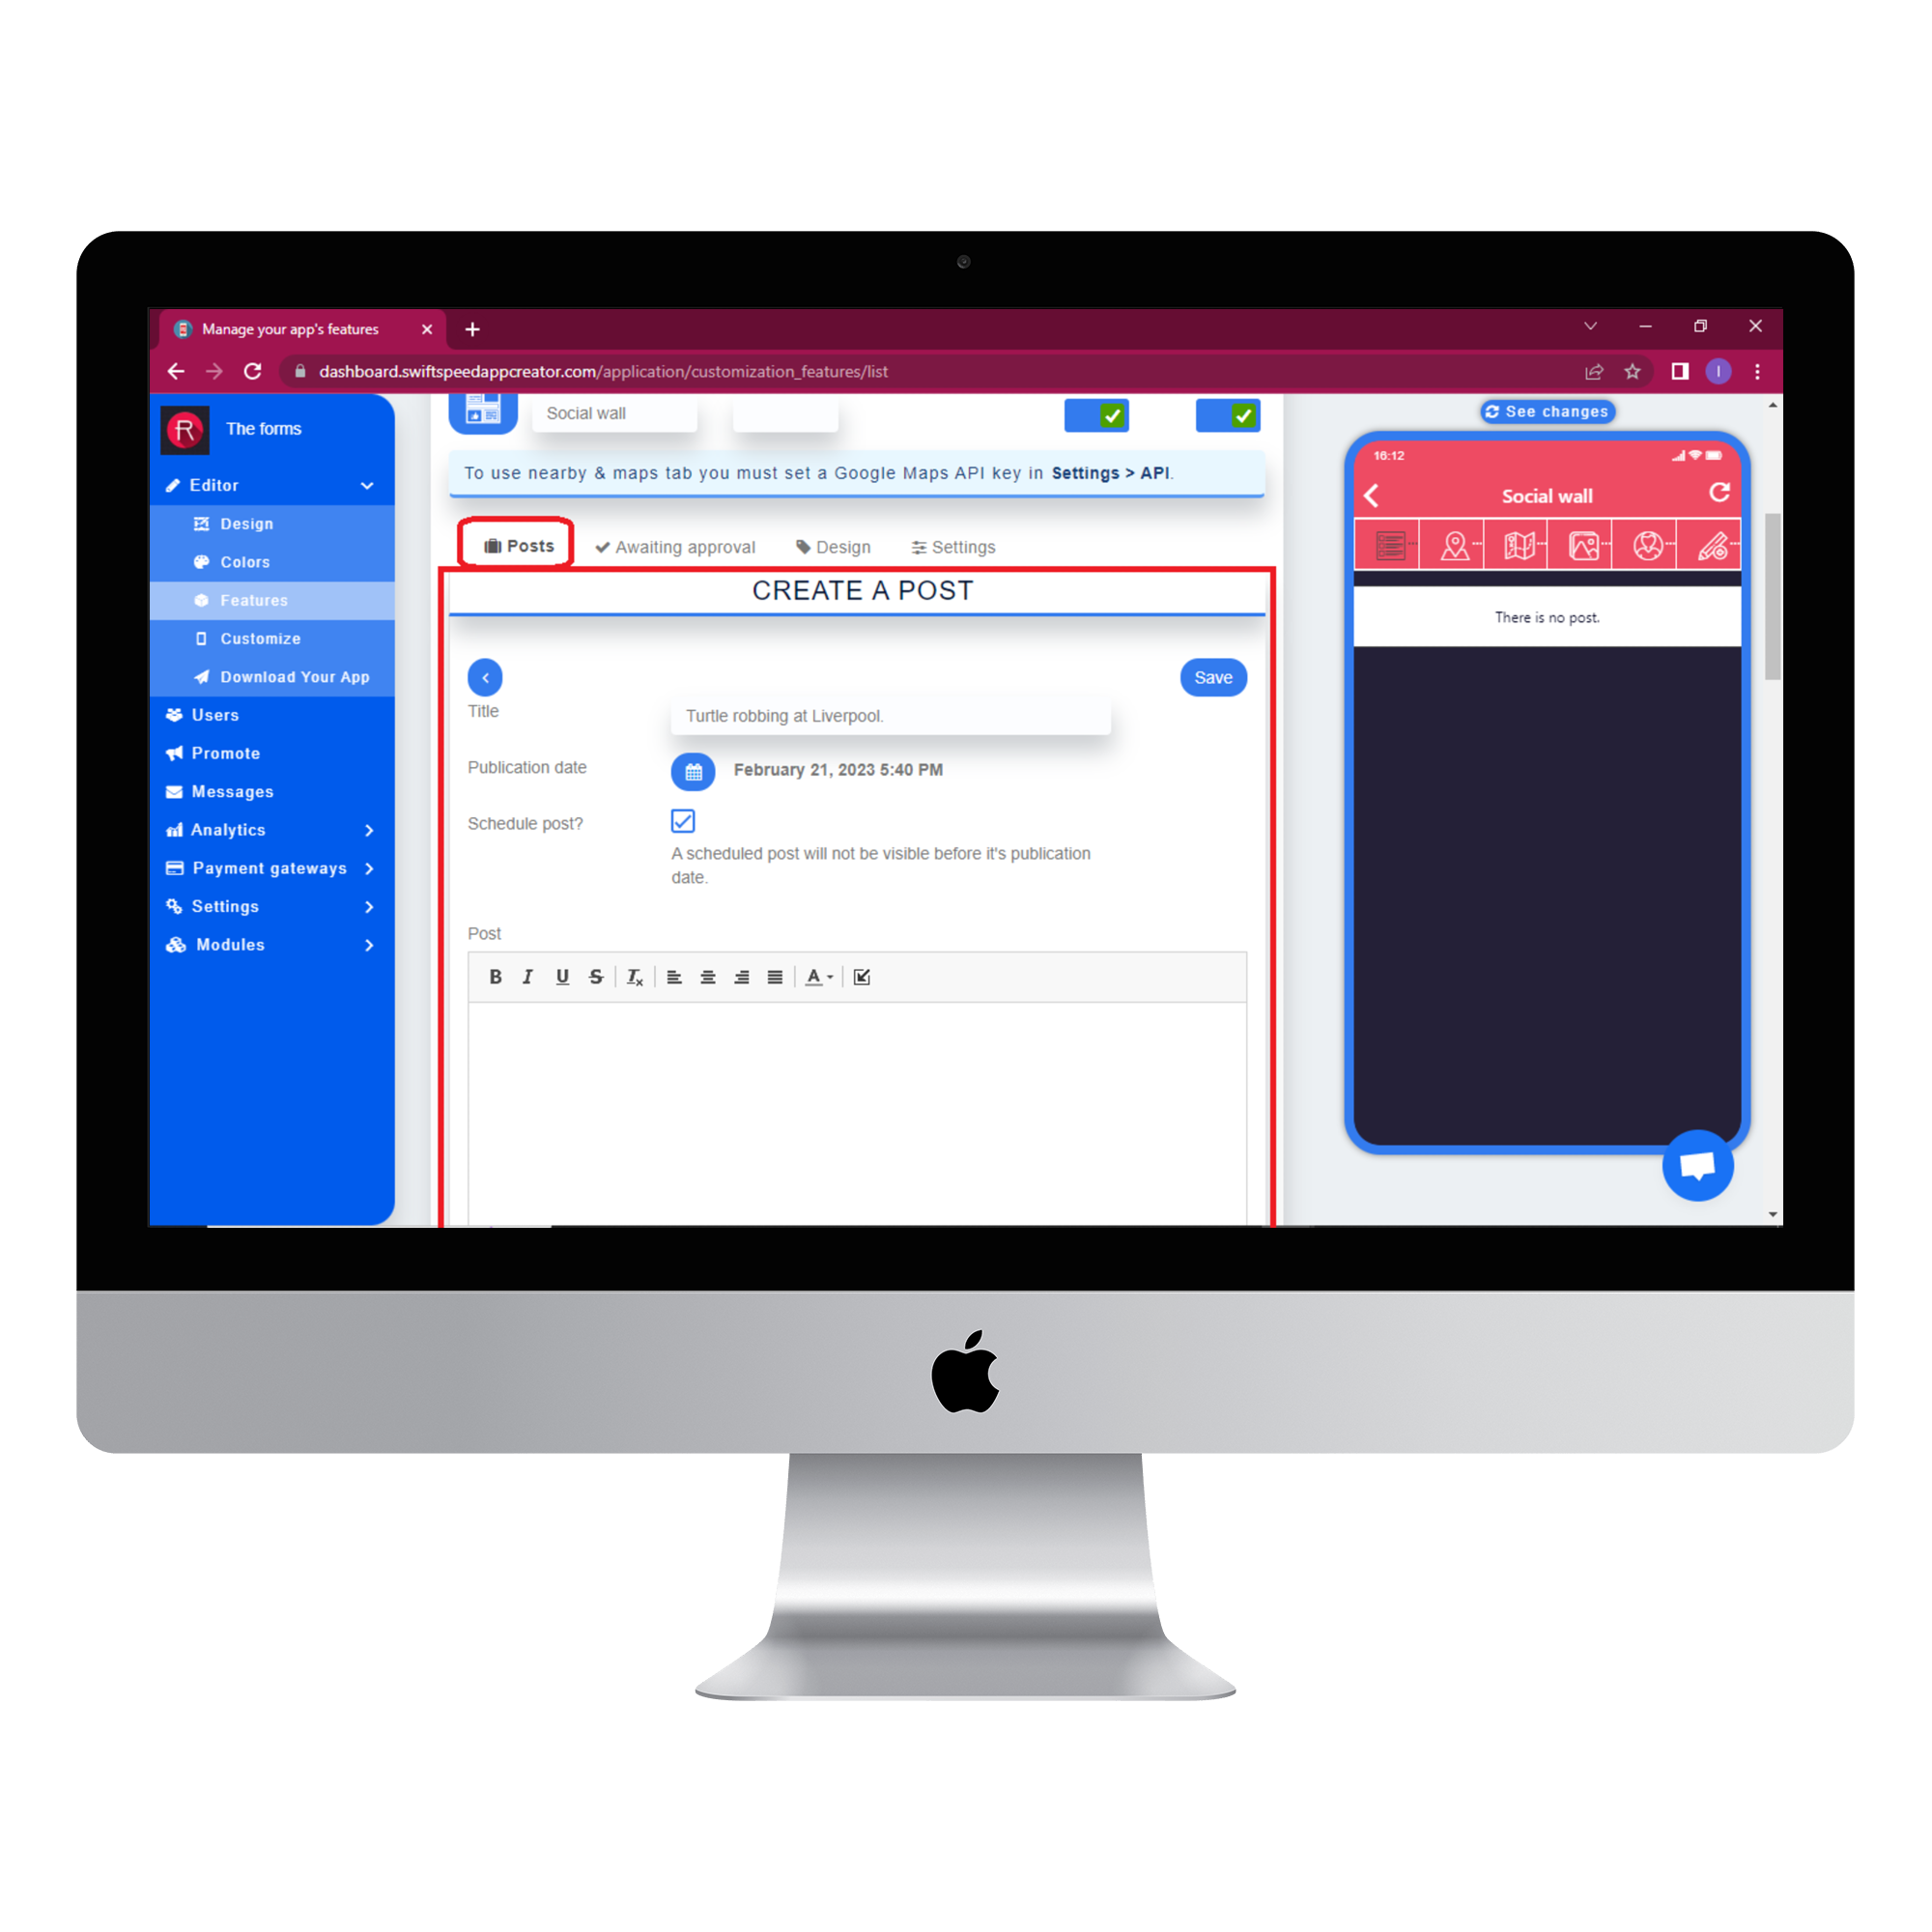
Select the posts tab and click the (+) button to add a post. Type in a title for your post. Tick the “schedule post” checkbox if you want the post to be published at later date. Type in the body of your post and add a picture if you want. Click save, and your post will be published.
Step 7:
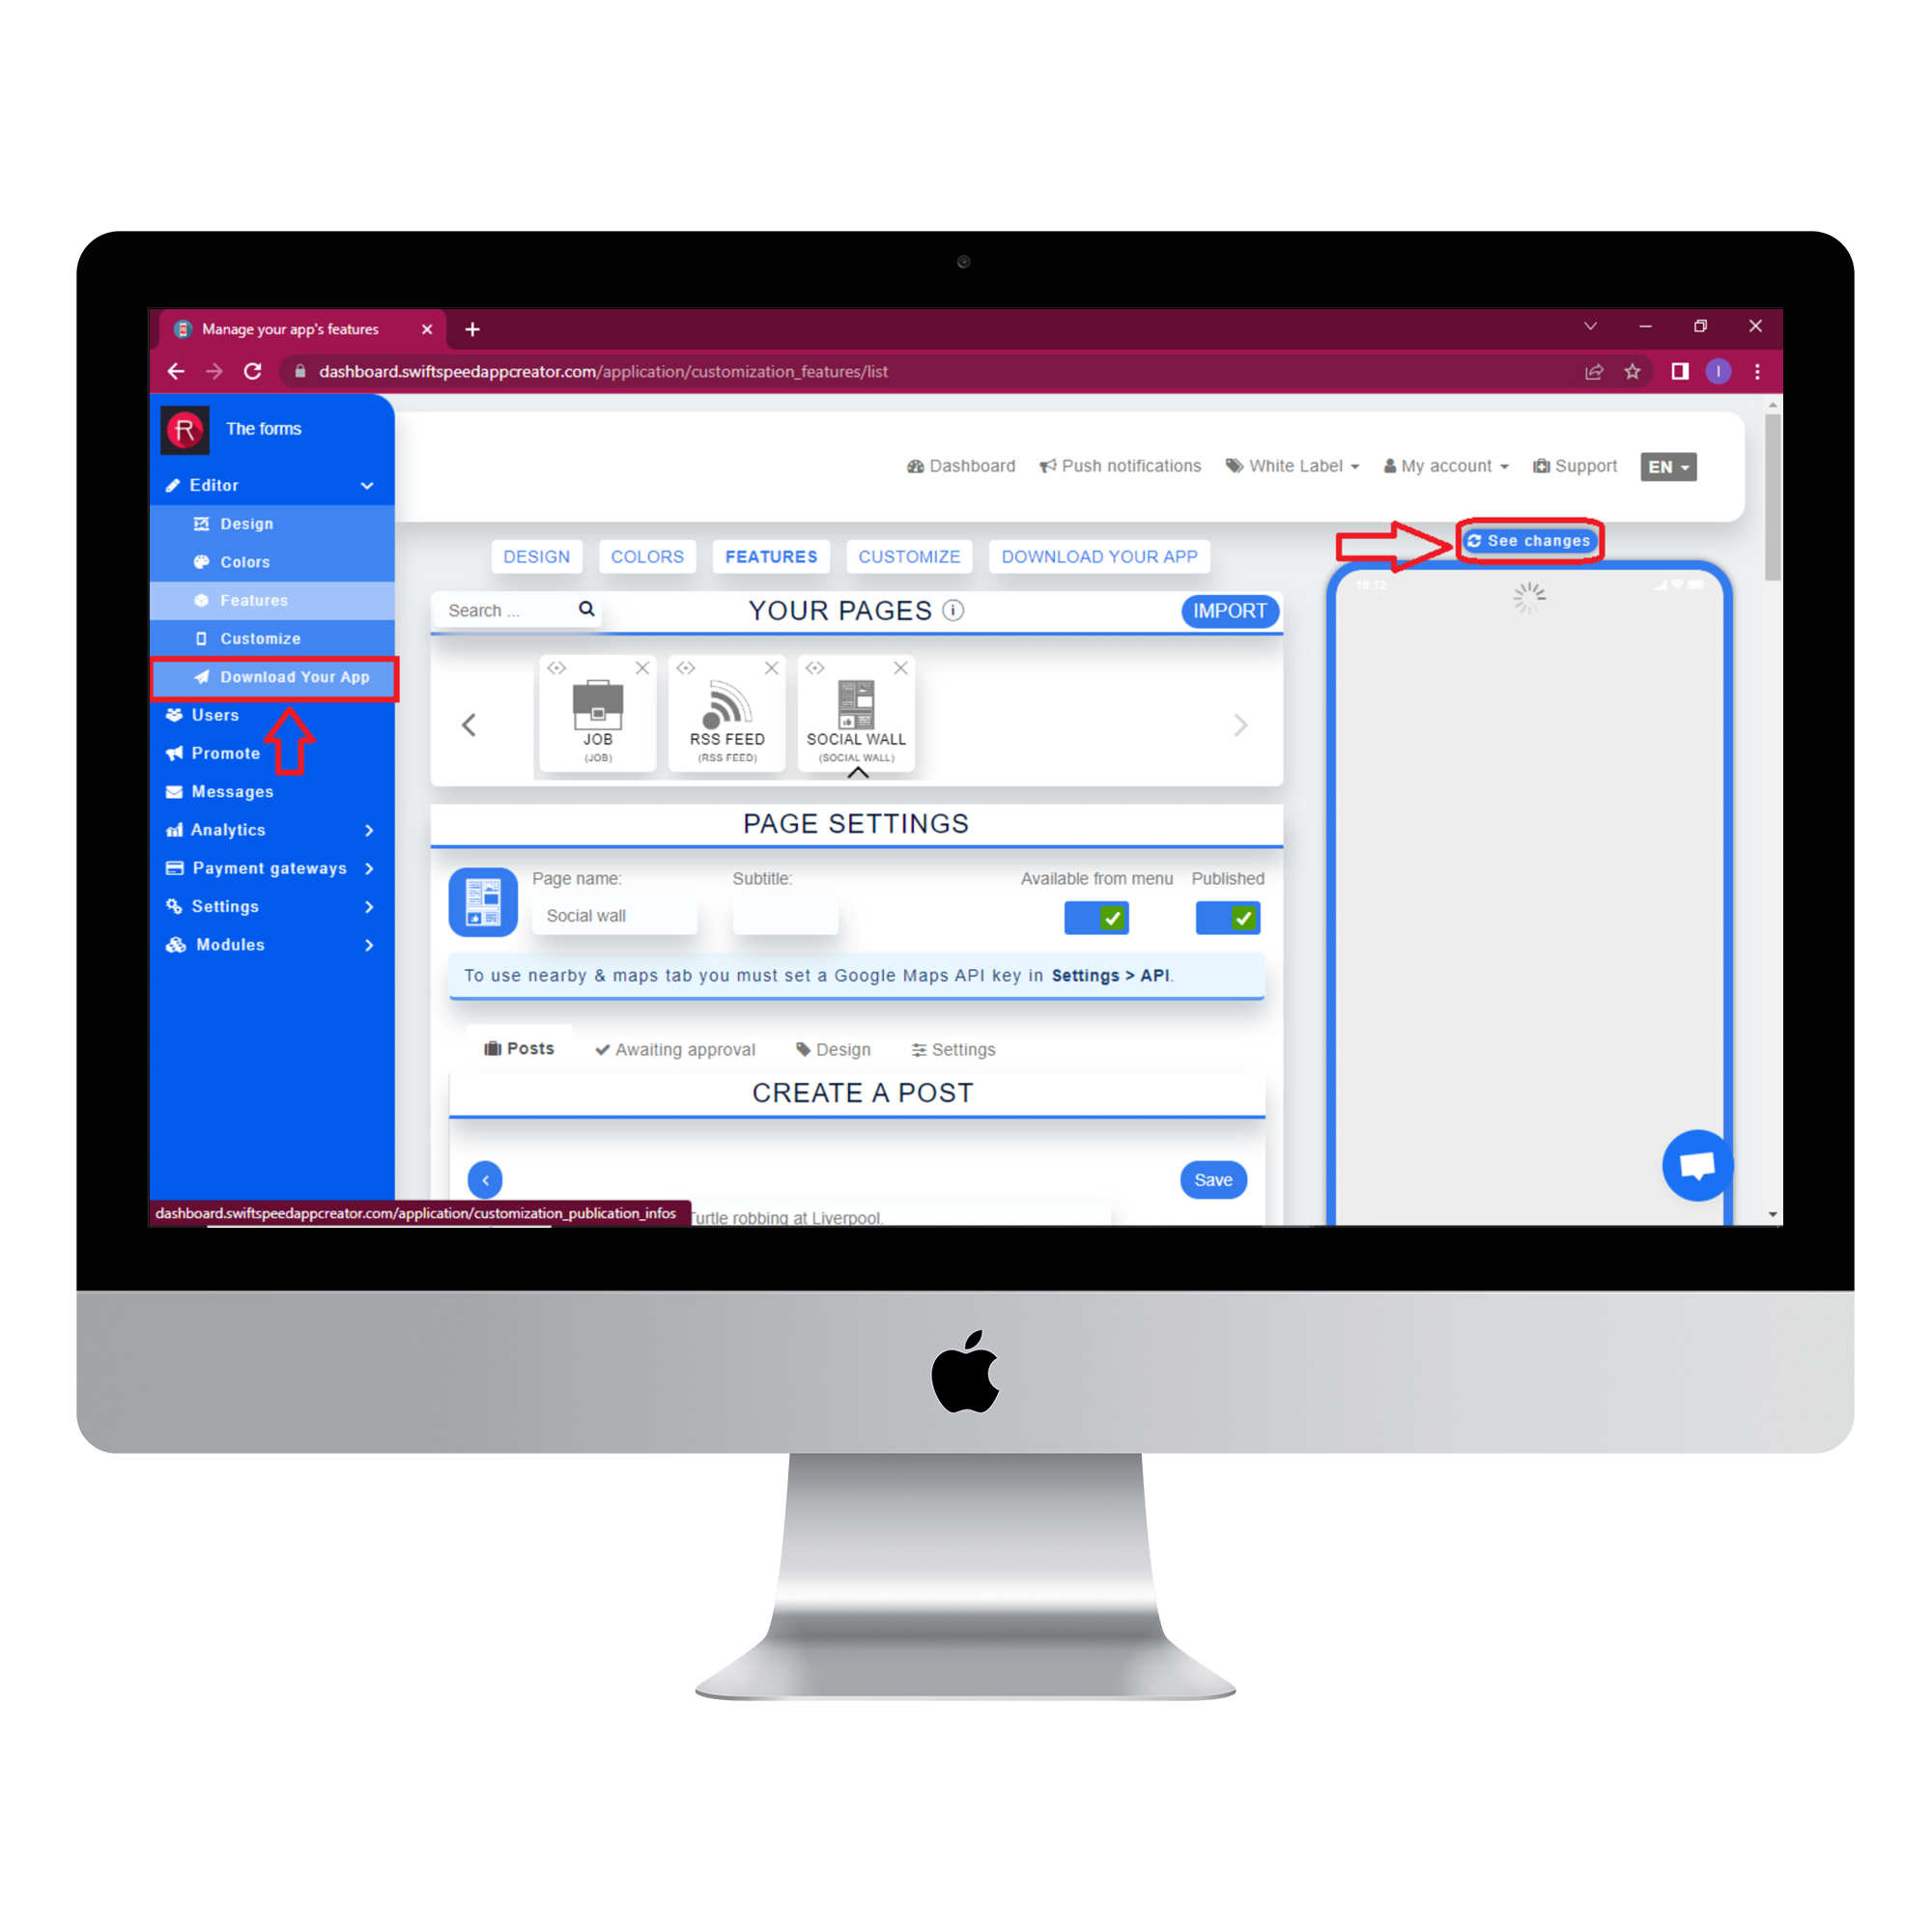
Click on the “see changes” button above the virtual device to see what your app would look like on a real device. To generate an Apk of your app, click on “Download your app” from the side menu, scroll down and click on “Generate Apk.” Choose a subscription plan and the Apk will be sent to your email address when the build is complete. Here is an example of what your app would look like.
Congratulations, you just successfully built your own social network app without having to code.
Check out our complete list of features here.


