How To Make Quiz App Without Coding
This article will show you how to make a quiz or trivia app with the Swiftspeed app creator. This process does not require any coding. Engage your audience in a unique and fun way while connecting them to your learning material. Kindly follow the steps below to create your own quiz app. Our youtube tutorial helps to simplify this article. You can watch it below. Please like and subscribe to our channel.
Step 1:
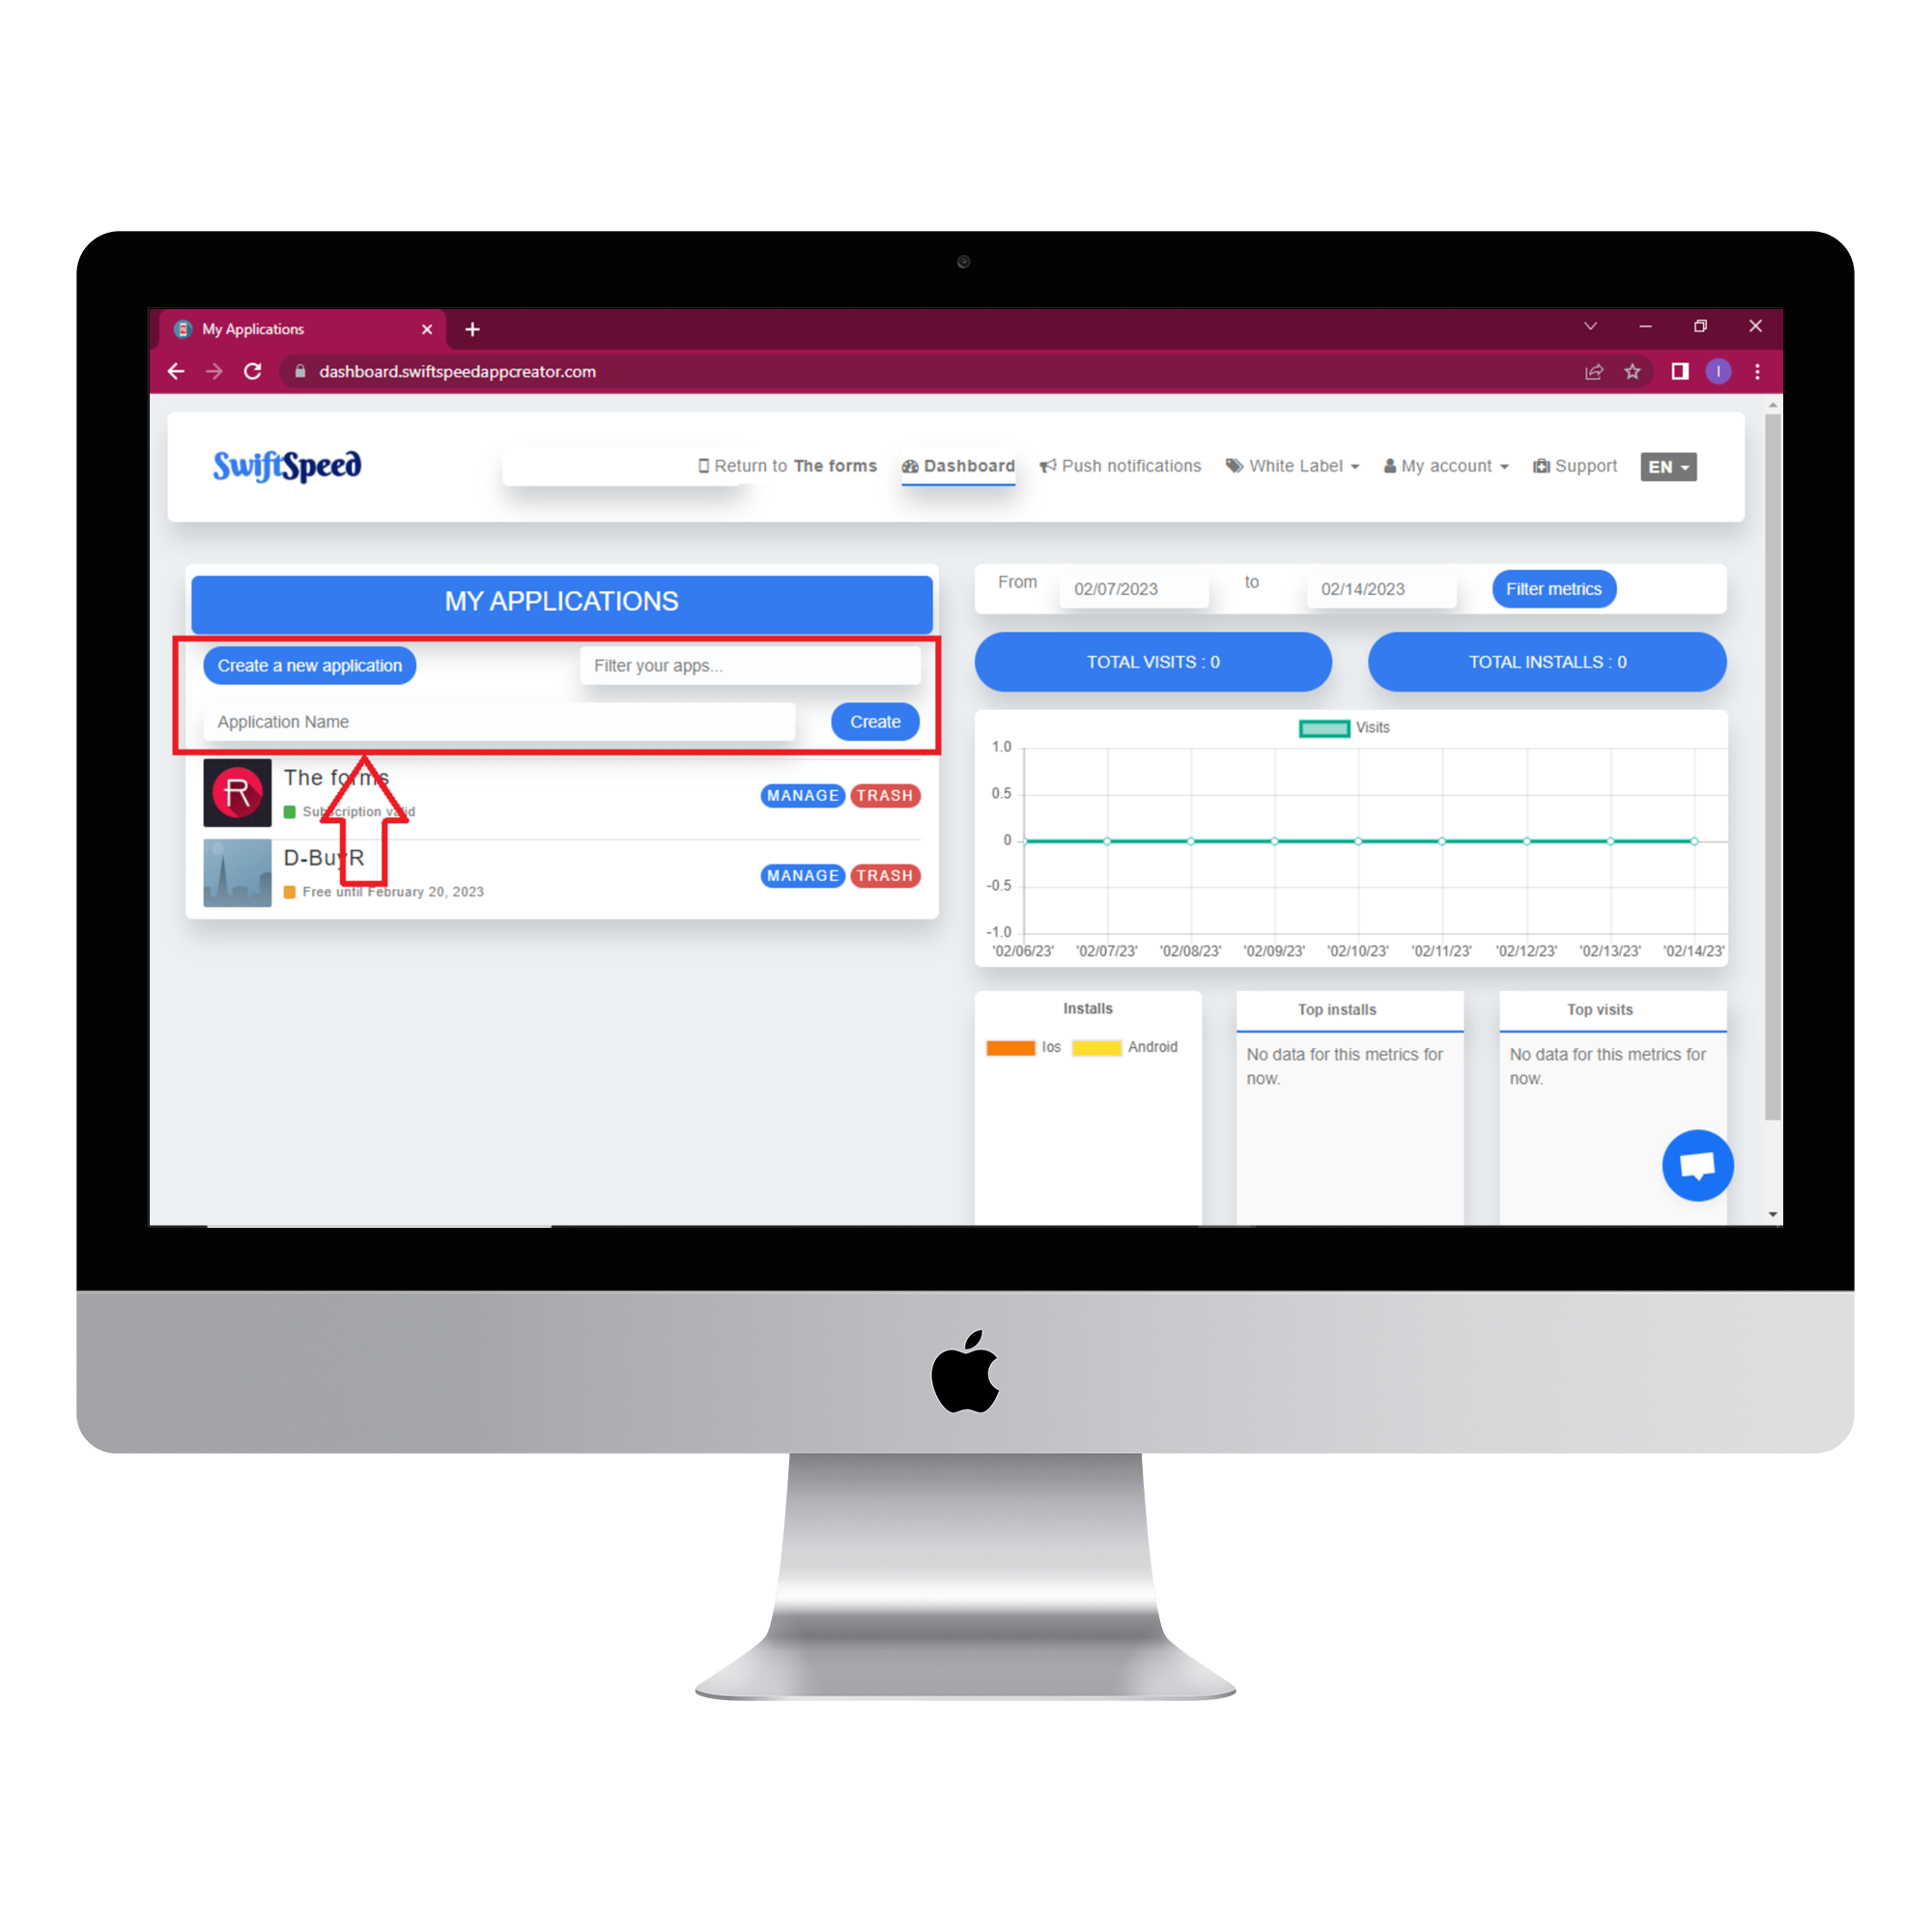
Go to the Swiftspeed homepage, log in, and you will be taken to the app creator dashboard. Click on “create a new application” or select a pre-existing app ( if you have one ). If you selected “Create a new application”, you will have to type in the name of your app and click “Create”. If you are not familiar with the app creation process, please read our article on creating an app on our platform.
Step 2:
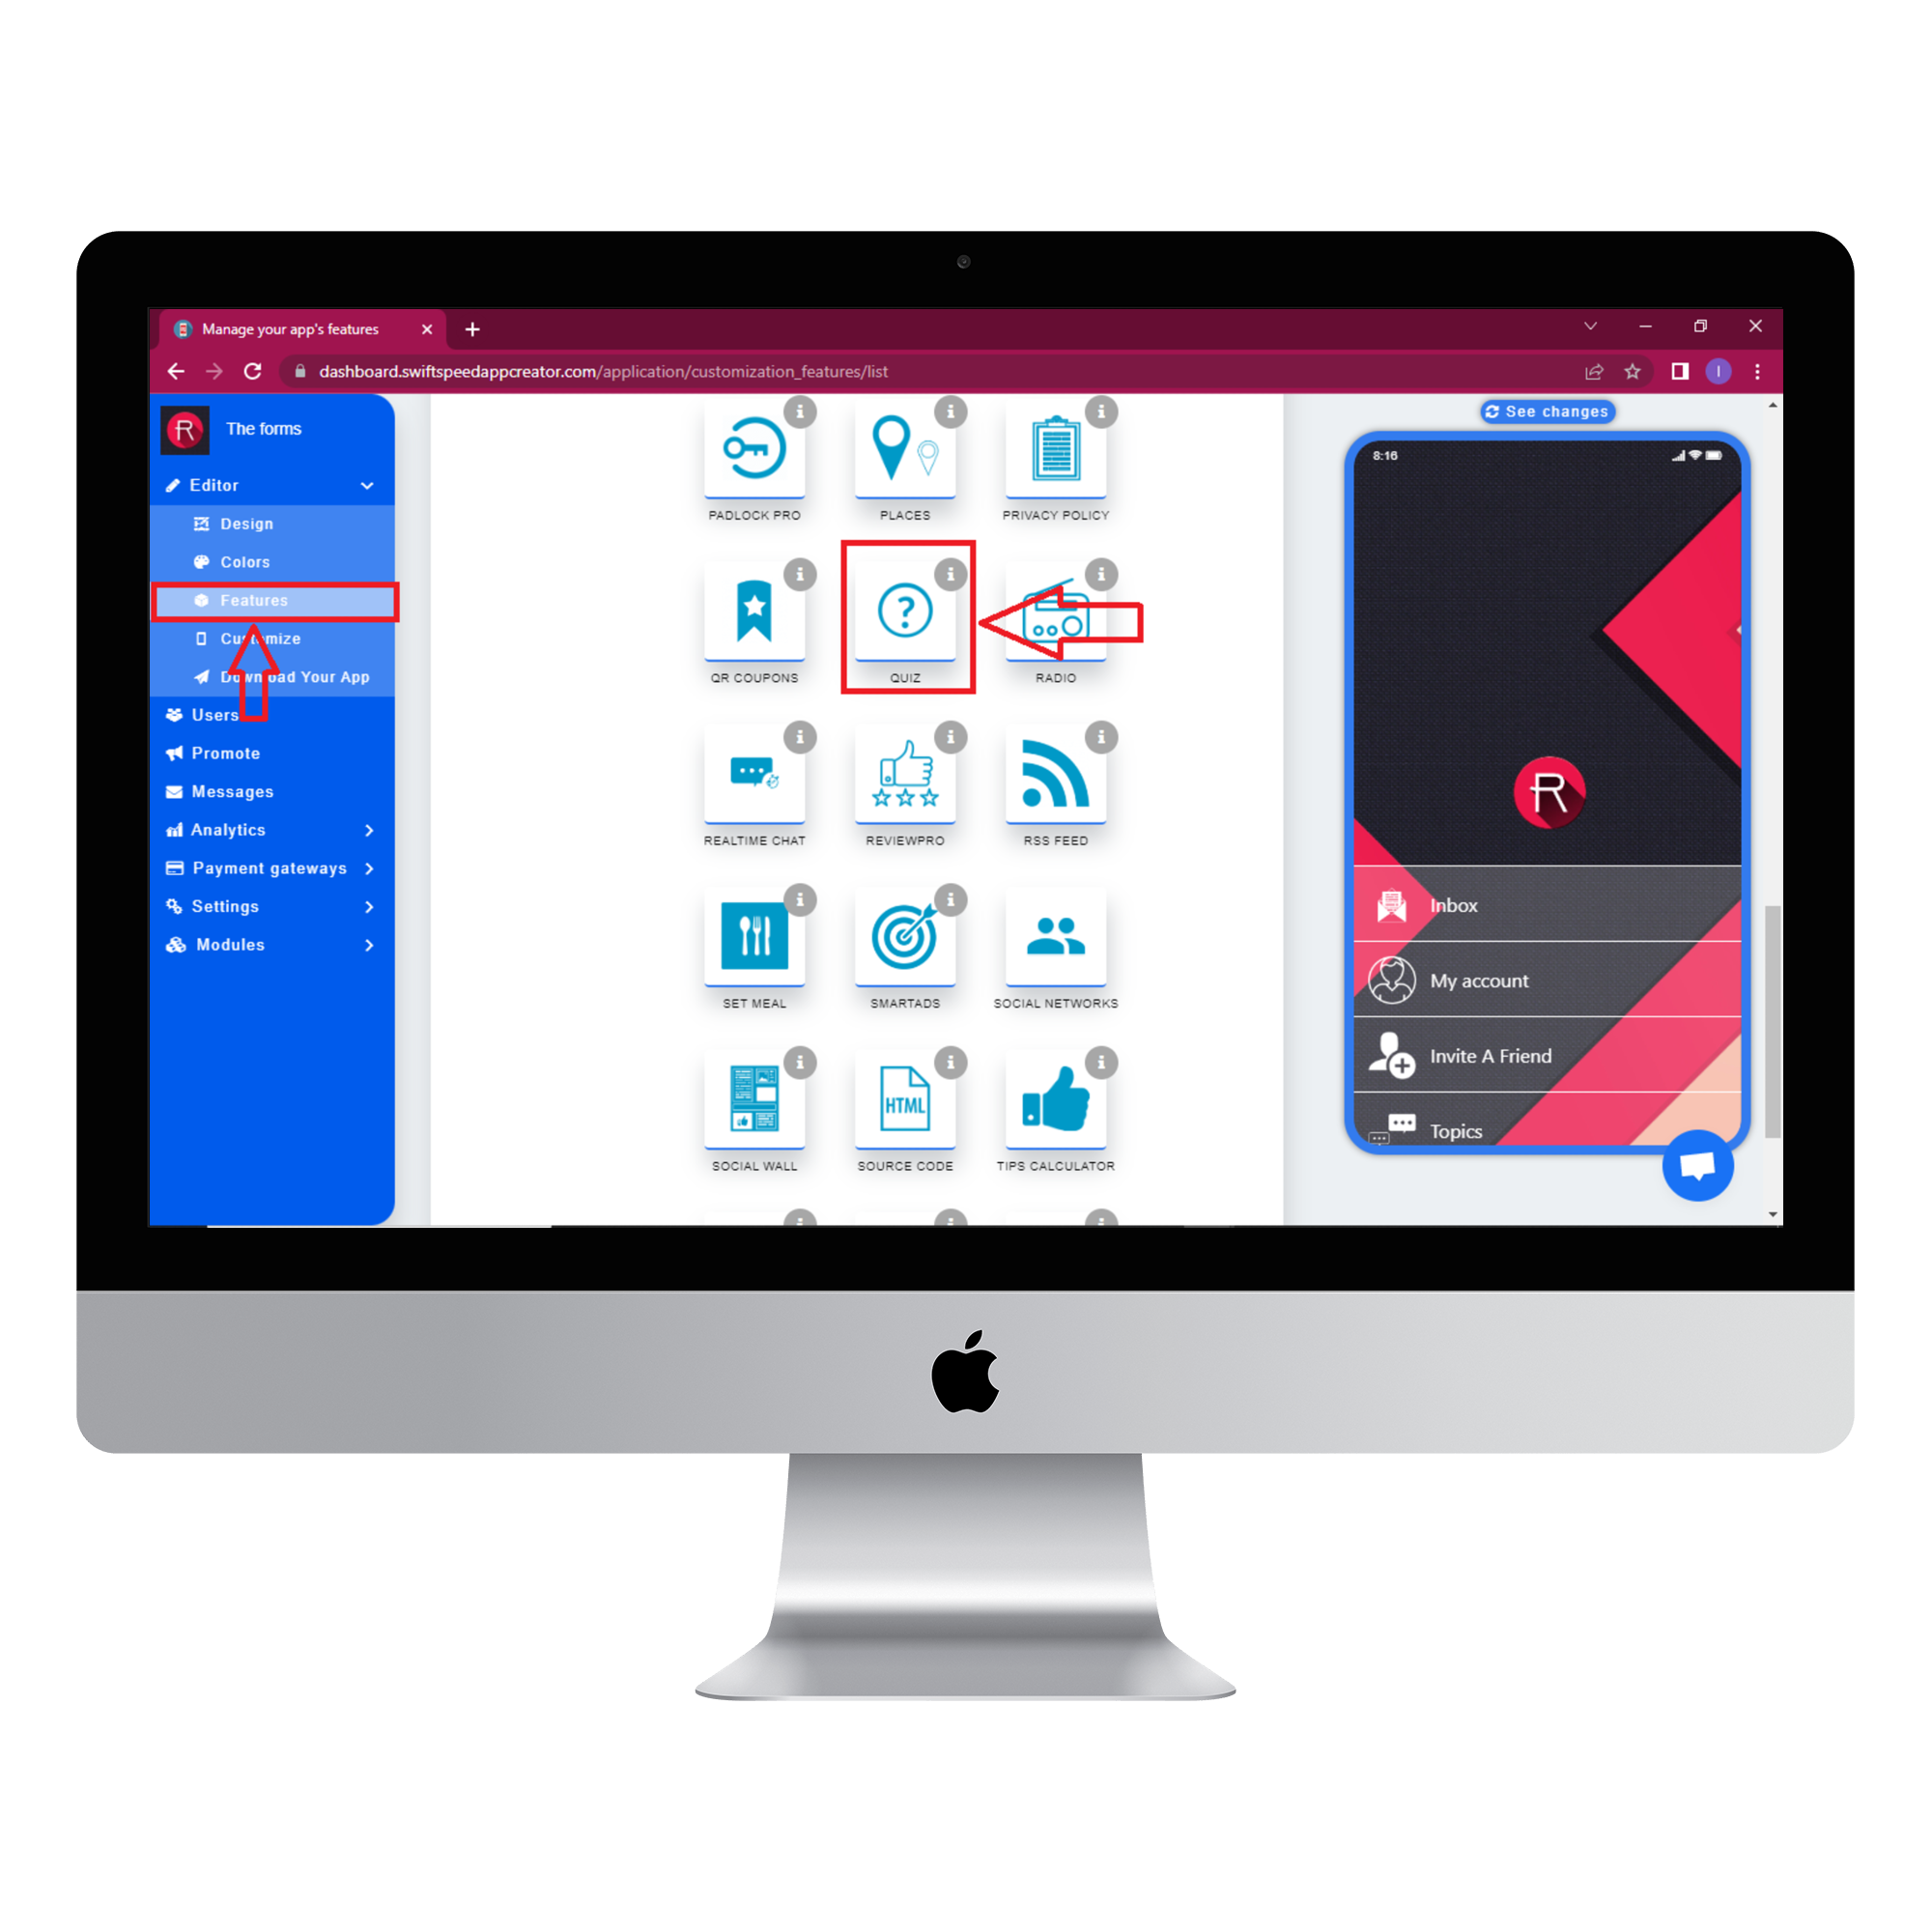
Select “Features” from the side menu on the left side of your screen. Choose the “Quiz” feature from the list of features and click on “Add feature” when the popup window appears. If you find it challenging to locate the “Quiz” feature, you can use the search box to find it. Just type in “Quiz” and press “Enter” on your keyboard.
Step 3:
In the Page settings section, you can change the feature icon by clicking on the image button to the left of the “Page name” label. Choose your new feature icon, and it will be saved automatically.
Step 4:
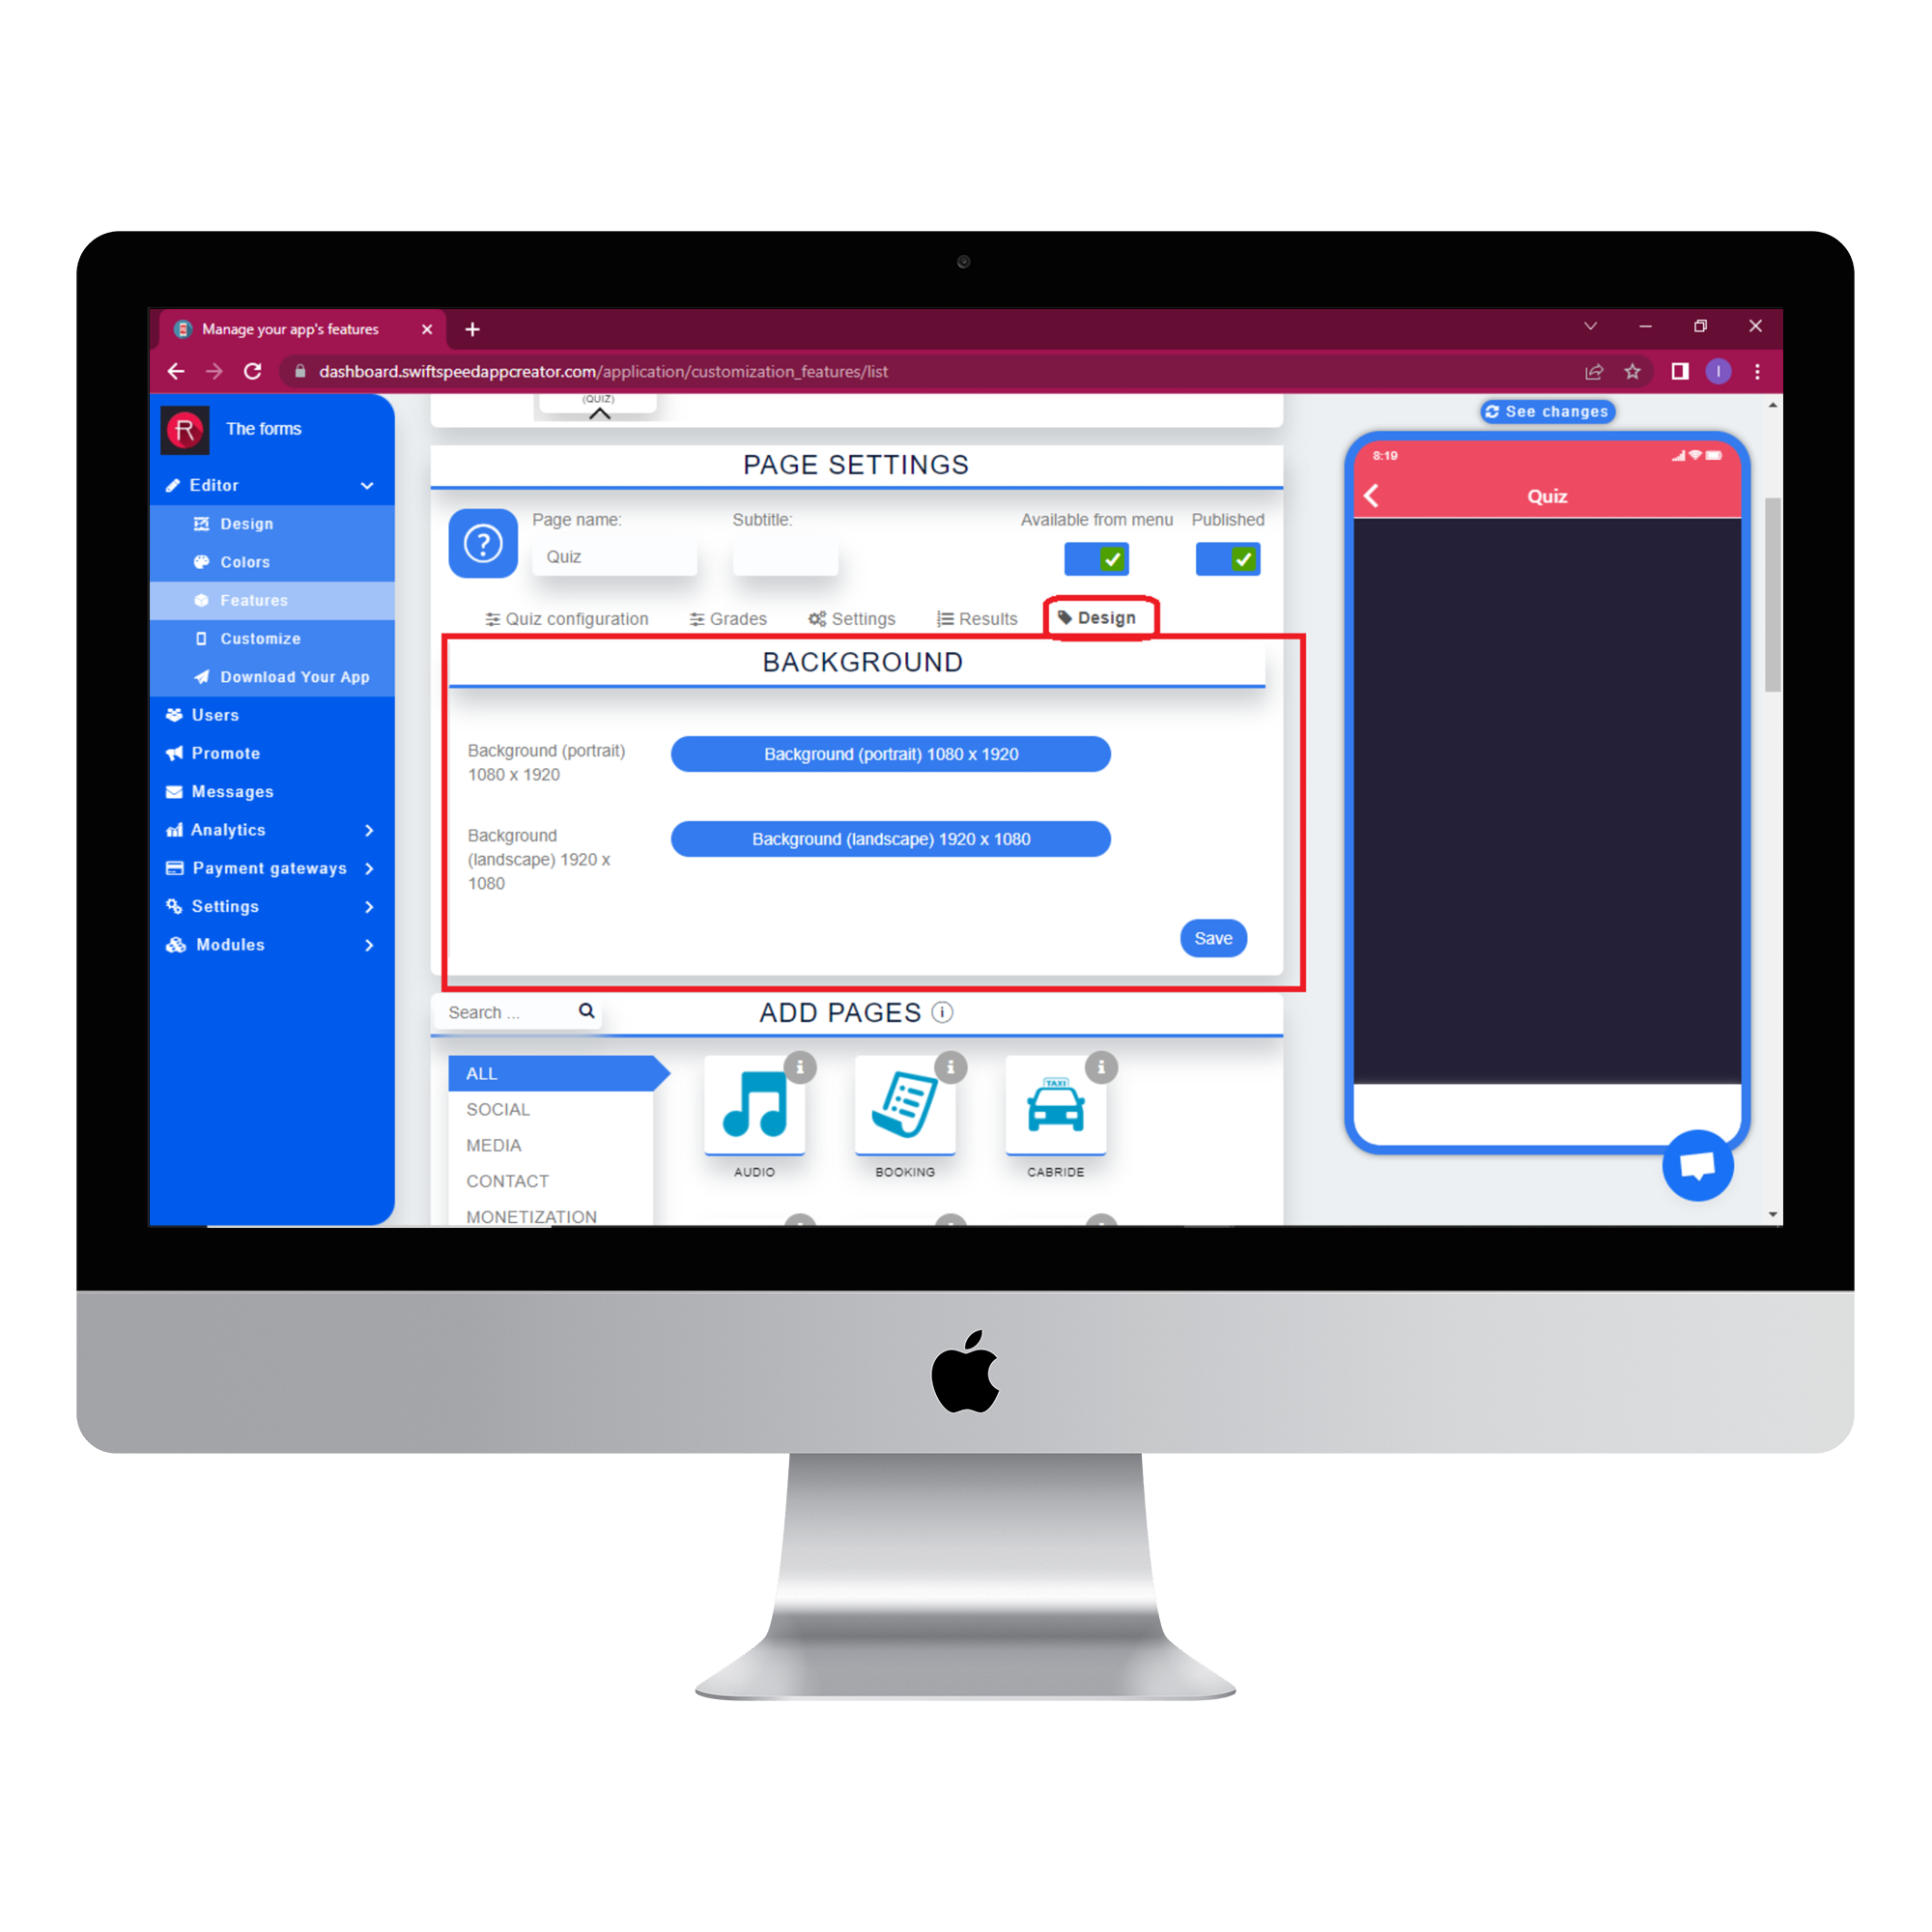
Select the design tab if you want to change the background image. You can use any image you like as the background for your app. Different images can be used as the background for portrait and landscape modes. Click “save” when you have chosen the image. You can skip this step if you prefer our default background.
Step 5:
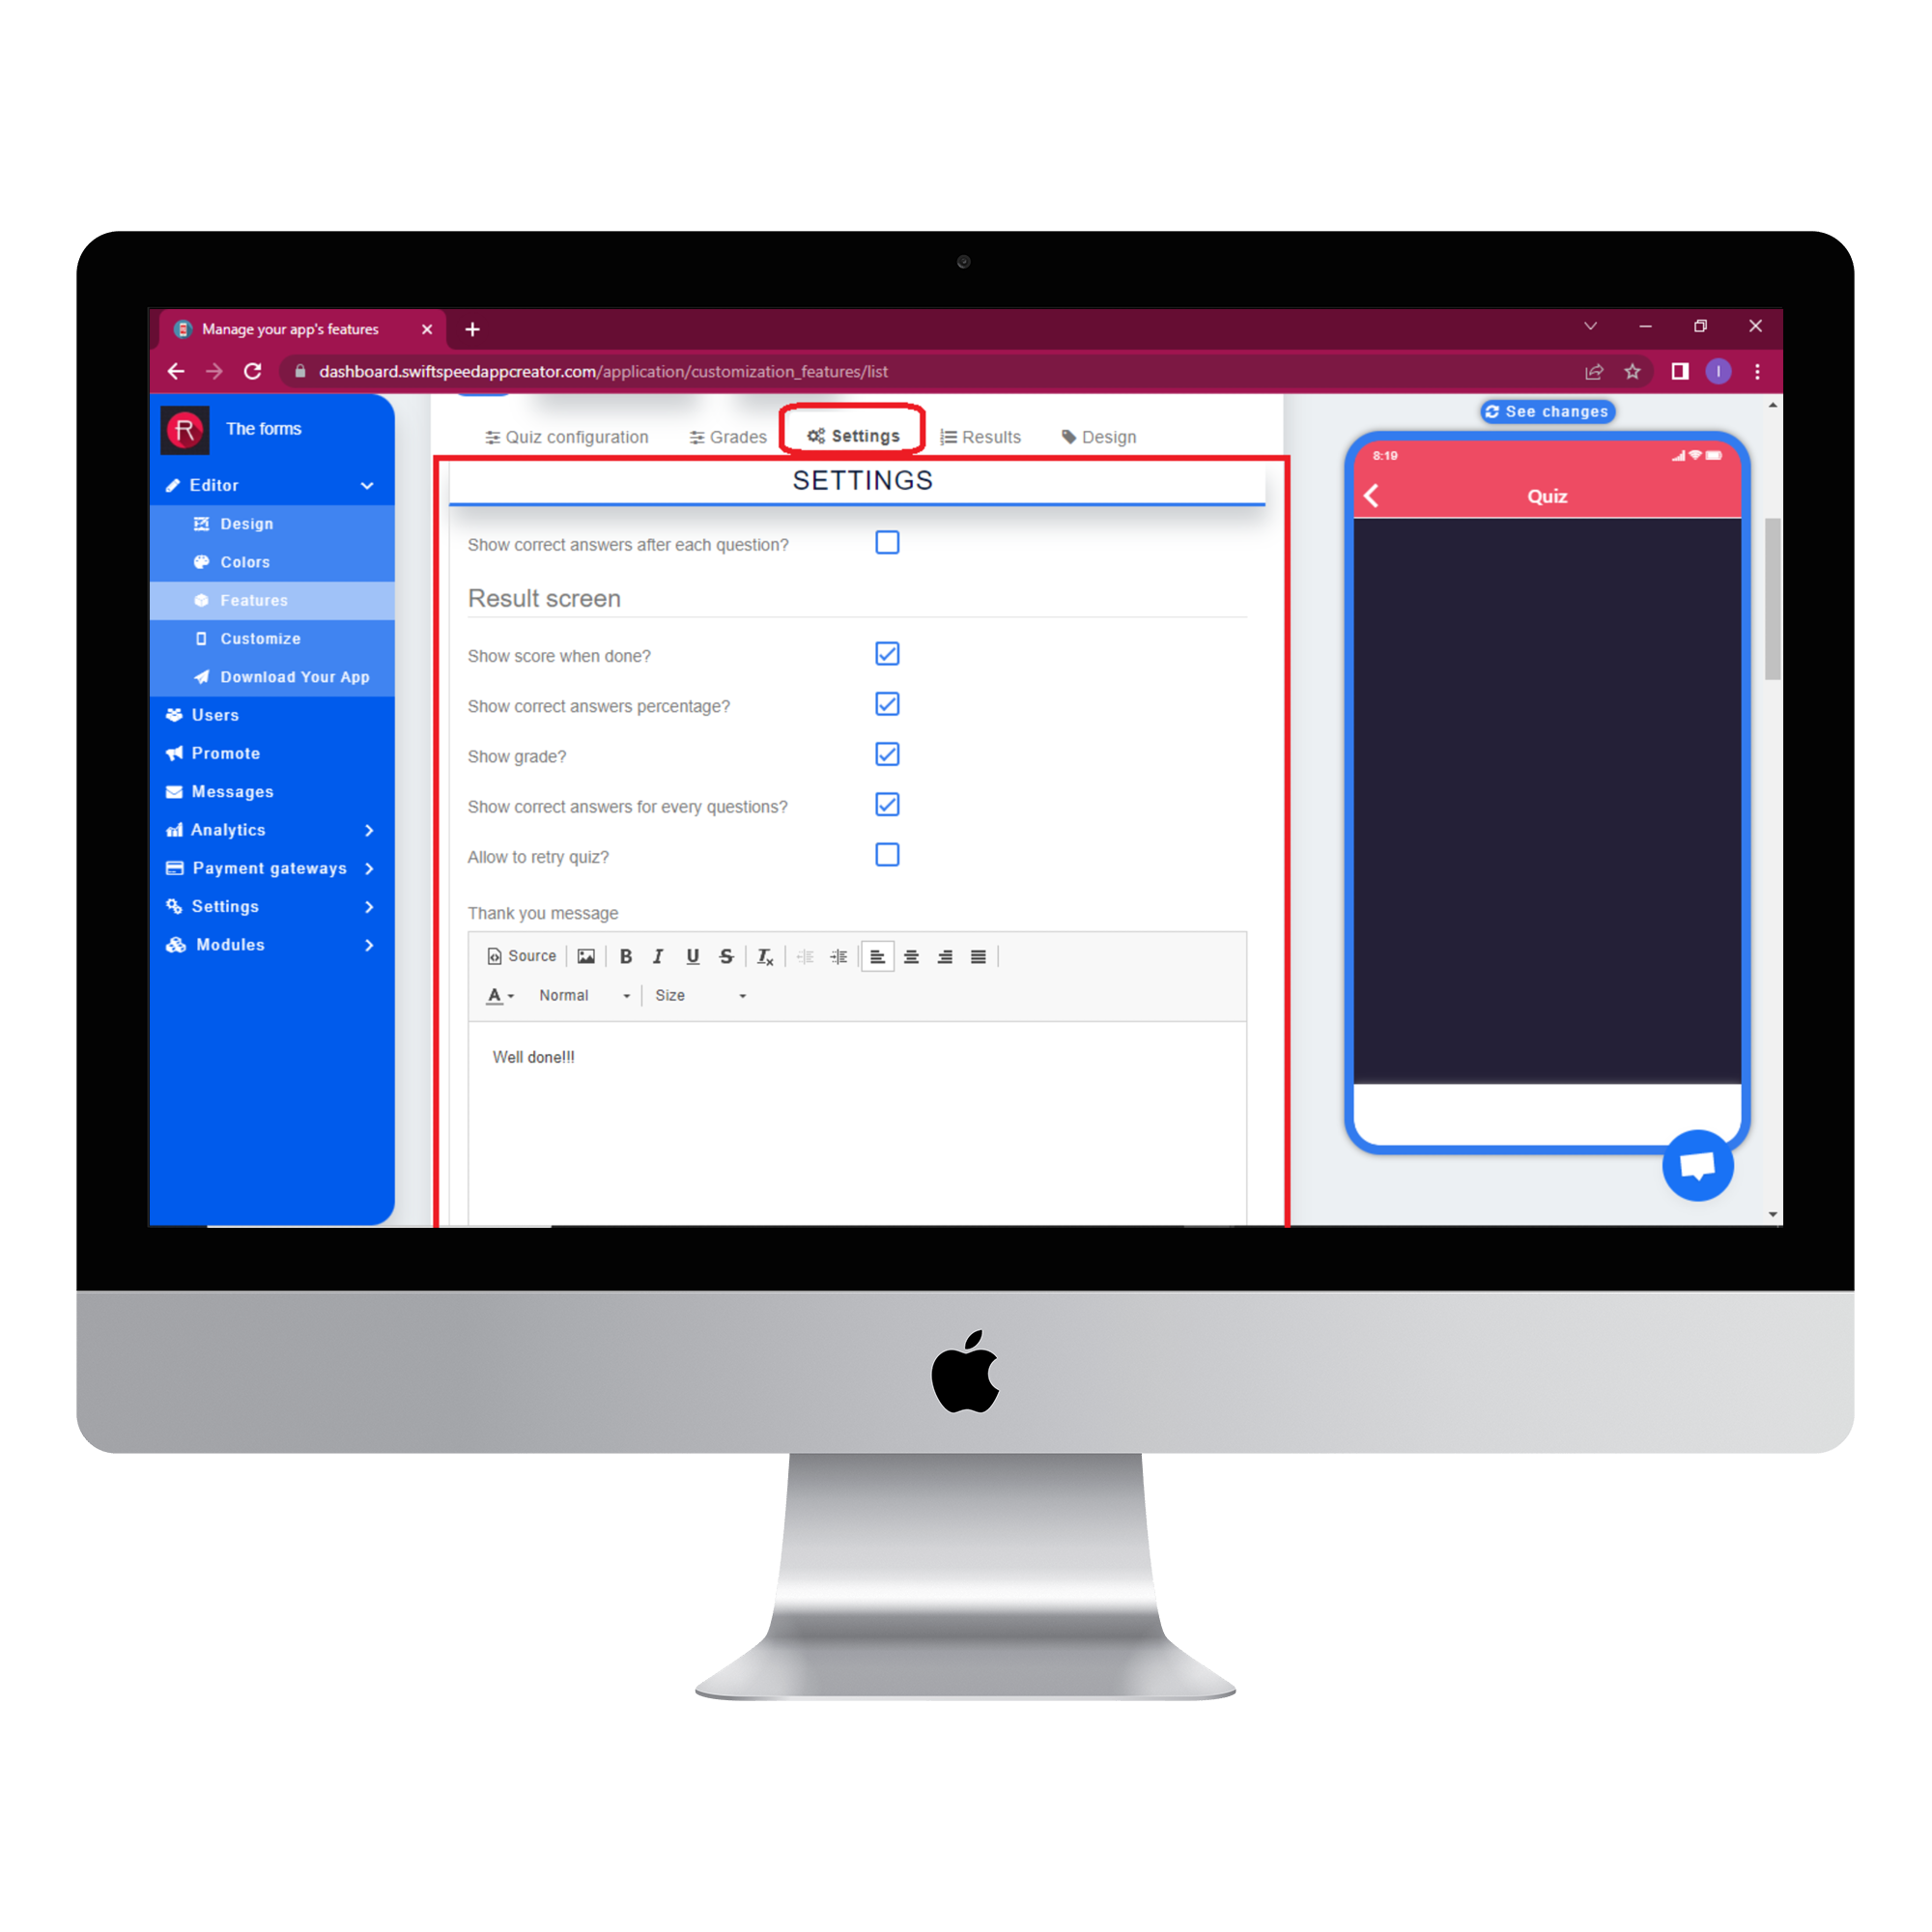
Select the settings tab and tick the checkboxes according to your preference. Type in the thank you message that will be displayed when your users complete the quiz. Click “save settings” when you are done.
Step 6:
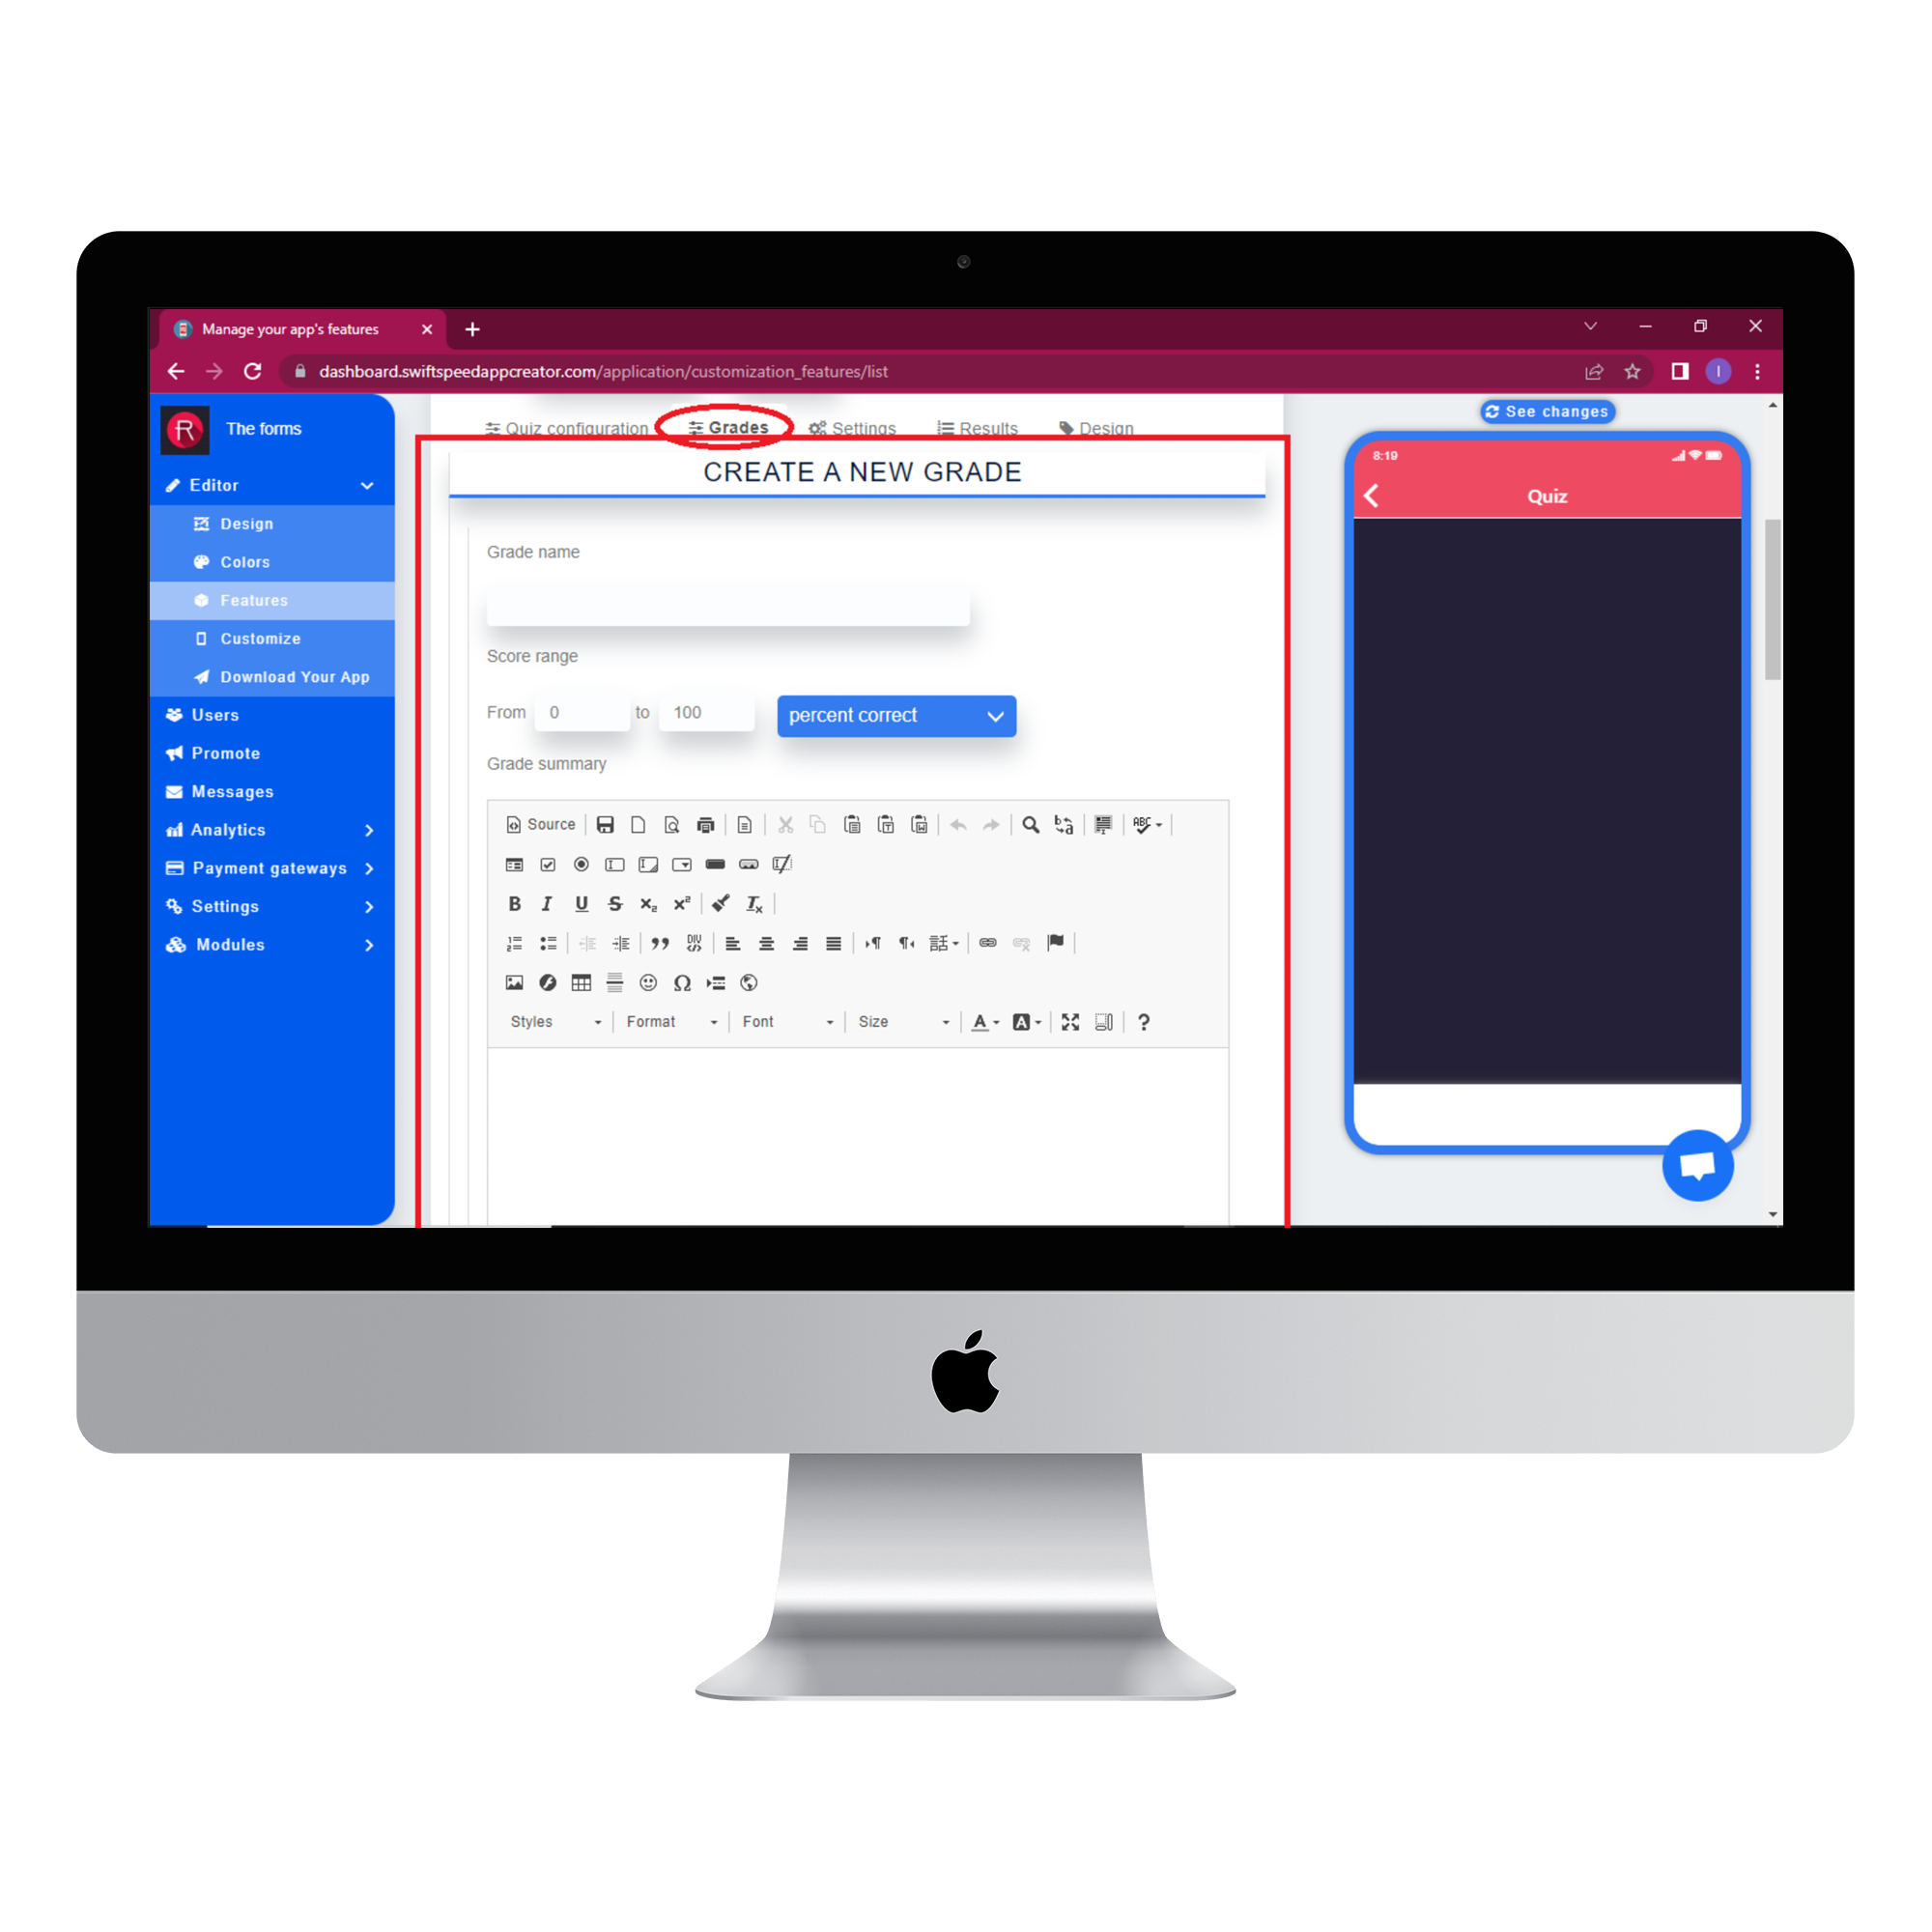
Select the grades tab to create a new grade. Type in a grade name and set the score range for the grade. Type in a grade summary for users that score within your set range and click save.
Step 7:
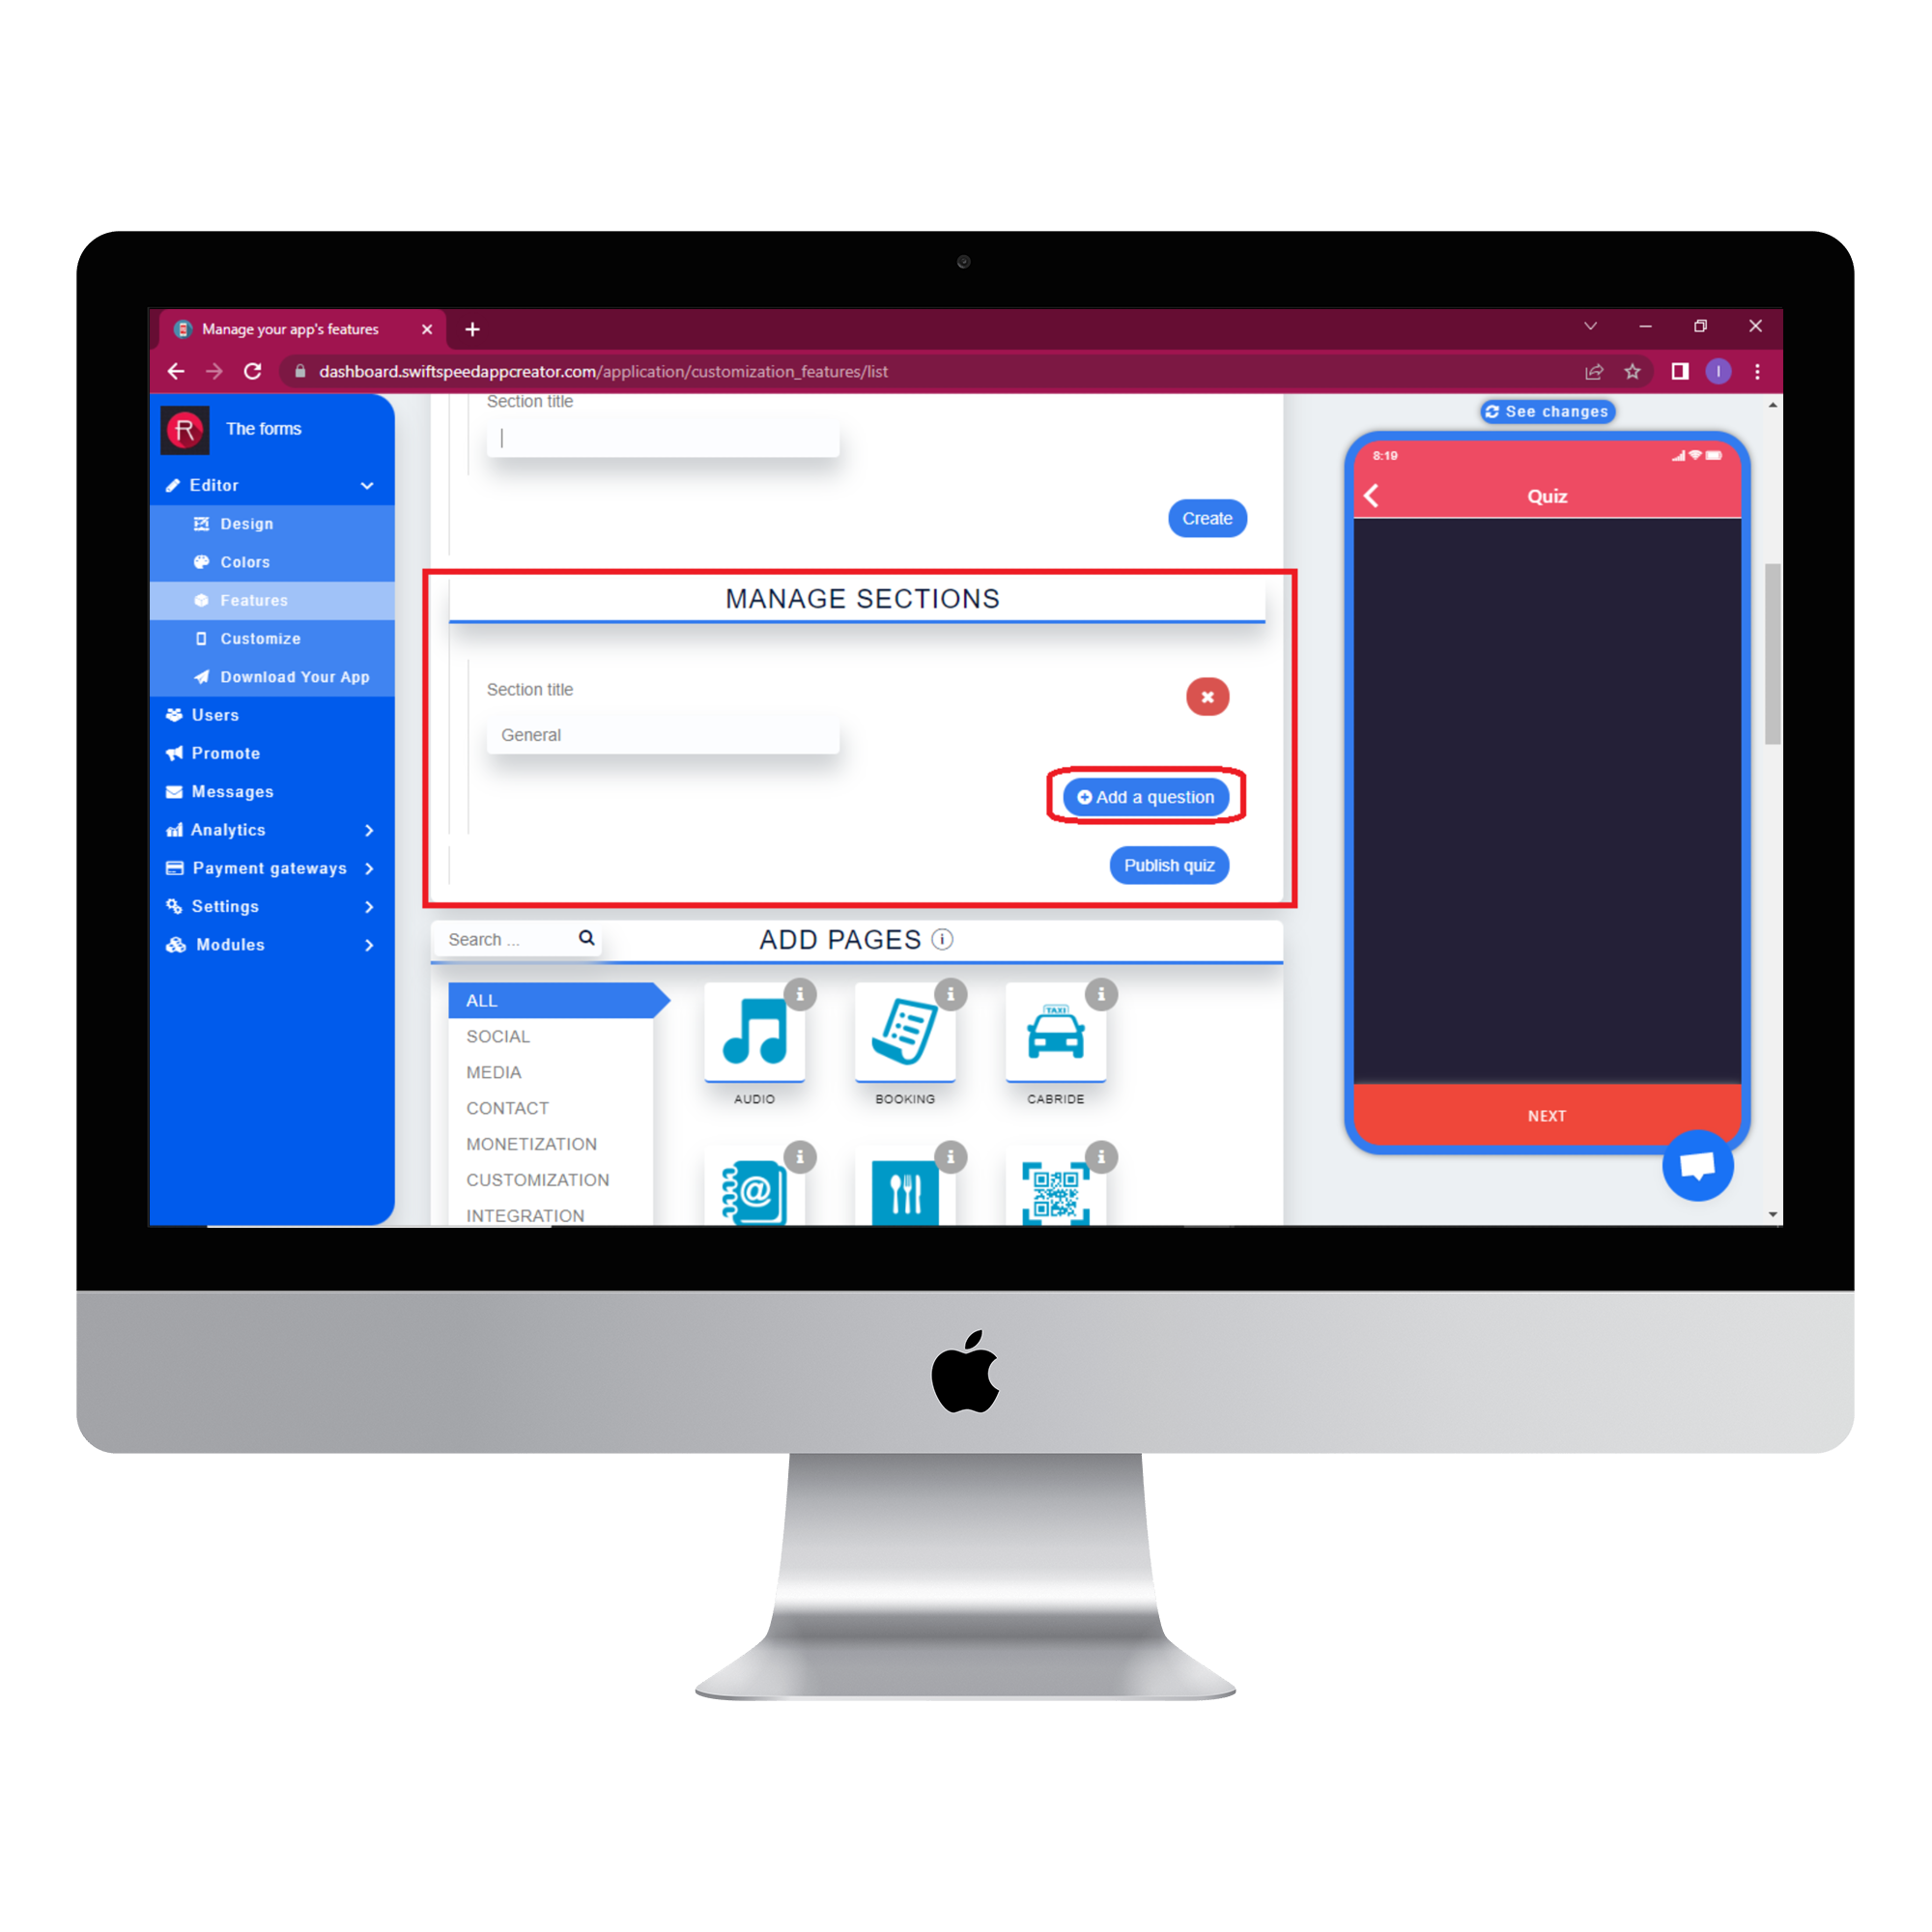
Select the quiz configuration tab to add the actual quiz questions. Type in the title section, click create, and a new quiz section will be created. Click on the “Add questions” button to add questions to your newly created quiz section.
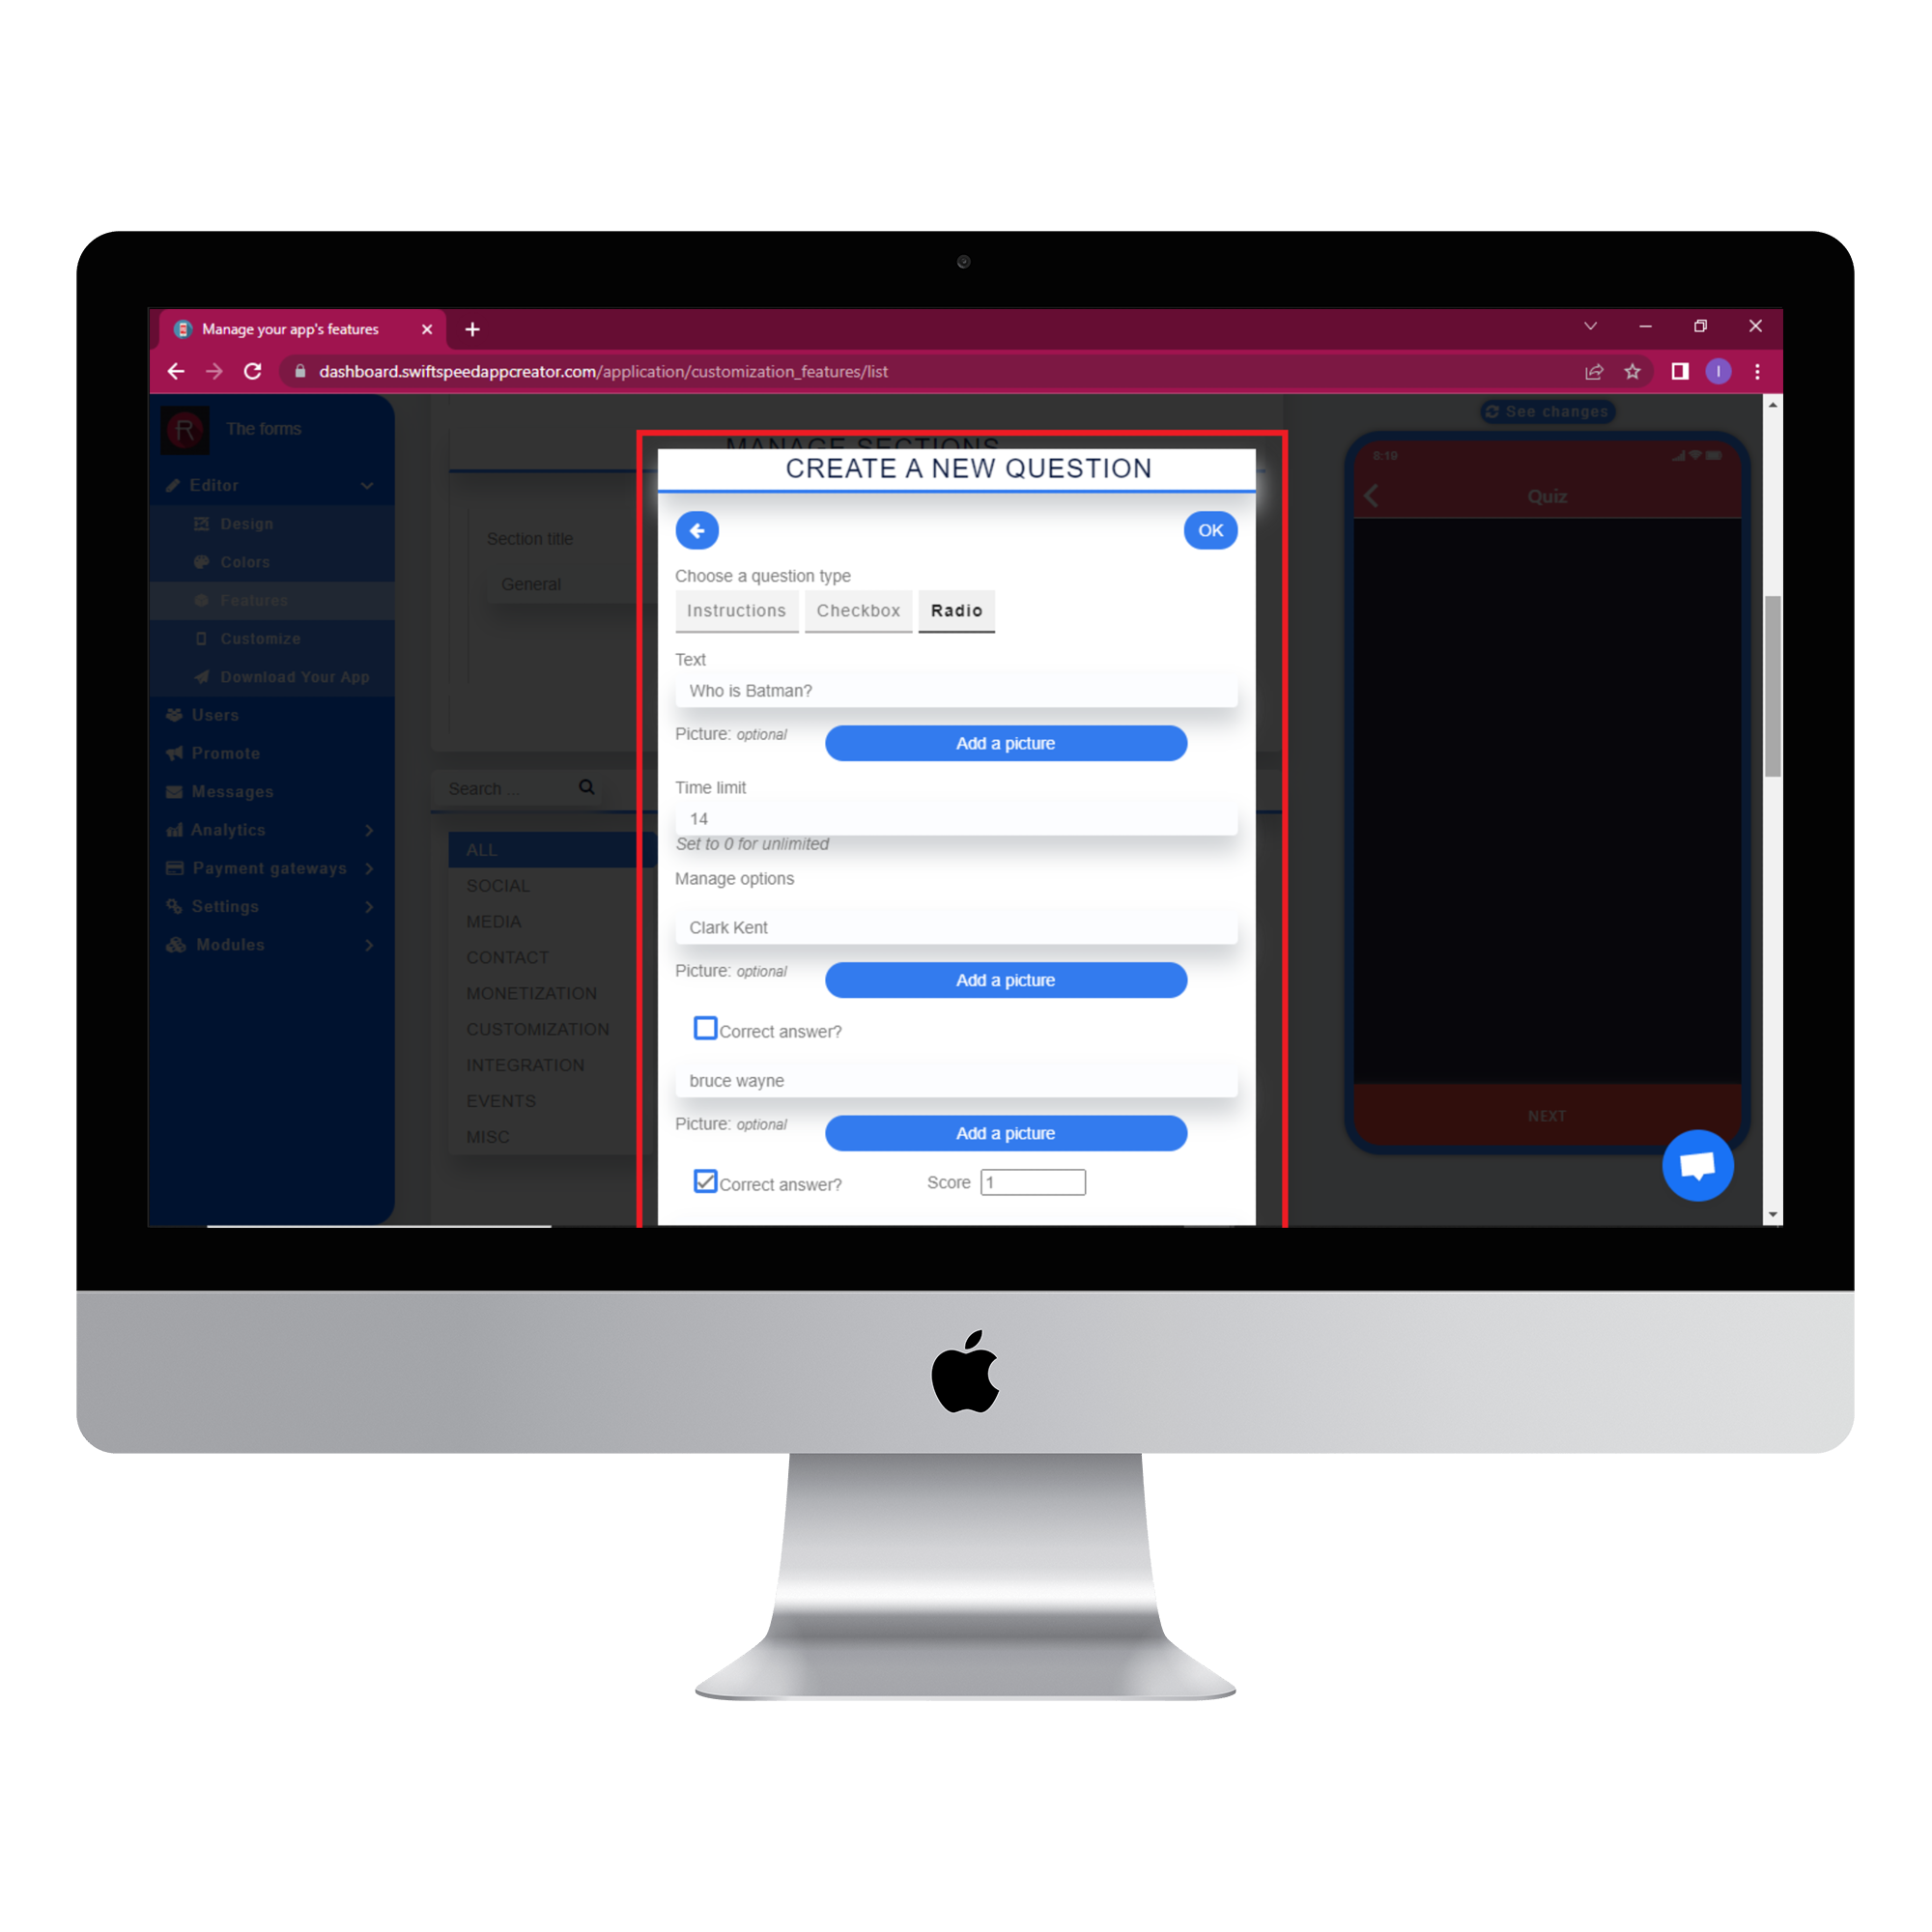
Select the checkbox as the question type and type in your question. Pictures are optional, so you can add one if you like. Add a sense of urgency to your quiz by setting a time limit for each question. Set the options for your question in the “manage options” section. Tick the correct answer checkbox below the correct option and set the score for that question. Click “Ok” when you are done setting the question. You can create as many questions as you want by repeating this step.
Step 8:
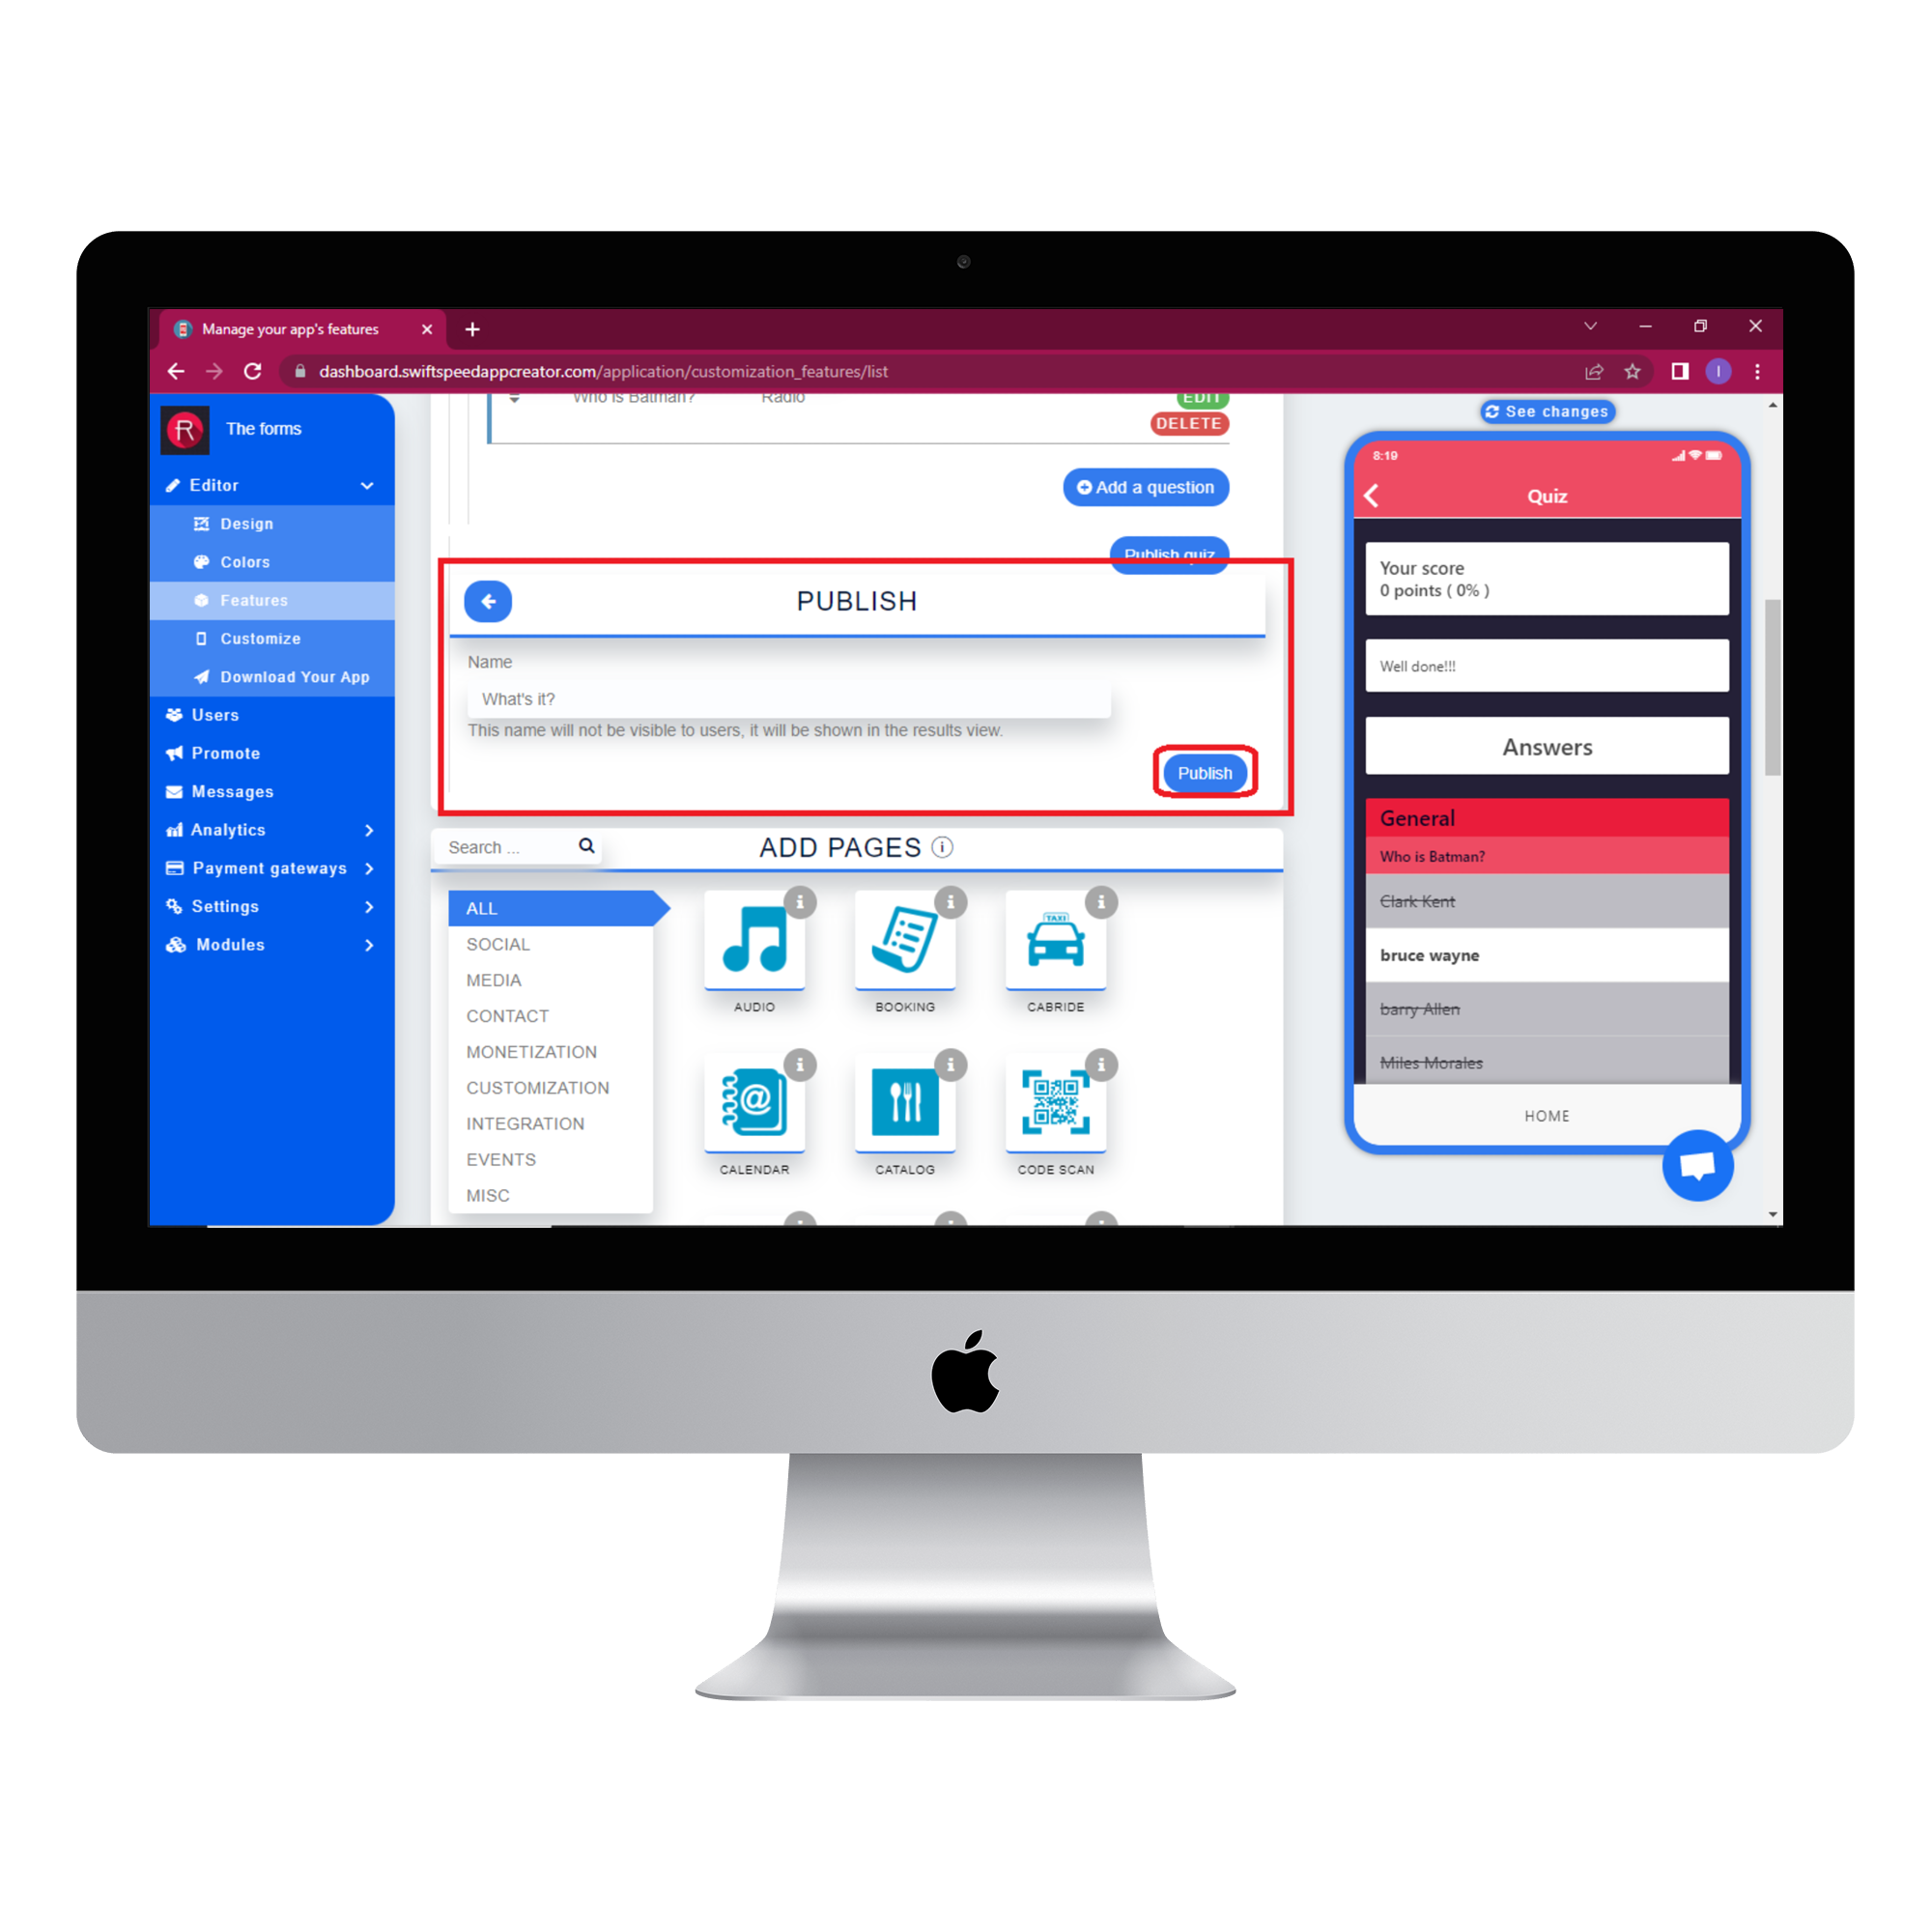
Click on the “publish quiz” button, and the publish section will appear. Type in the name of your quiz ( This name will not be visible to users, it will be shown in the results tab ) and click publish.
Step 9:
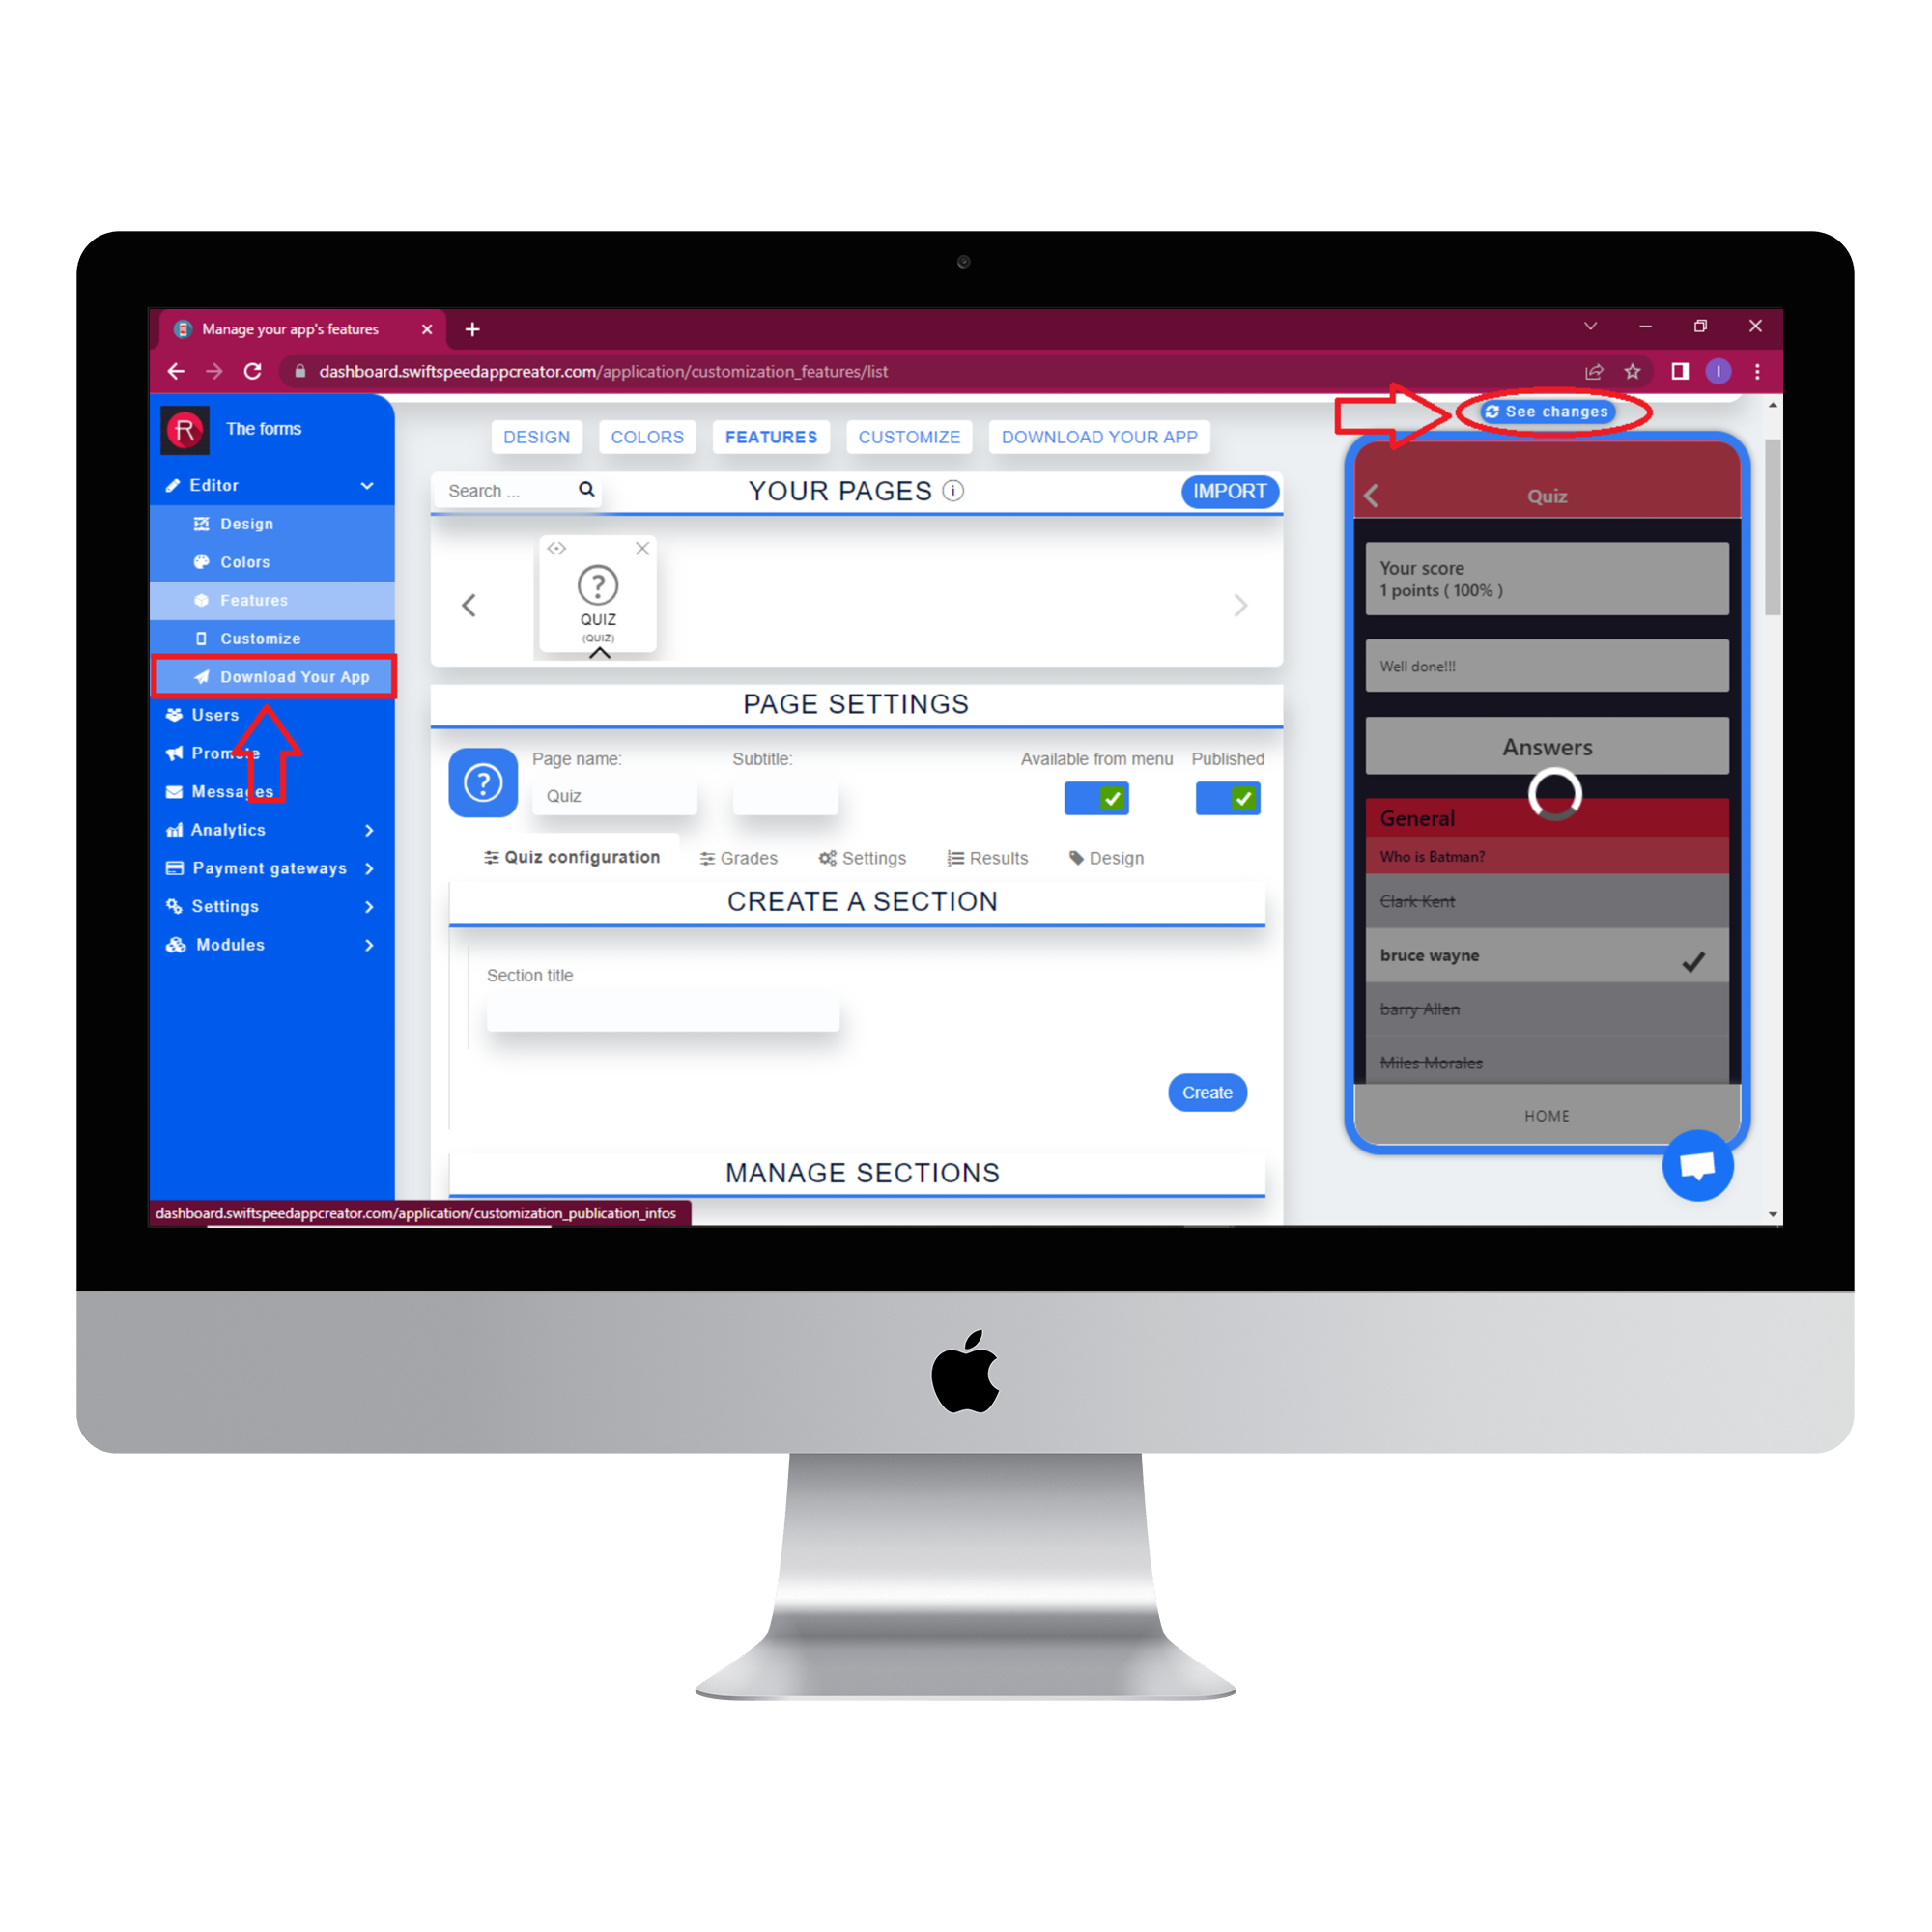
Click on the “see changes” button above the virtual device to see what your app would look like on an actual device. To generate an Apk of your app, click on “Download your app” from the side menu, scroll down and click on “Generate Apk.” Choose a subscription plan, and the Apk will be sent to your email address when the build is complete. Here is an example of what your app would look like. Please note that quizzes submitted on the virtual device will not be shown in the result tab.
Good job on building your own quiz app. Check out our other unique features here

