How To Make An App With Swiftspeed App Builder
In this tutorial, You will learn how to make an app with Swiftspeed App Builder. This requires absolutely no coding or programming knowledge.
Follow the below steps to make an app
Step 1:
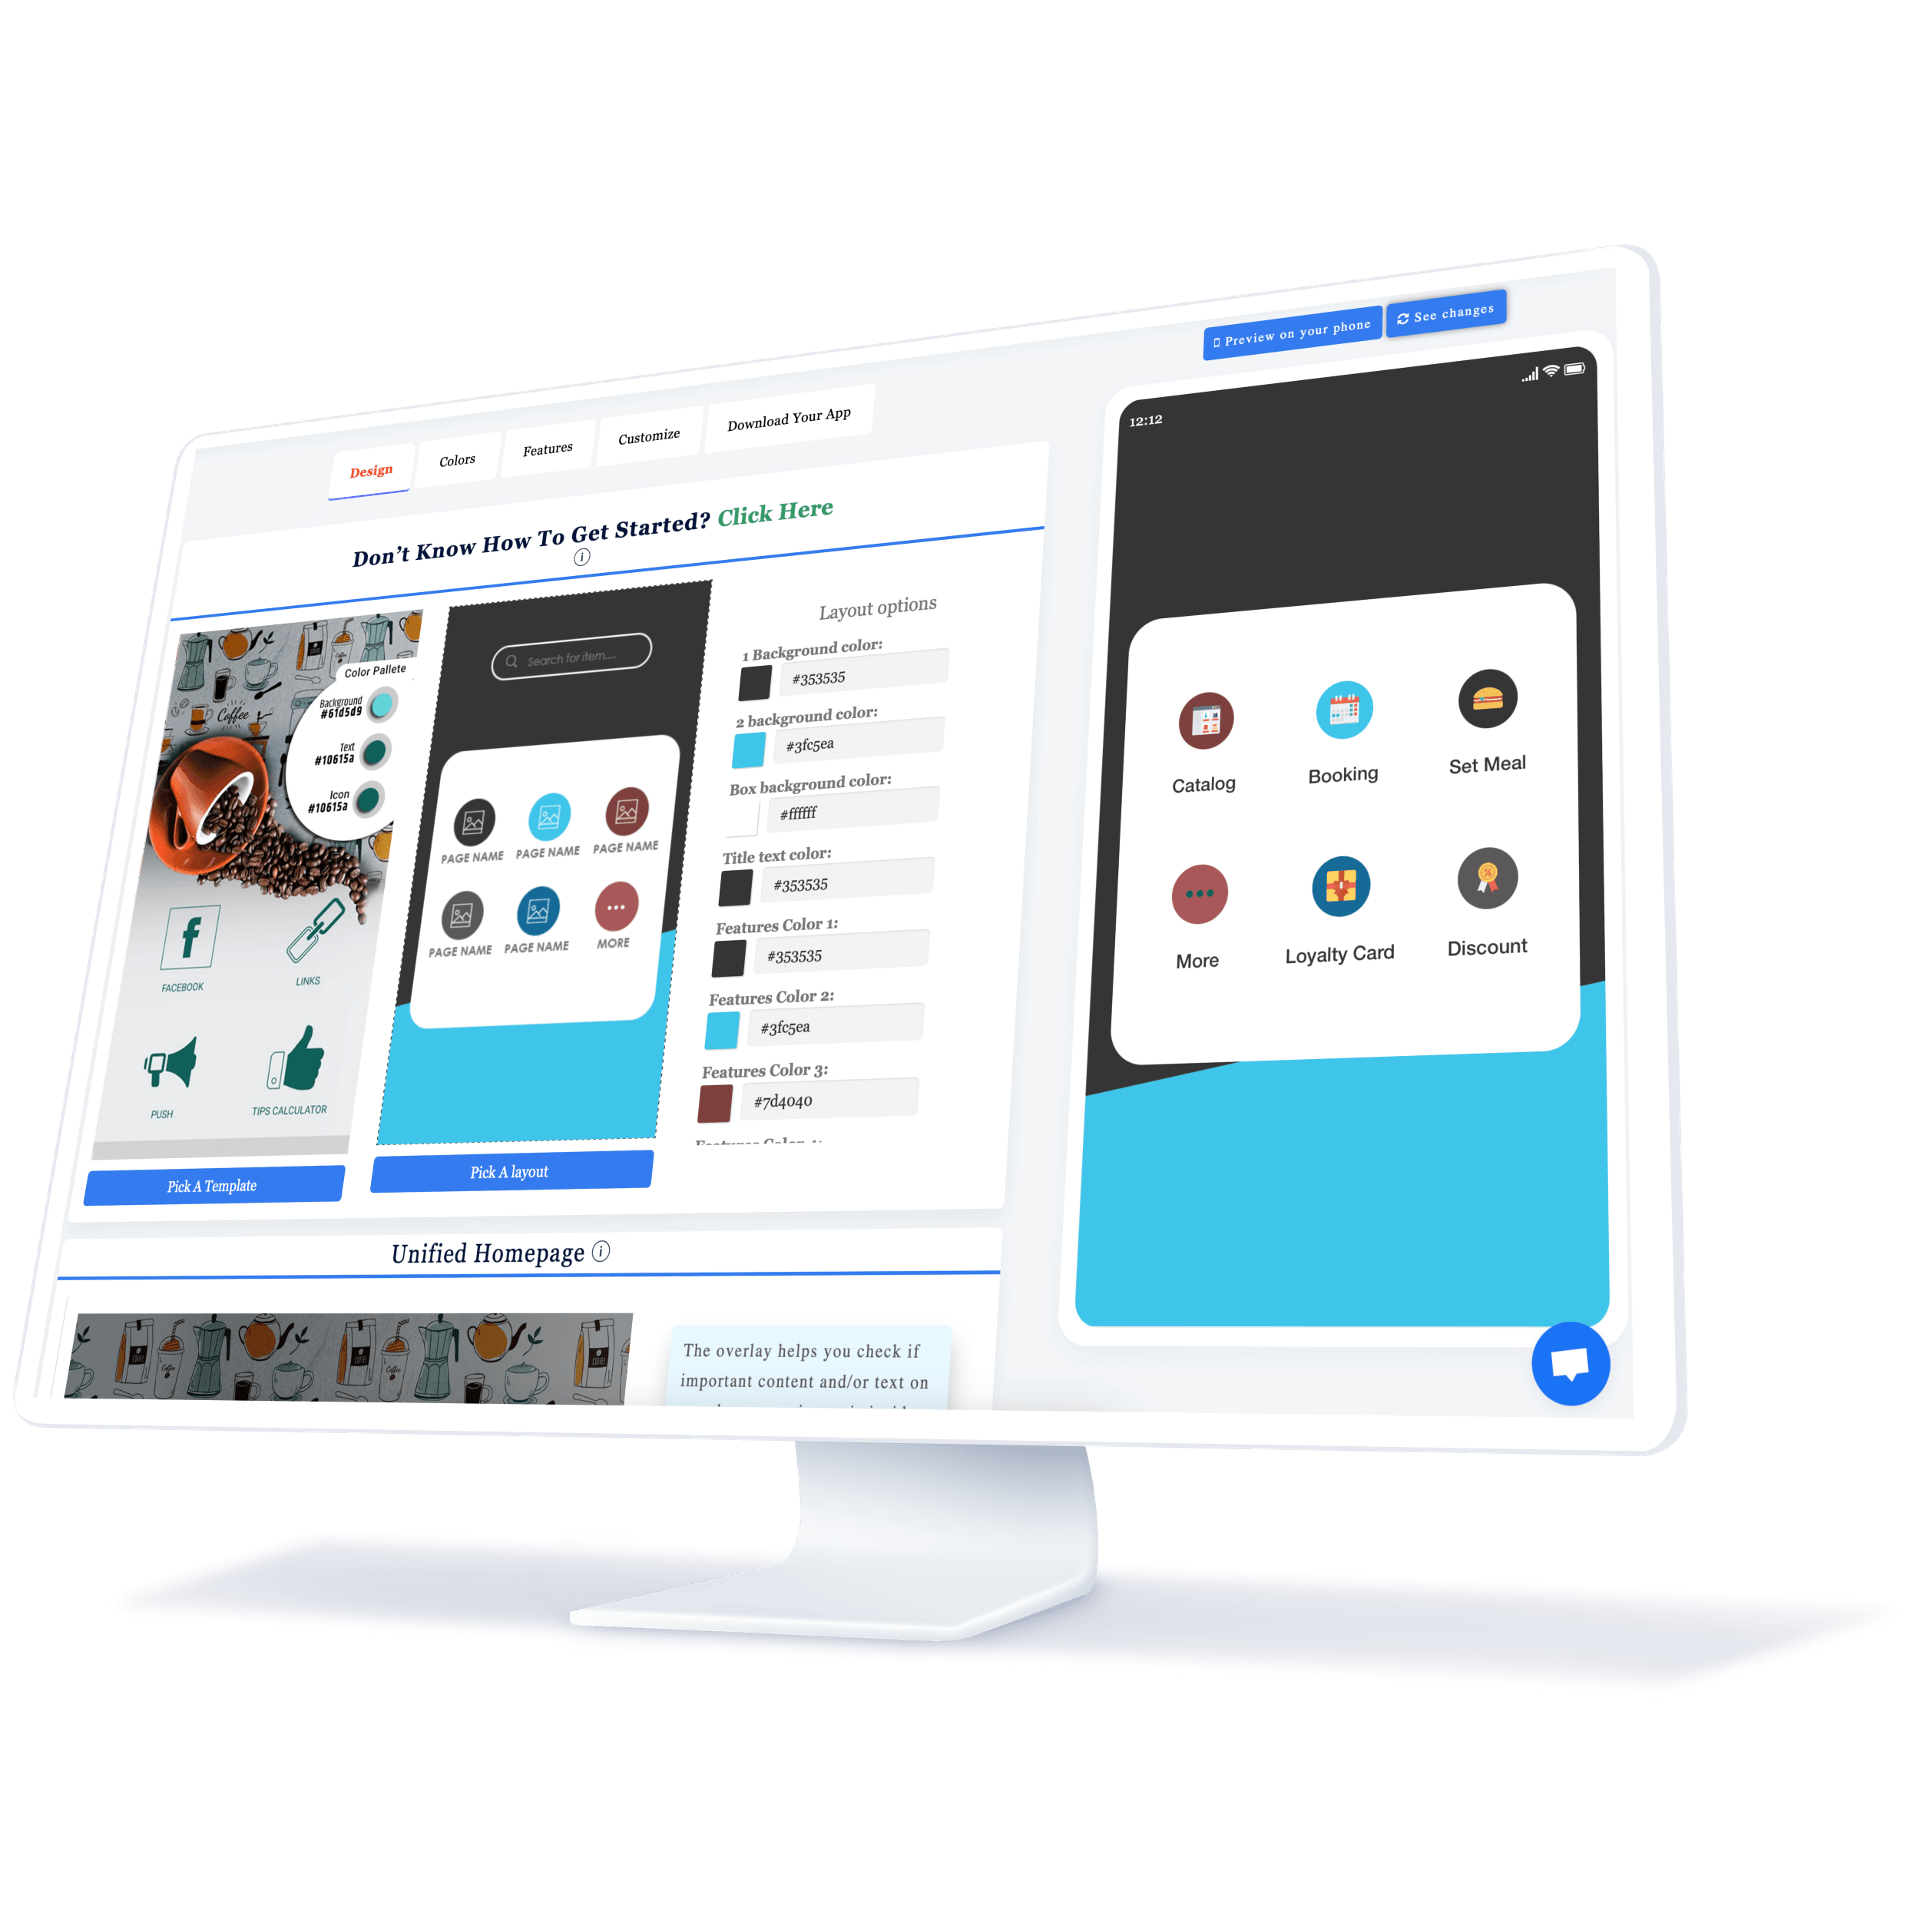
Visit our registration page to sign up on our platform. If you are an existing user, you can log in here. Please see our mobile app features and app templates if you require more information on the type of applications you can create with our app maker. After you have logged in
Step 2:
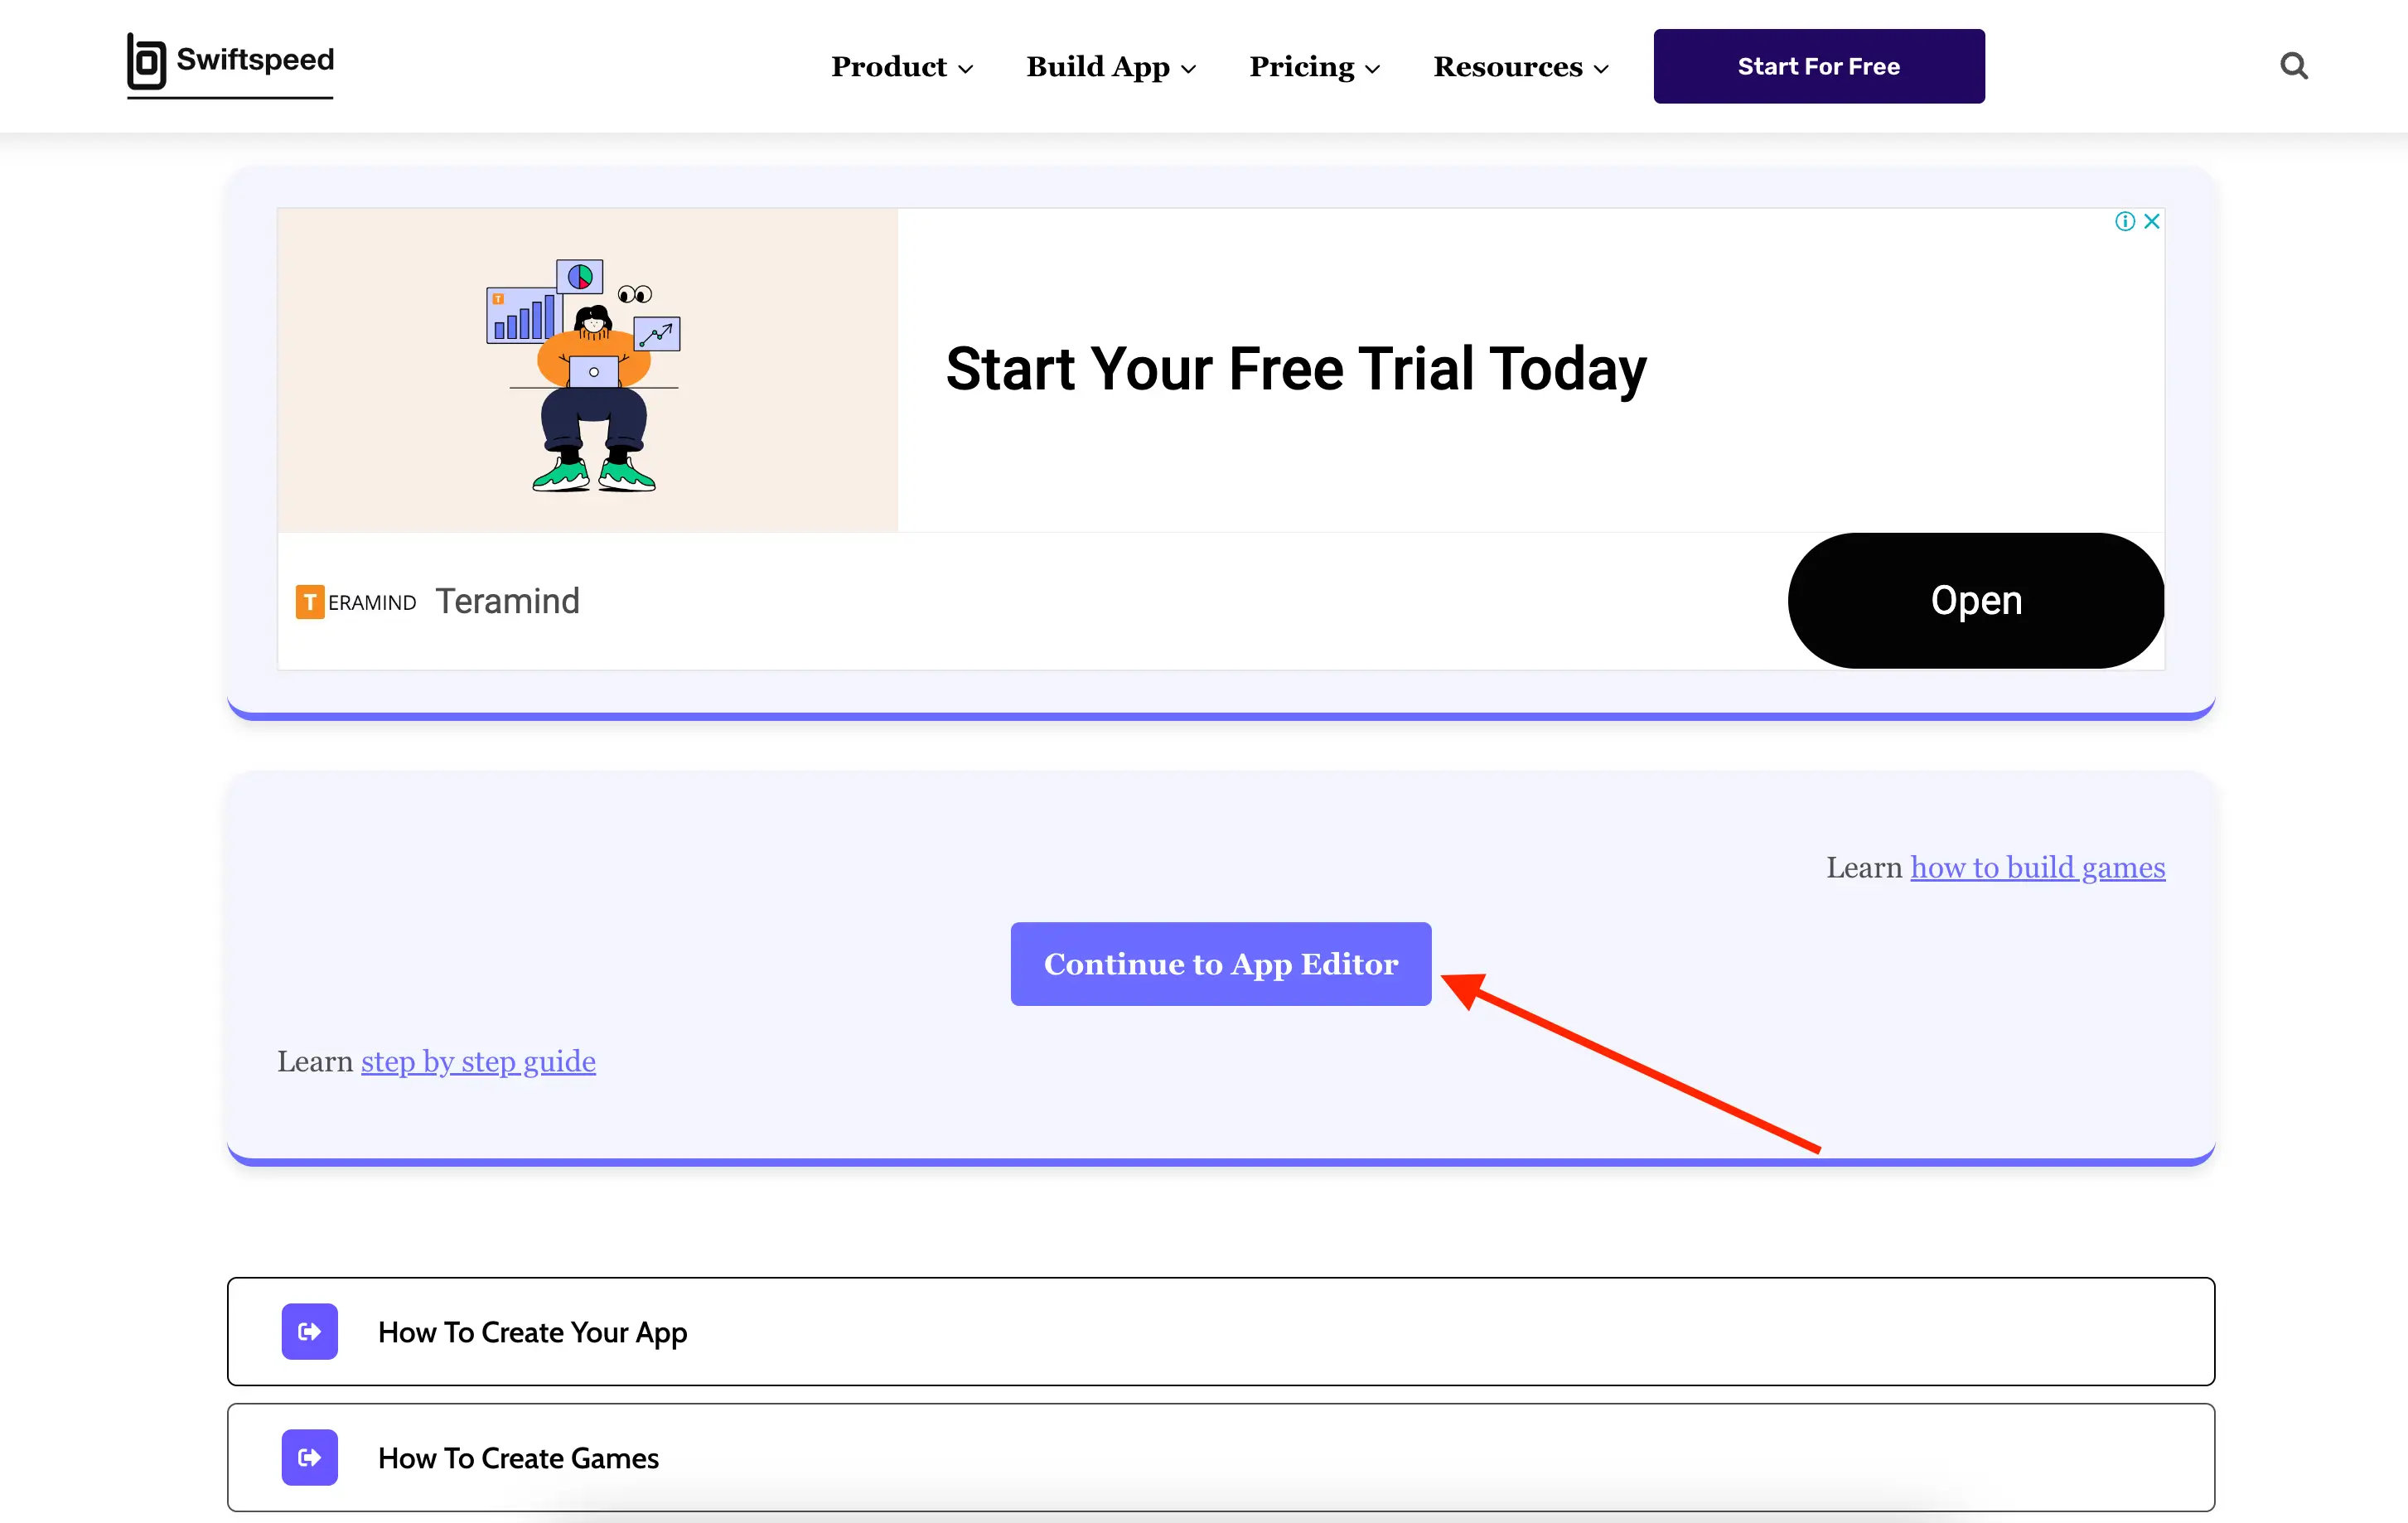
After logging in, you can create your first application. Click on the Dashboard in the top navigation and then click on the “Create a new Application” button. Type in the name of your application (here, we will use “Tutorial”), and click on the “Create” button.
Step 3:
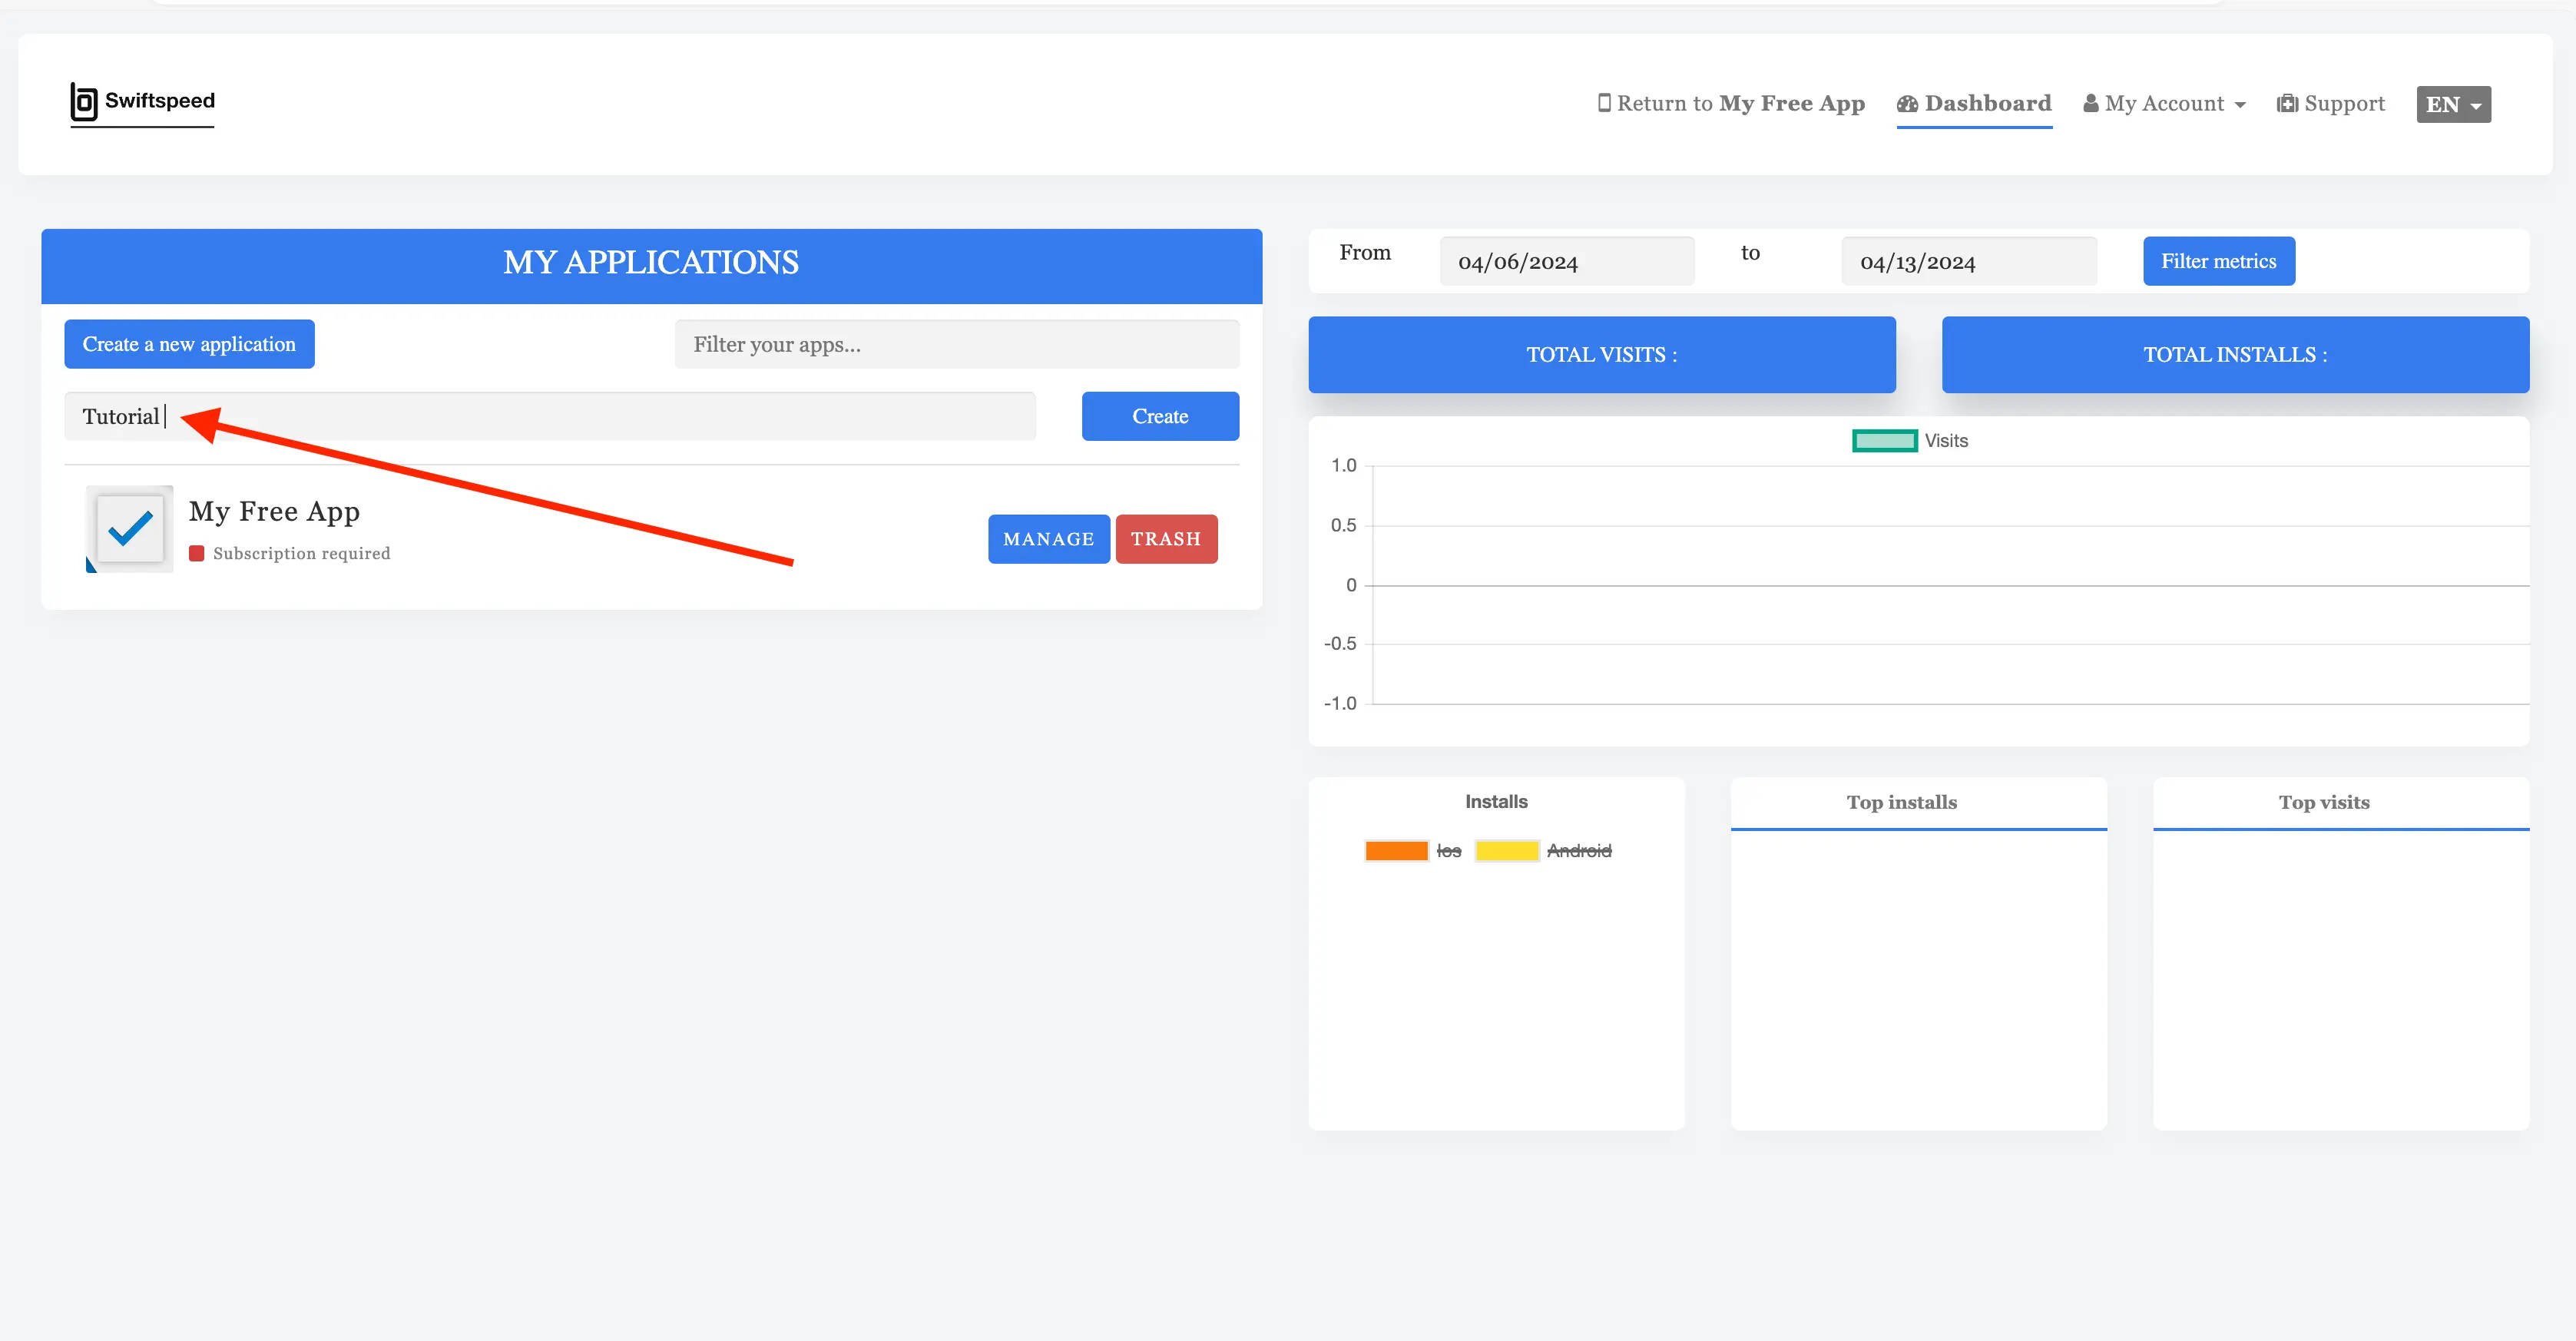
To be able to customize your newly created mobile application, you are required to activate a subscription but do not worry; we also have a free plan that you can use for a lifetime. After entering your desired app name (which can be changed later), you will be automatically redirected to the subscription activation form
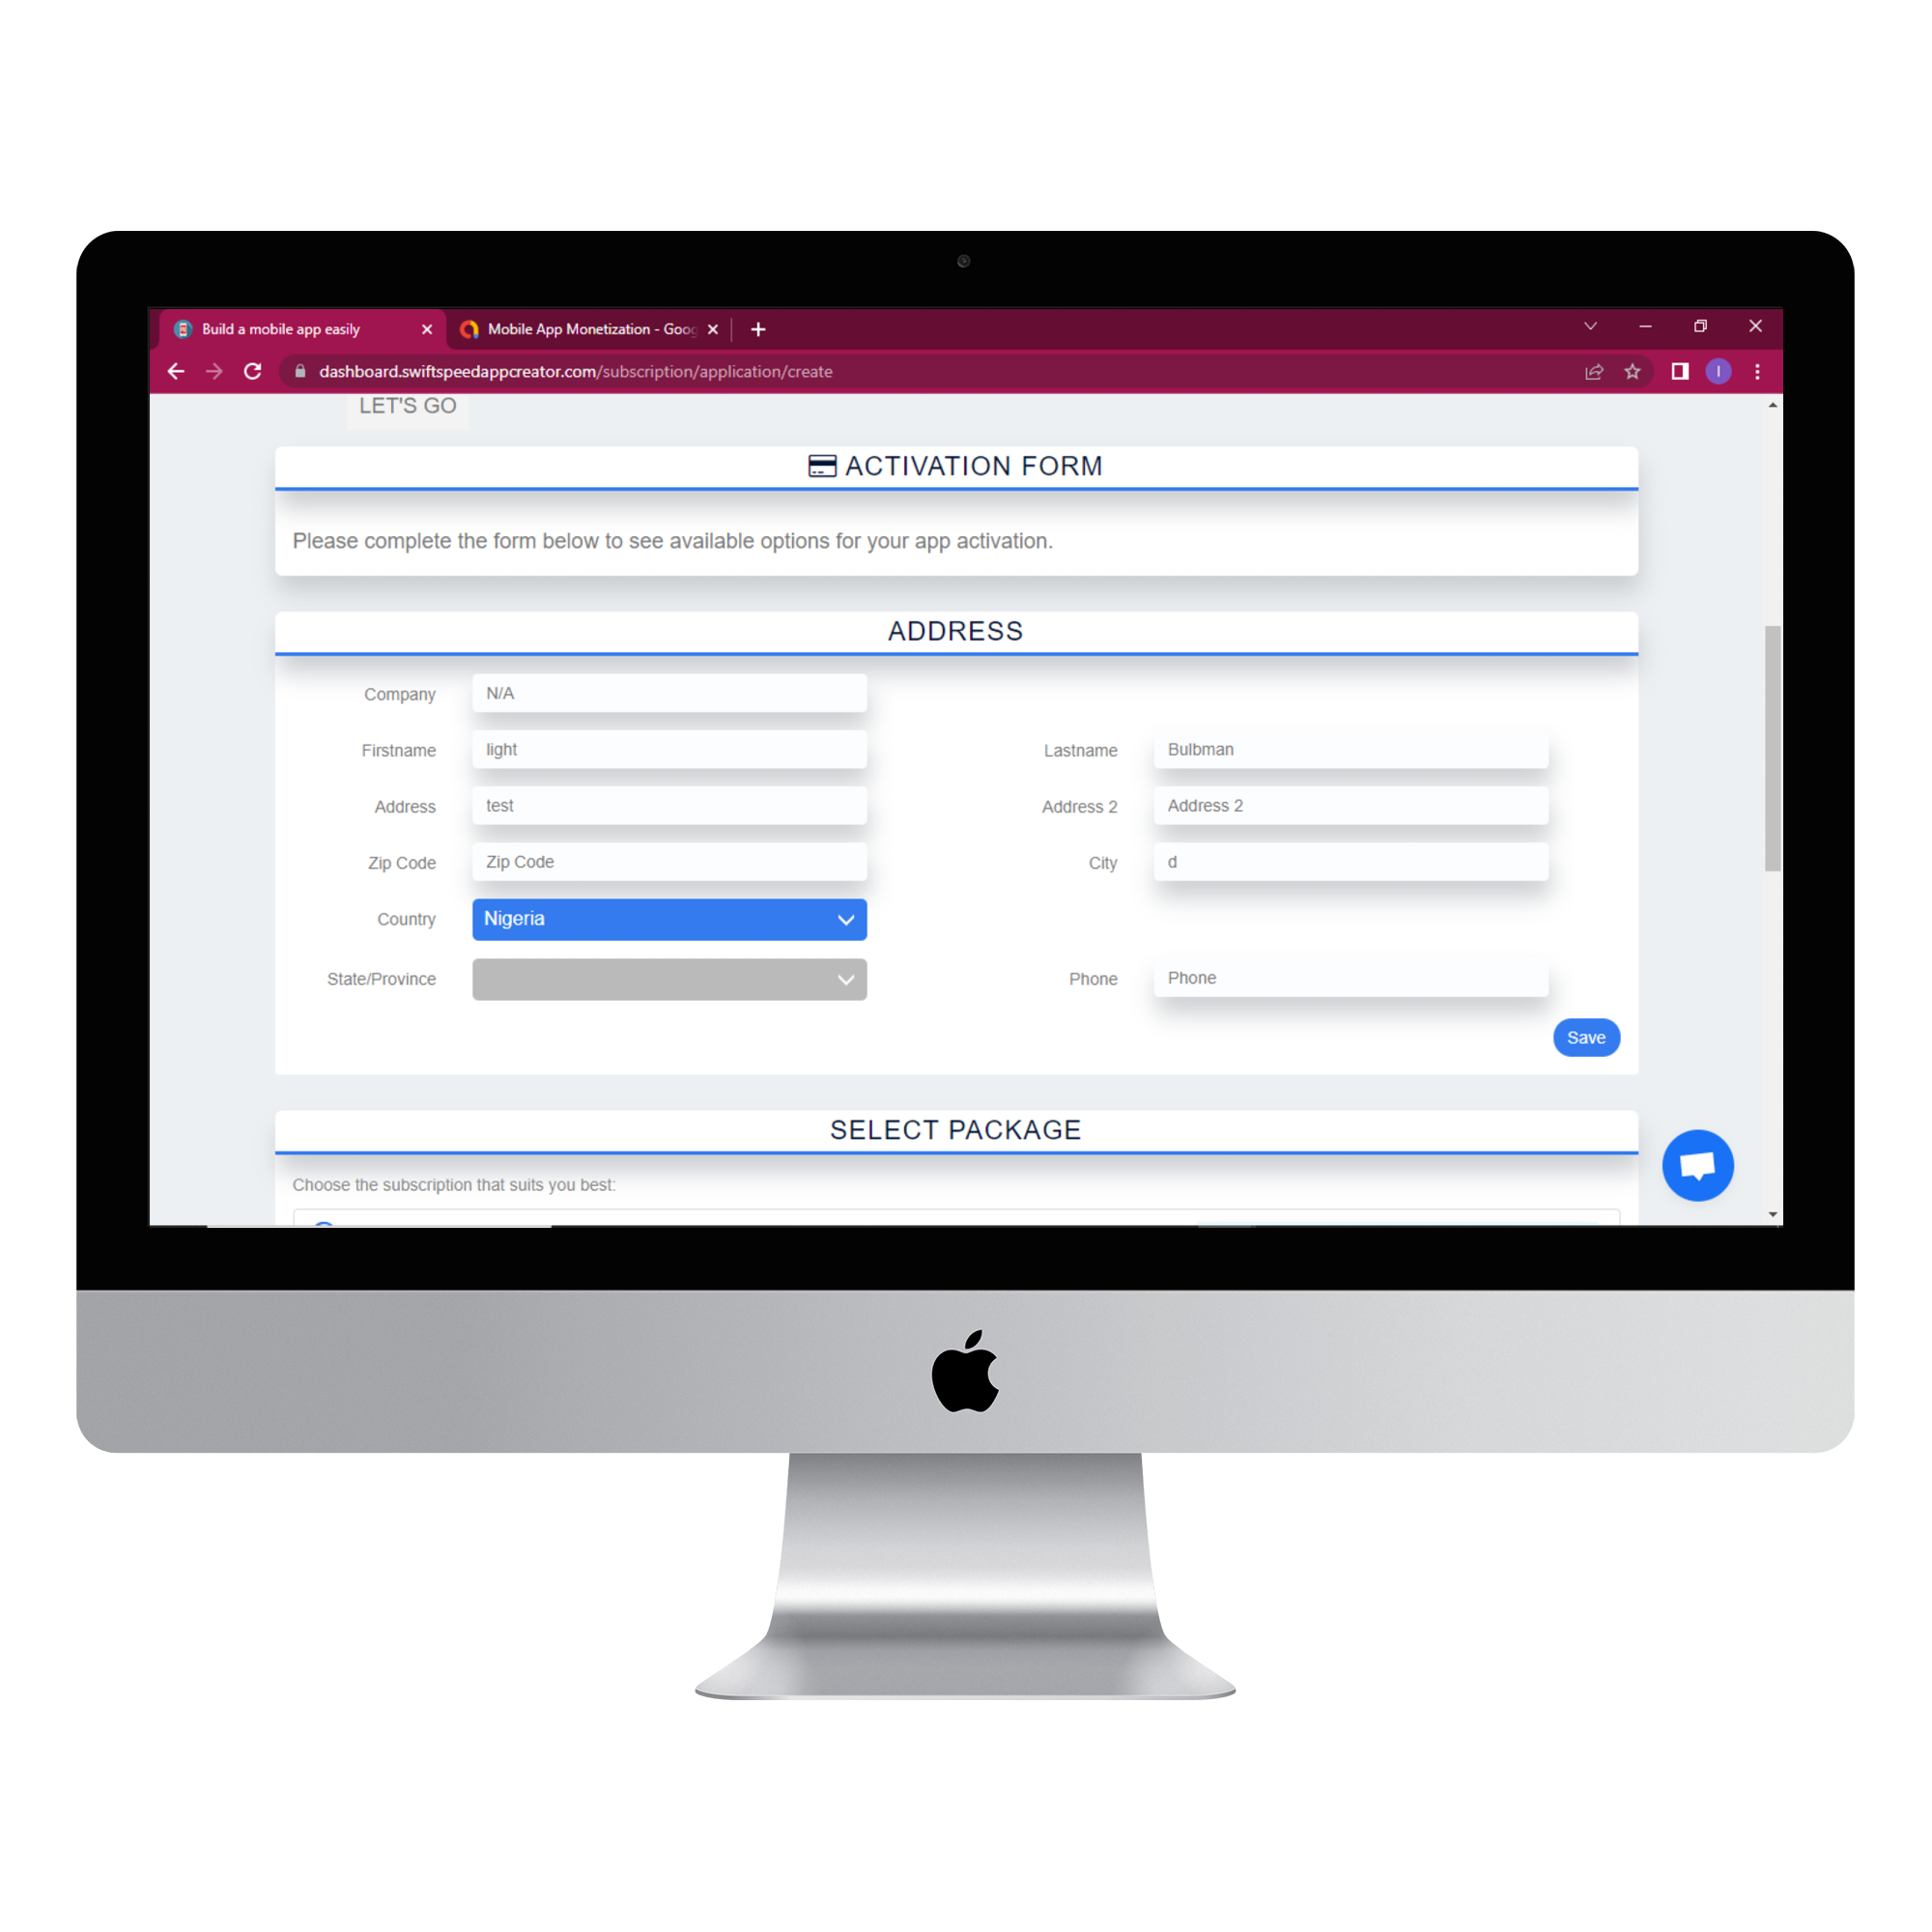
The activation form page requires that you fill out your company details and other required information, complete this form, and click save to proceed
Step 4:
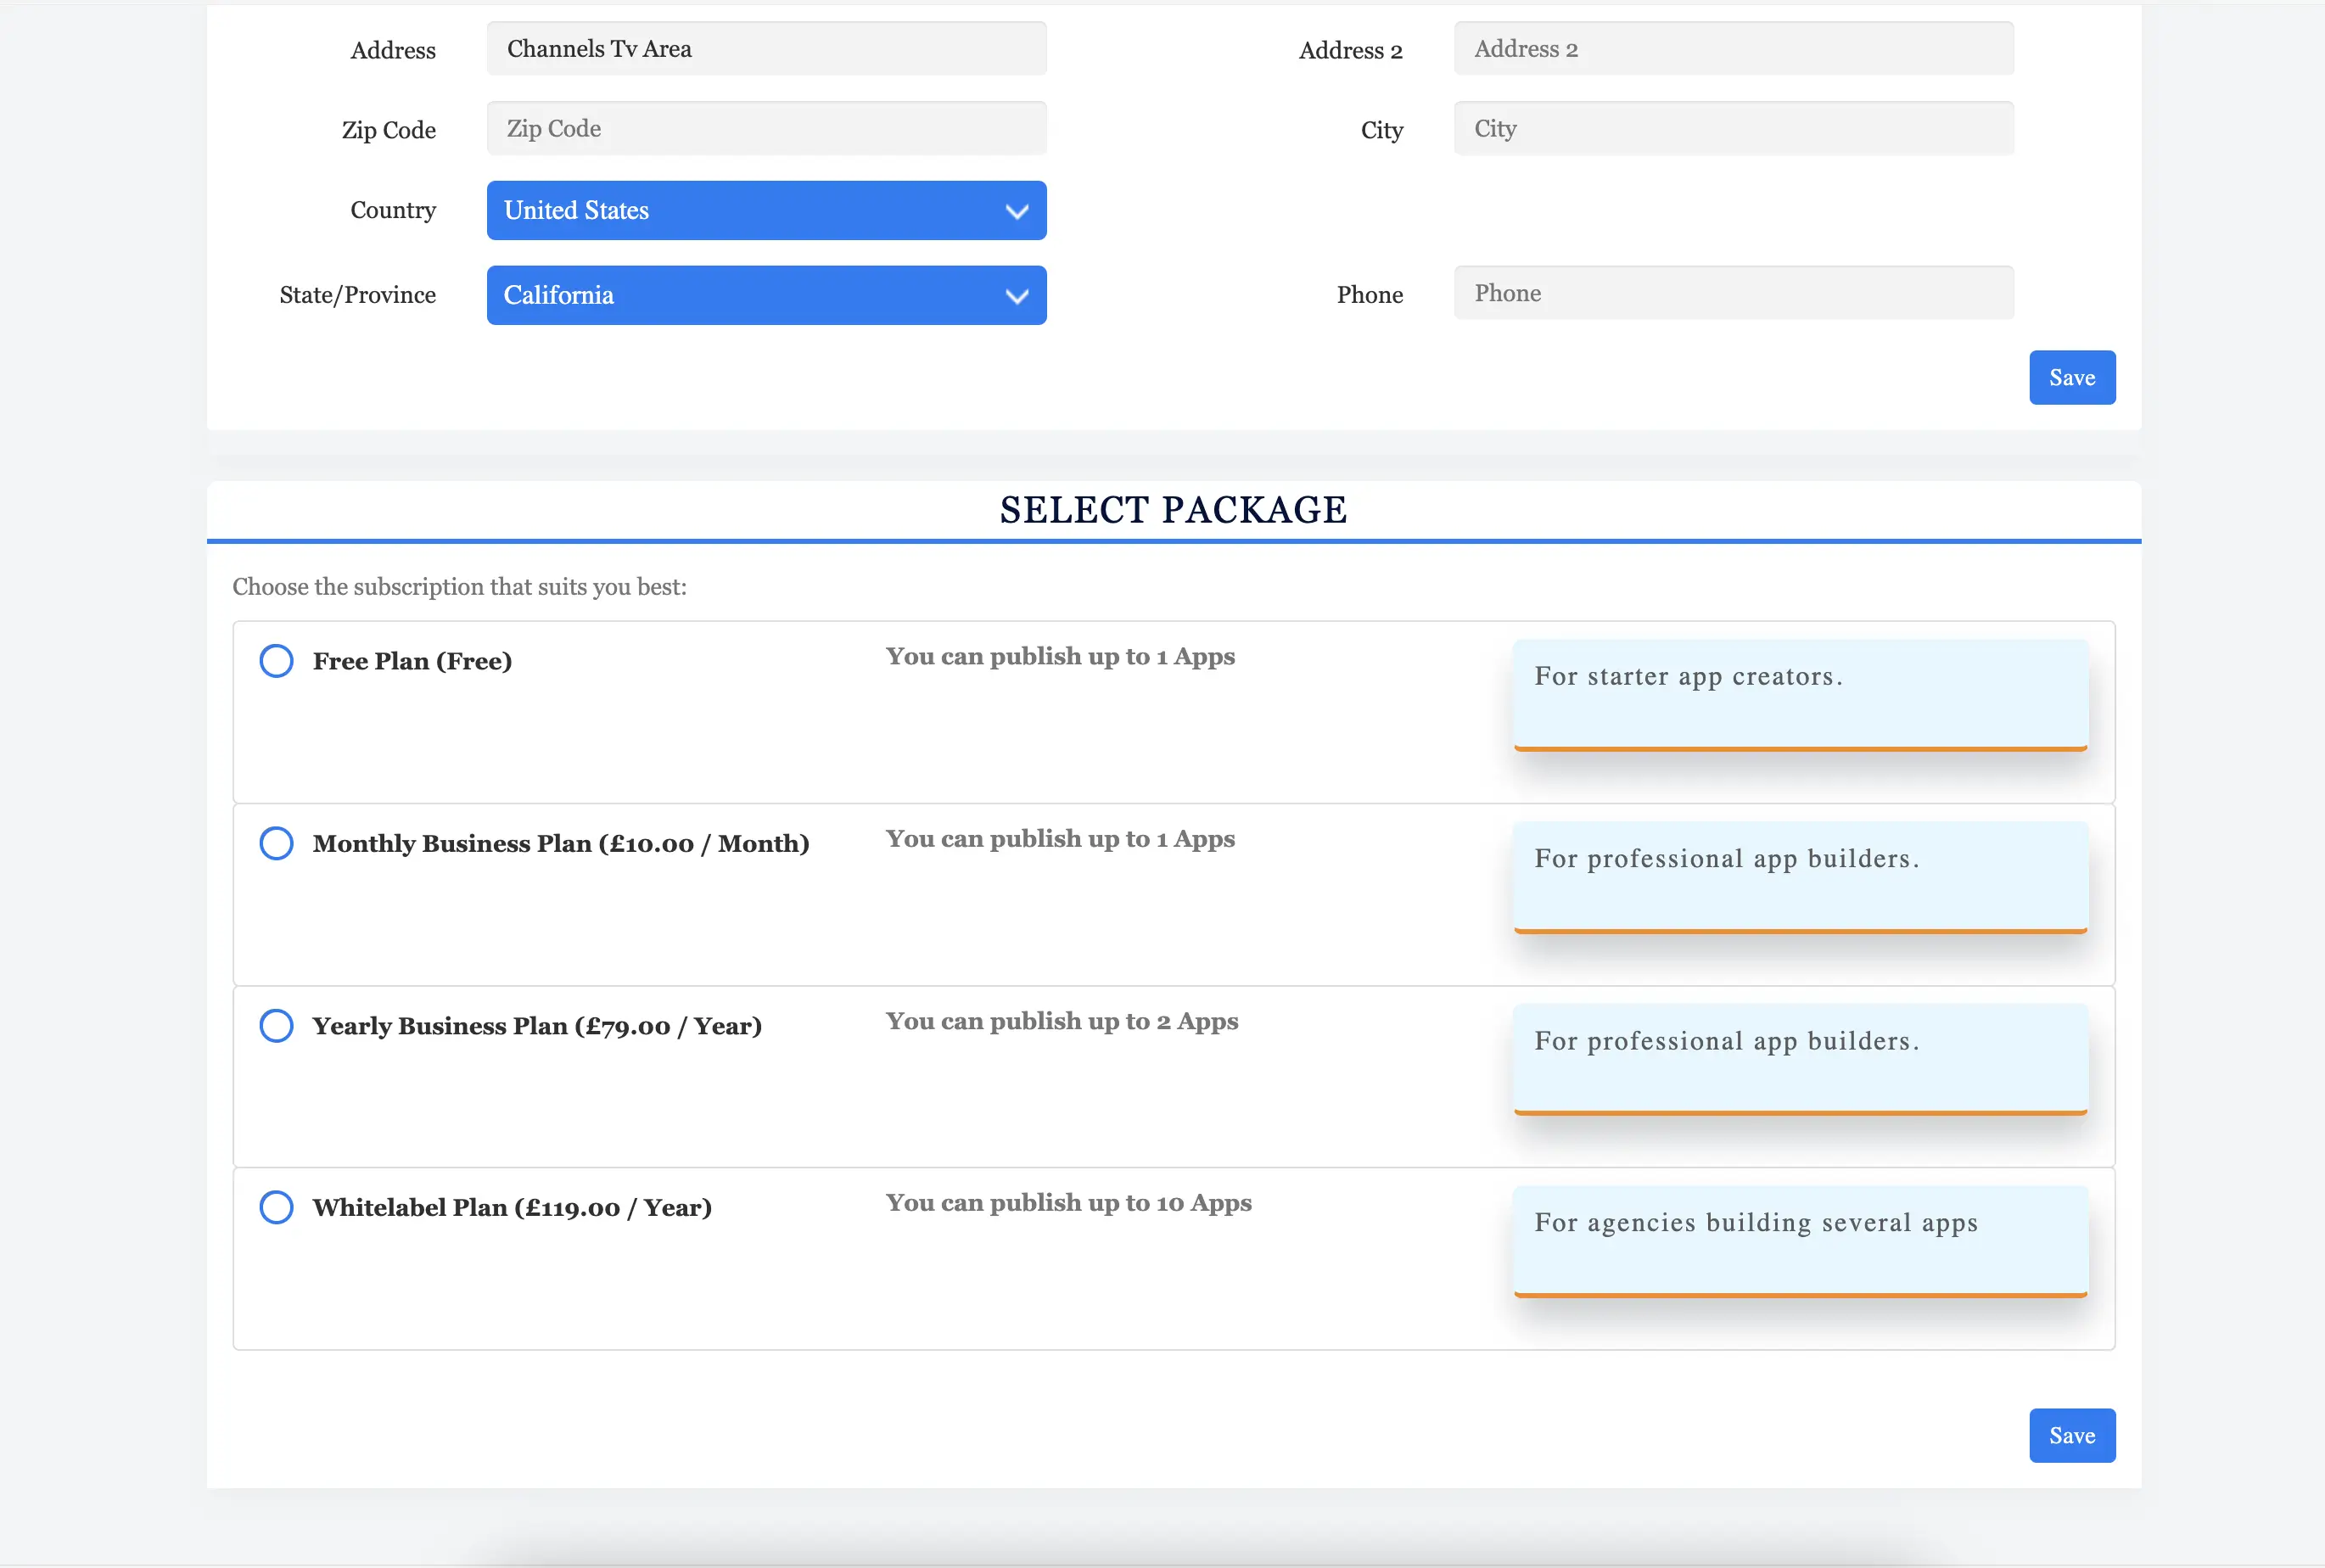
Immediately after completing the form, click on “Save” The “Select package” section will become visible. Select the package that best suits your needs. For this tutorial, I am going to select the Free Plan. If you choose a free plan, you’d not have access to our advanced features and templates or restricted customized options and app monetization. This option has been provided to test out the platform before you opt for an upgraded option. See here for a list of features and templates available on the free plan. Also, you will see non-intrusive ads as a free user on Swiftspeed until you upgrade to a pro version. This does not mean we will add ads to any free app you make.
Step 5:
The order details section will show the sum total of the package you selected. If you select any of the paid options, you will be redirected to the checkout page, where you’ll be required to enter your billing information and cards. Since we are using the free option in this tutorial, there is no need for that, I will just select the free plan and click Save then after the sum total has been shown, I will accept Swiftspeed terms of services by checking the box then afterwards I will click Validate.
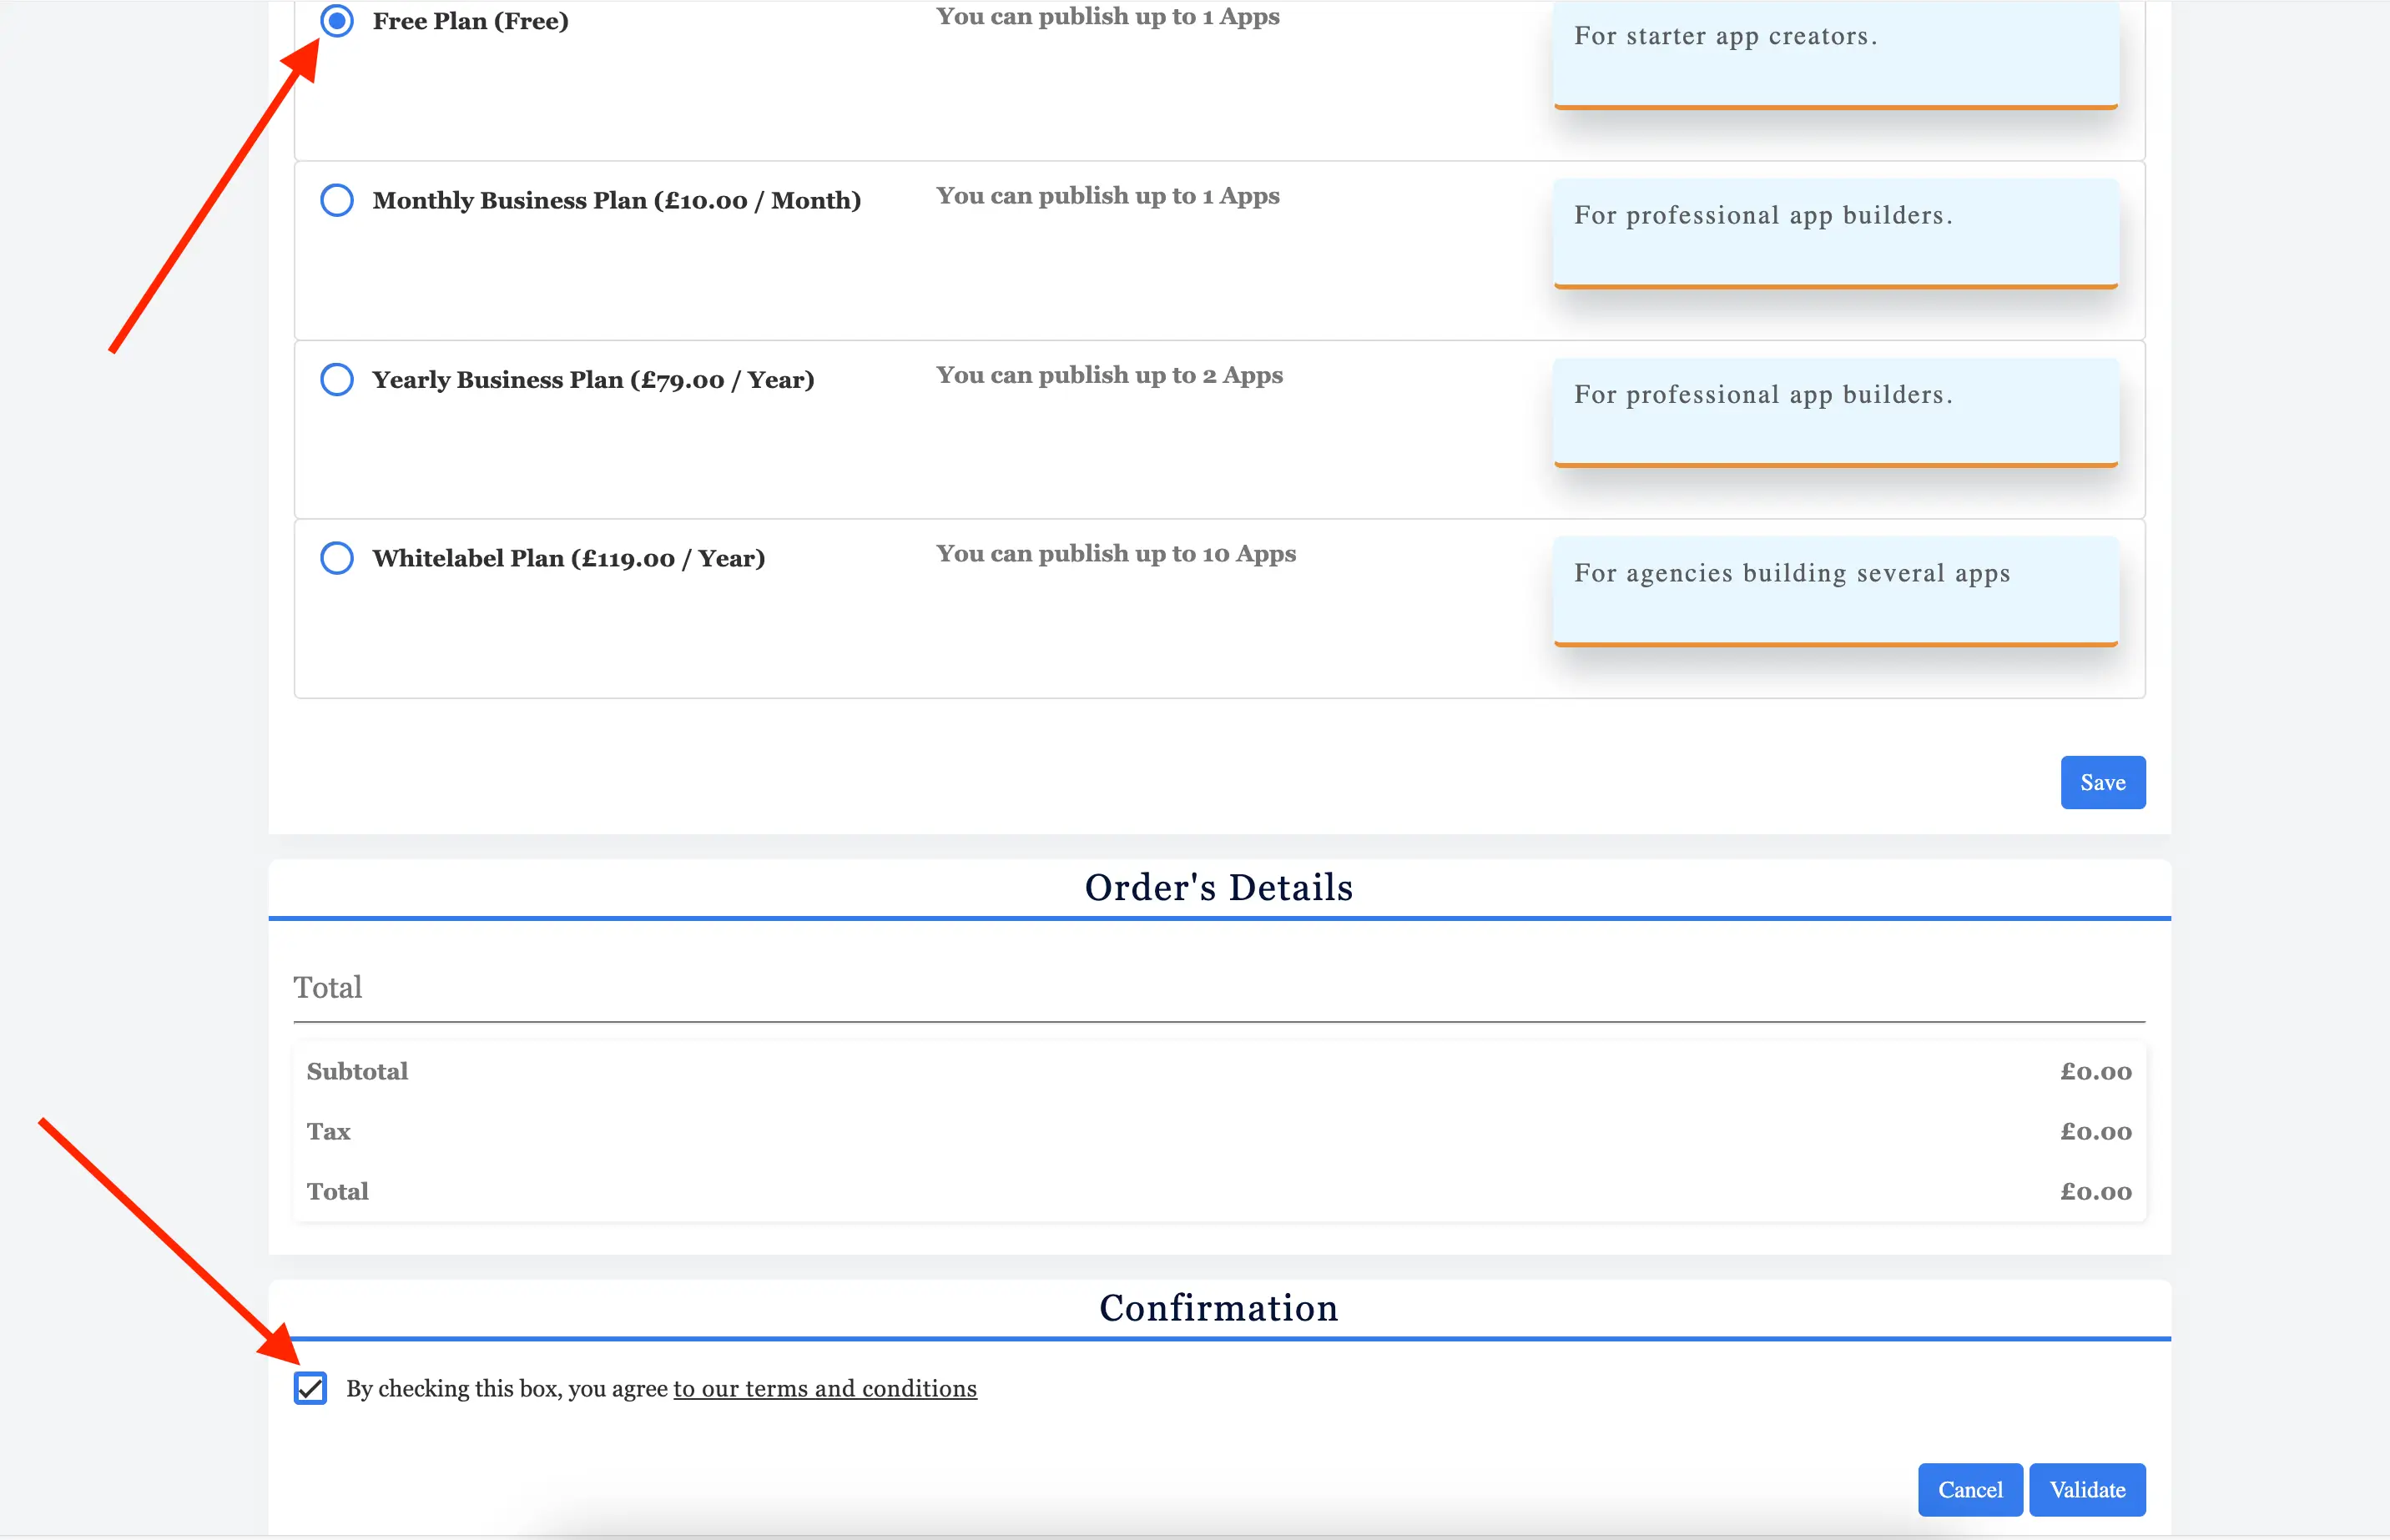
After clicking on validate, you will be redirected to the PayPal platform, where you will complete the payment. If the payment is successful or you have selected a free plan, your app will be activated. You will be redirected to an info page; on that page, click the ” Click here” button, and you will be taken back to your main dashboard menu.

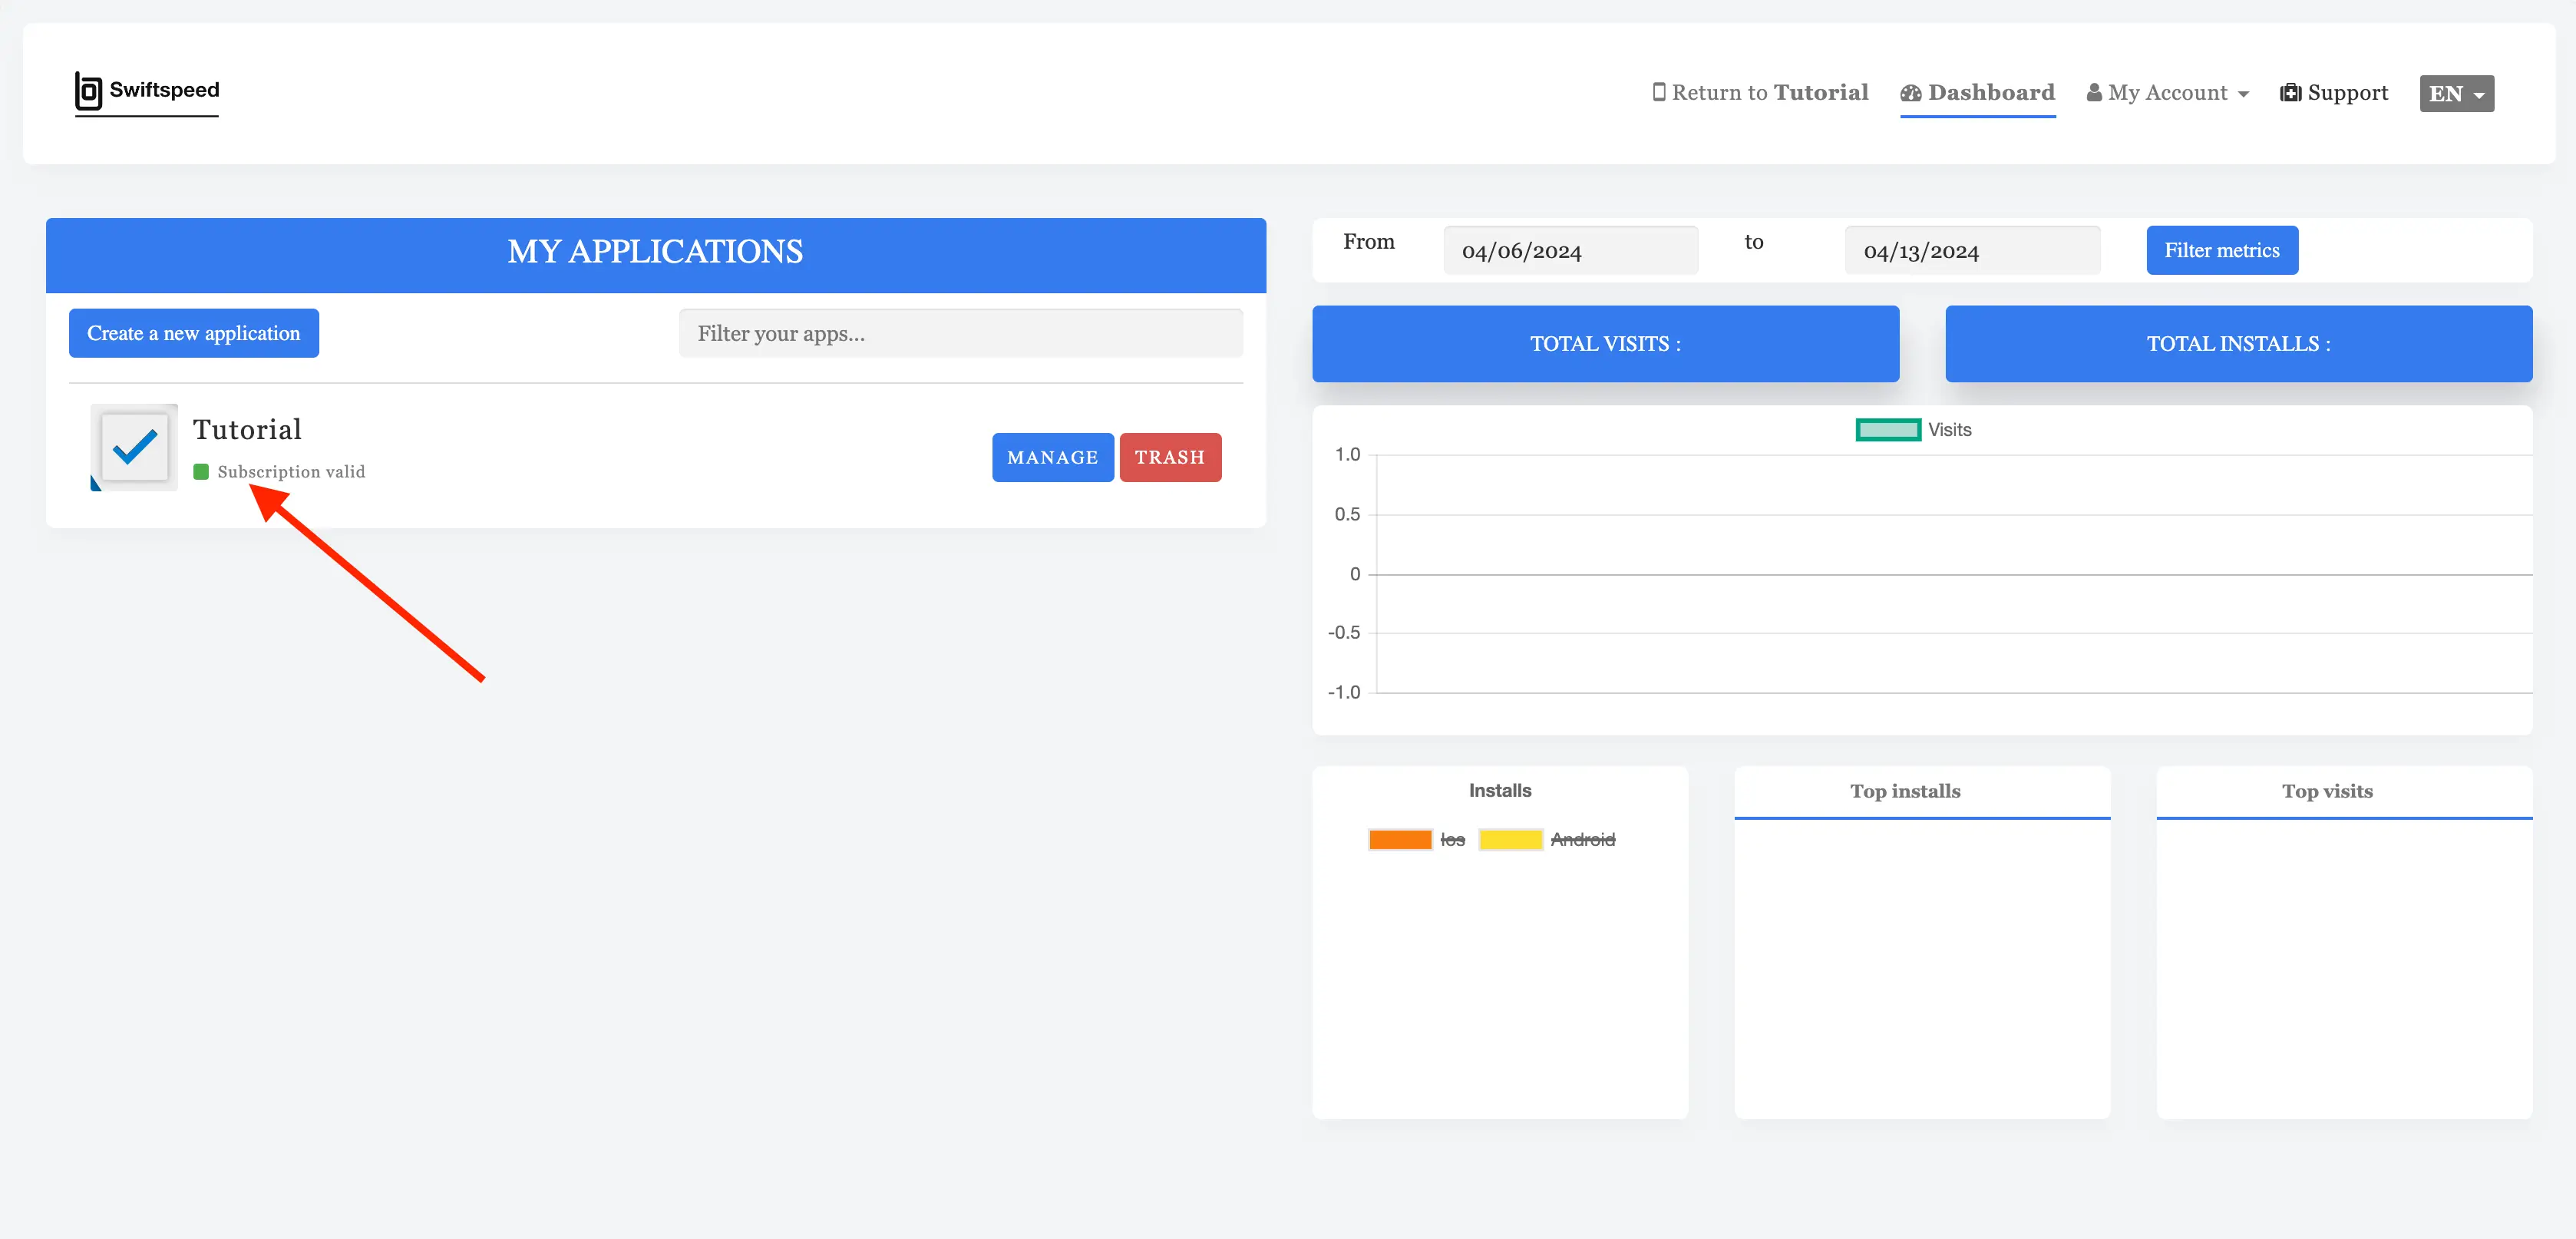
If your payment is successful, you will be directed to the app home page where it all began, with a valid subscription tag underneath your newly created app like below:
Step 6:
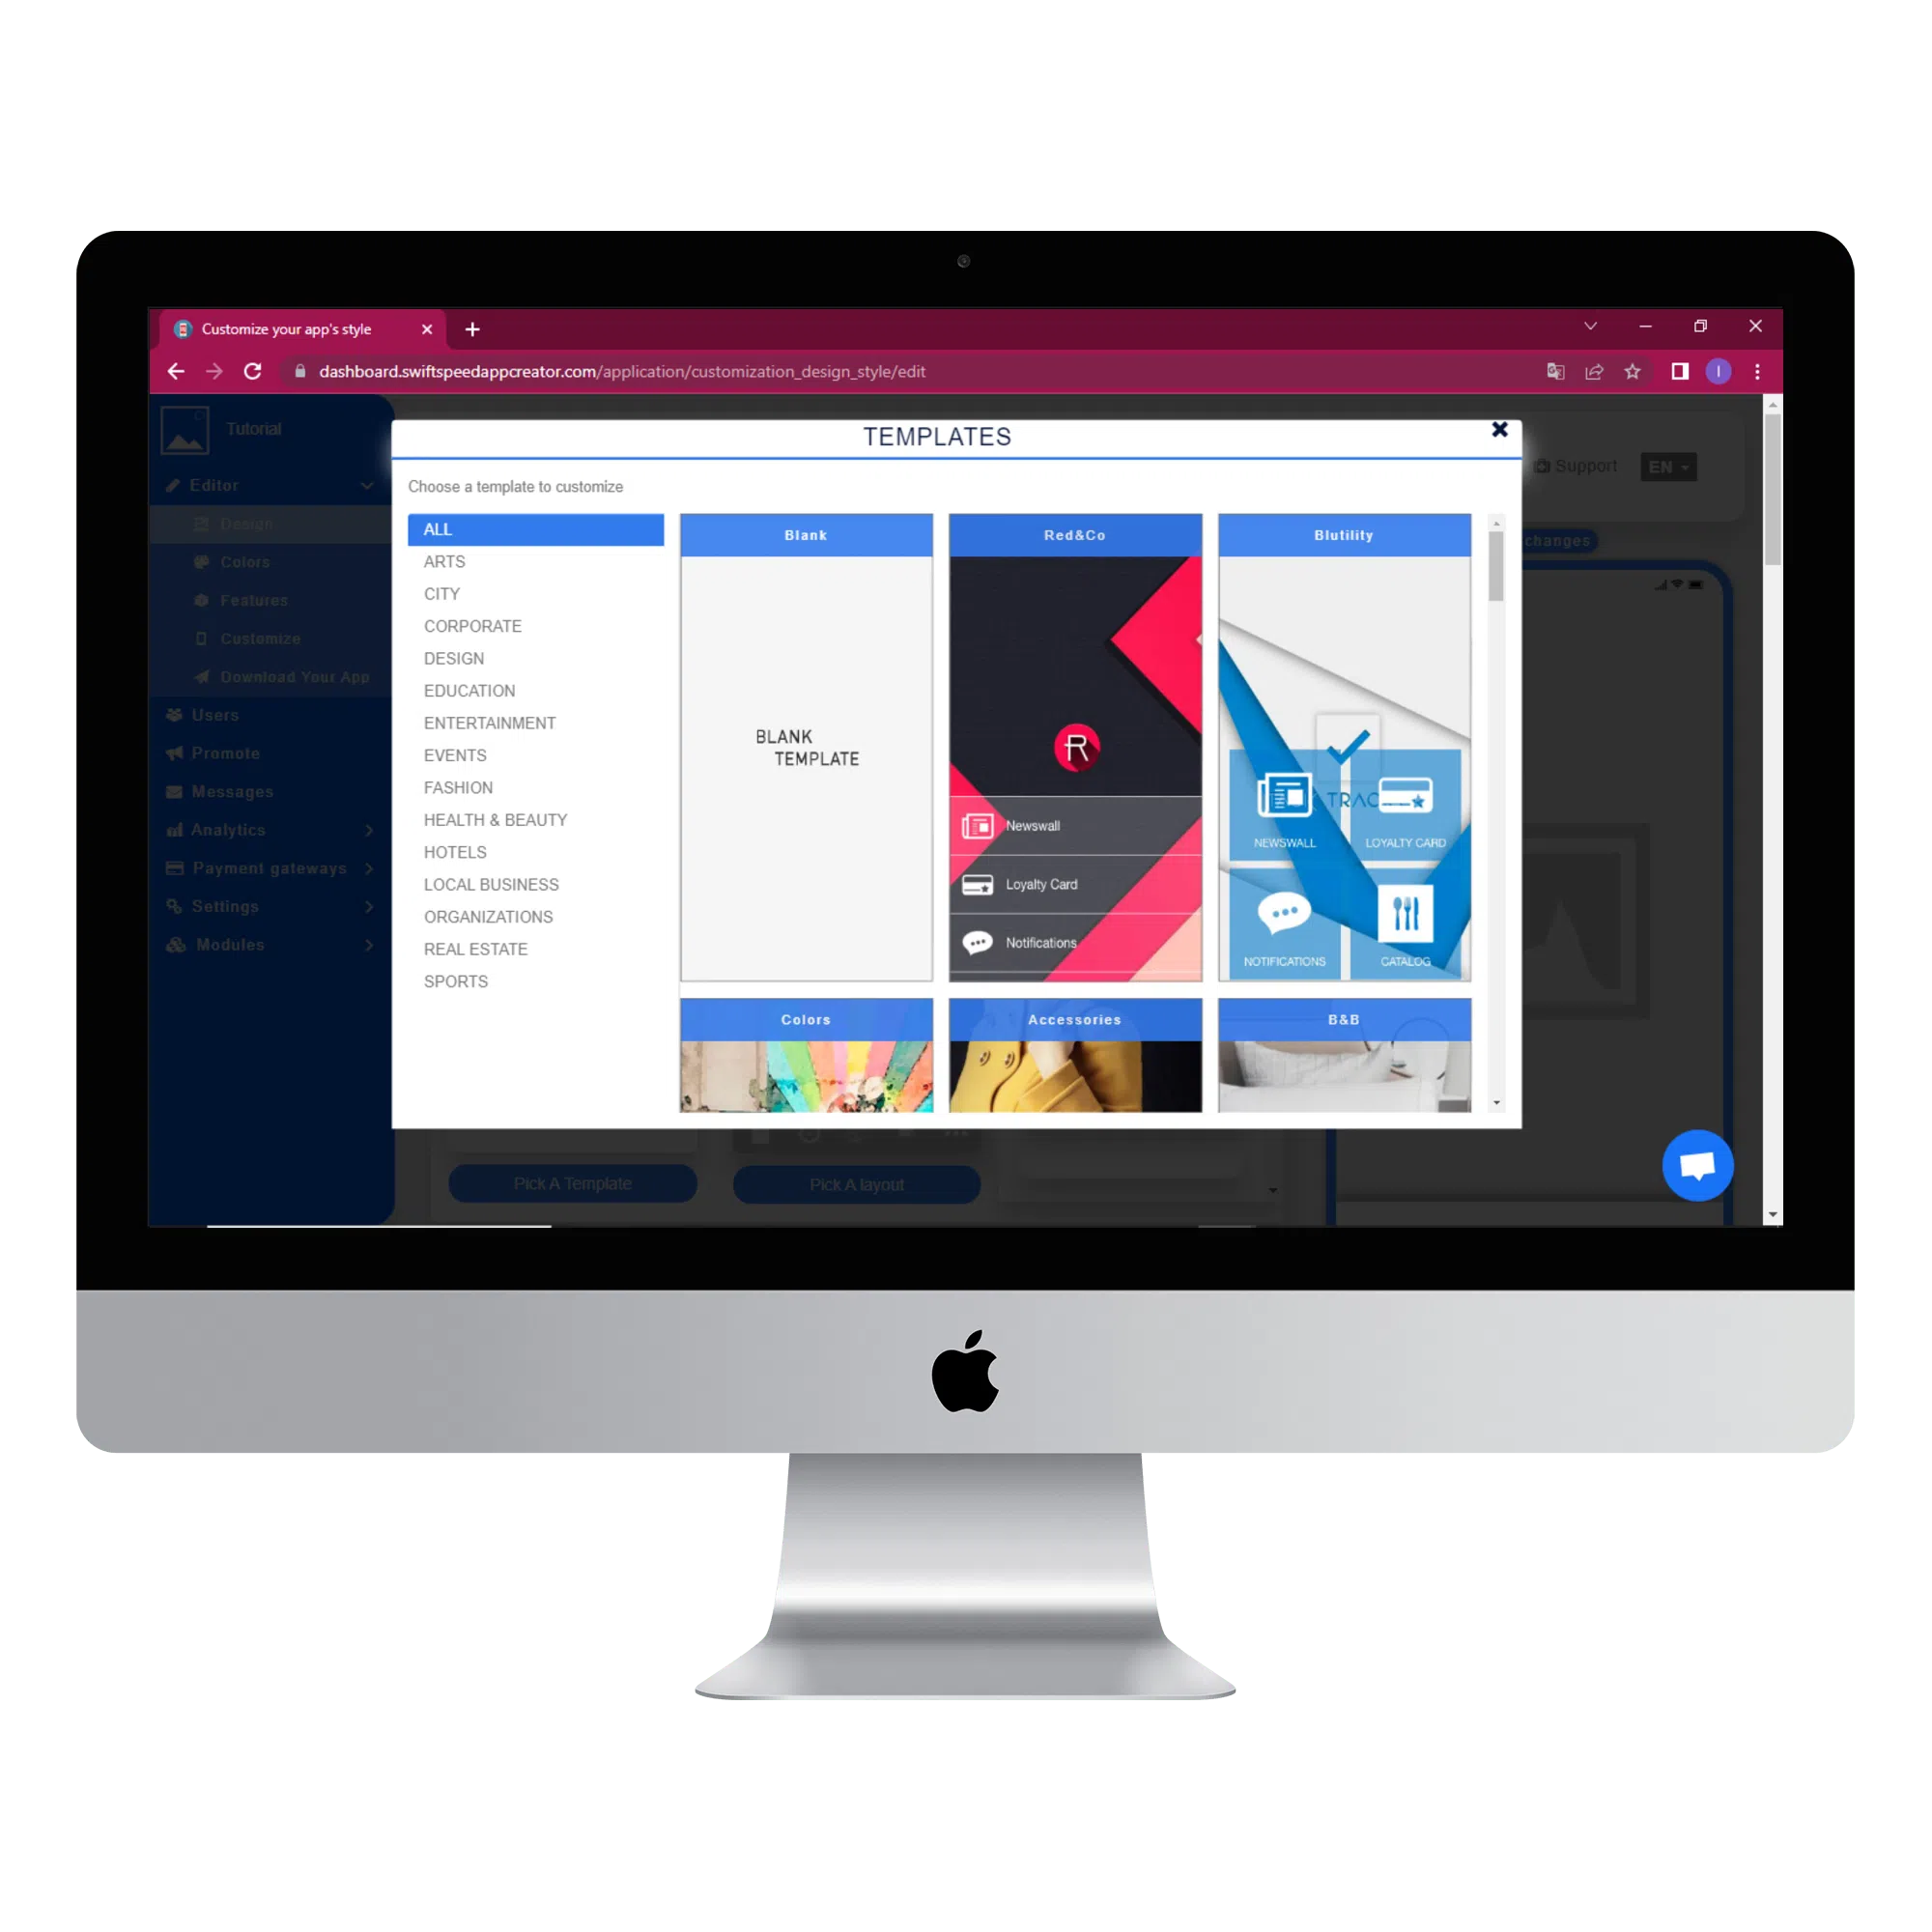
Then click on the “Manage” button at the right side of your app name, and a template window will pop up. Here, you are required to choose a desired template that best suits your app’s purpose for your new app. We have templates for almost any kind of app you can think of making. Choose any template that suits your needs, and the effects will be applied immediately. For this tutorial, the “Blutility” template will be used.
Step 7:
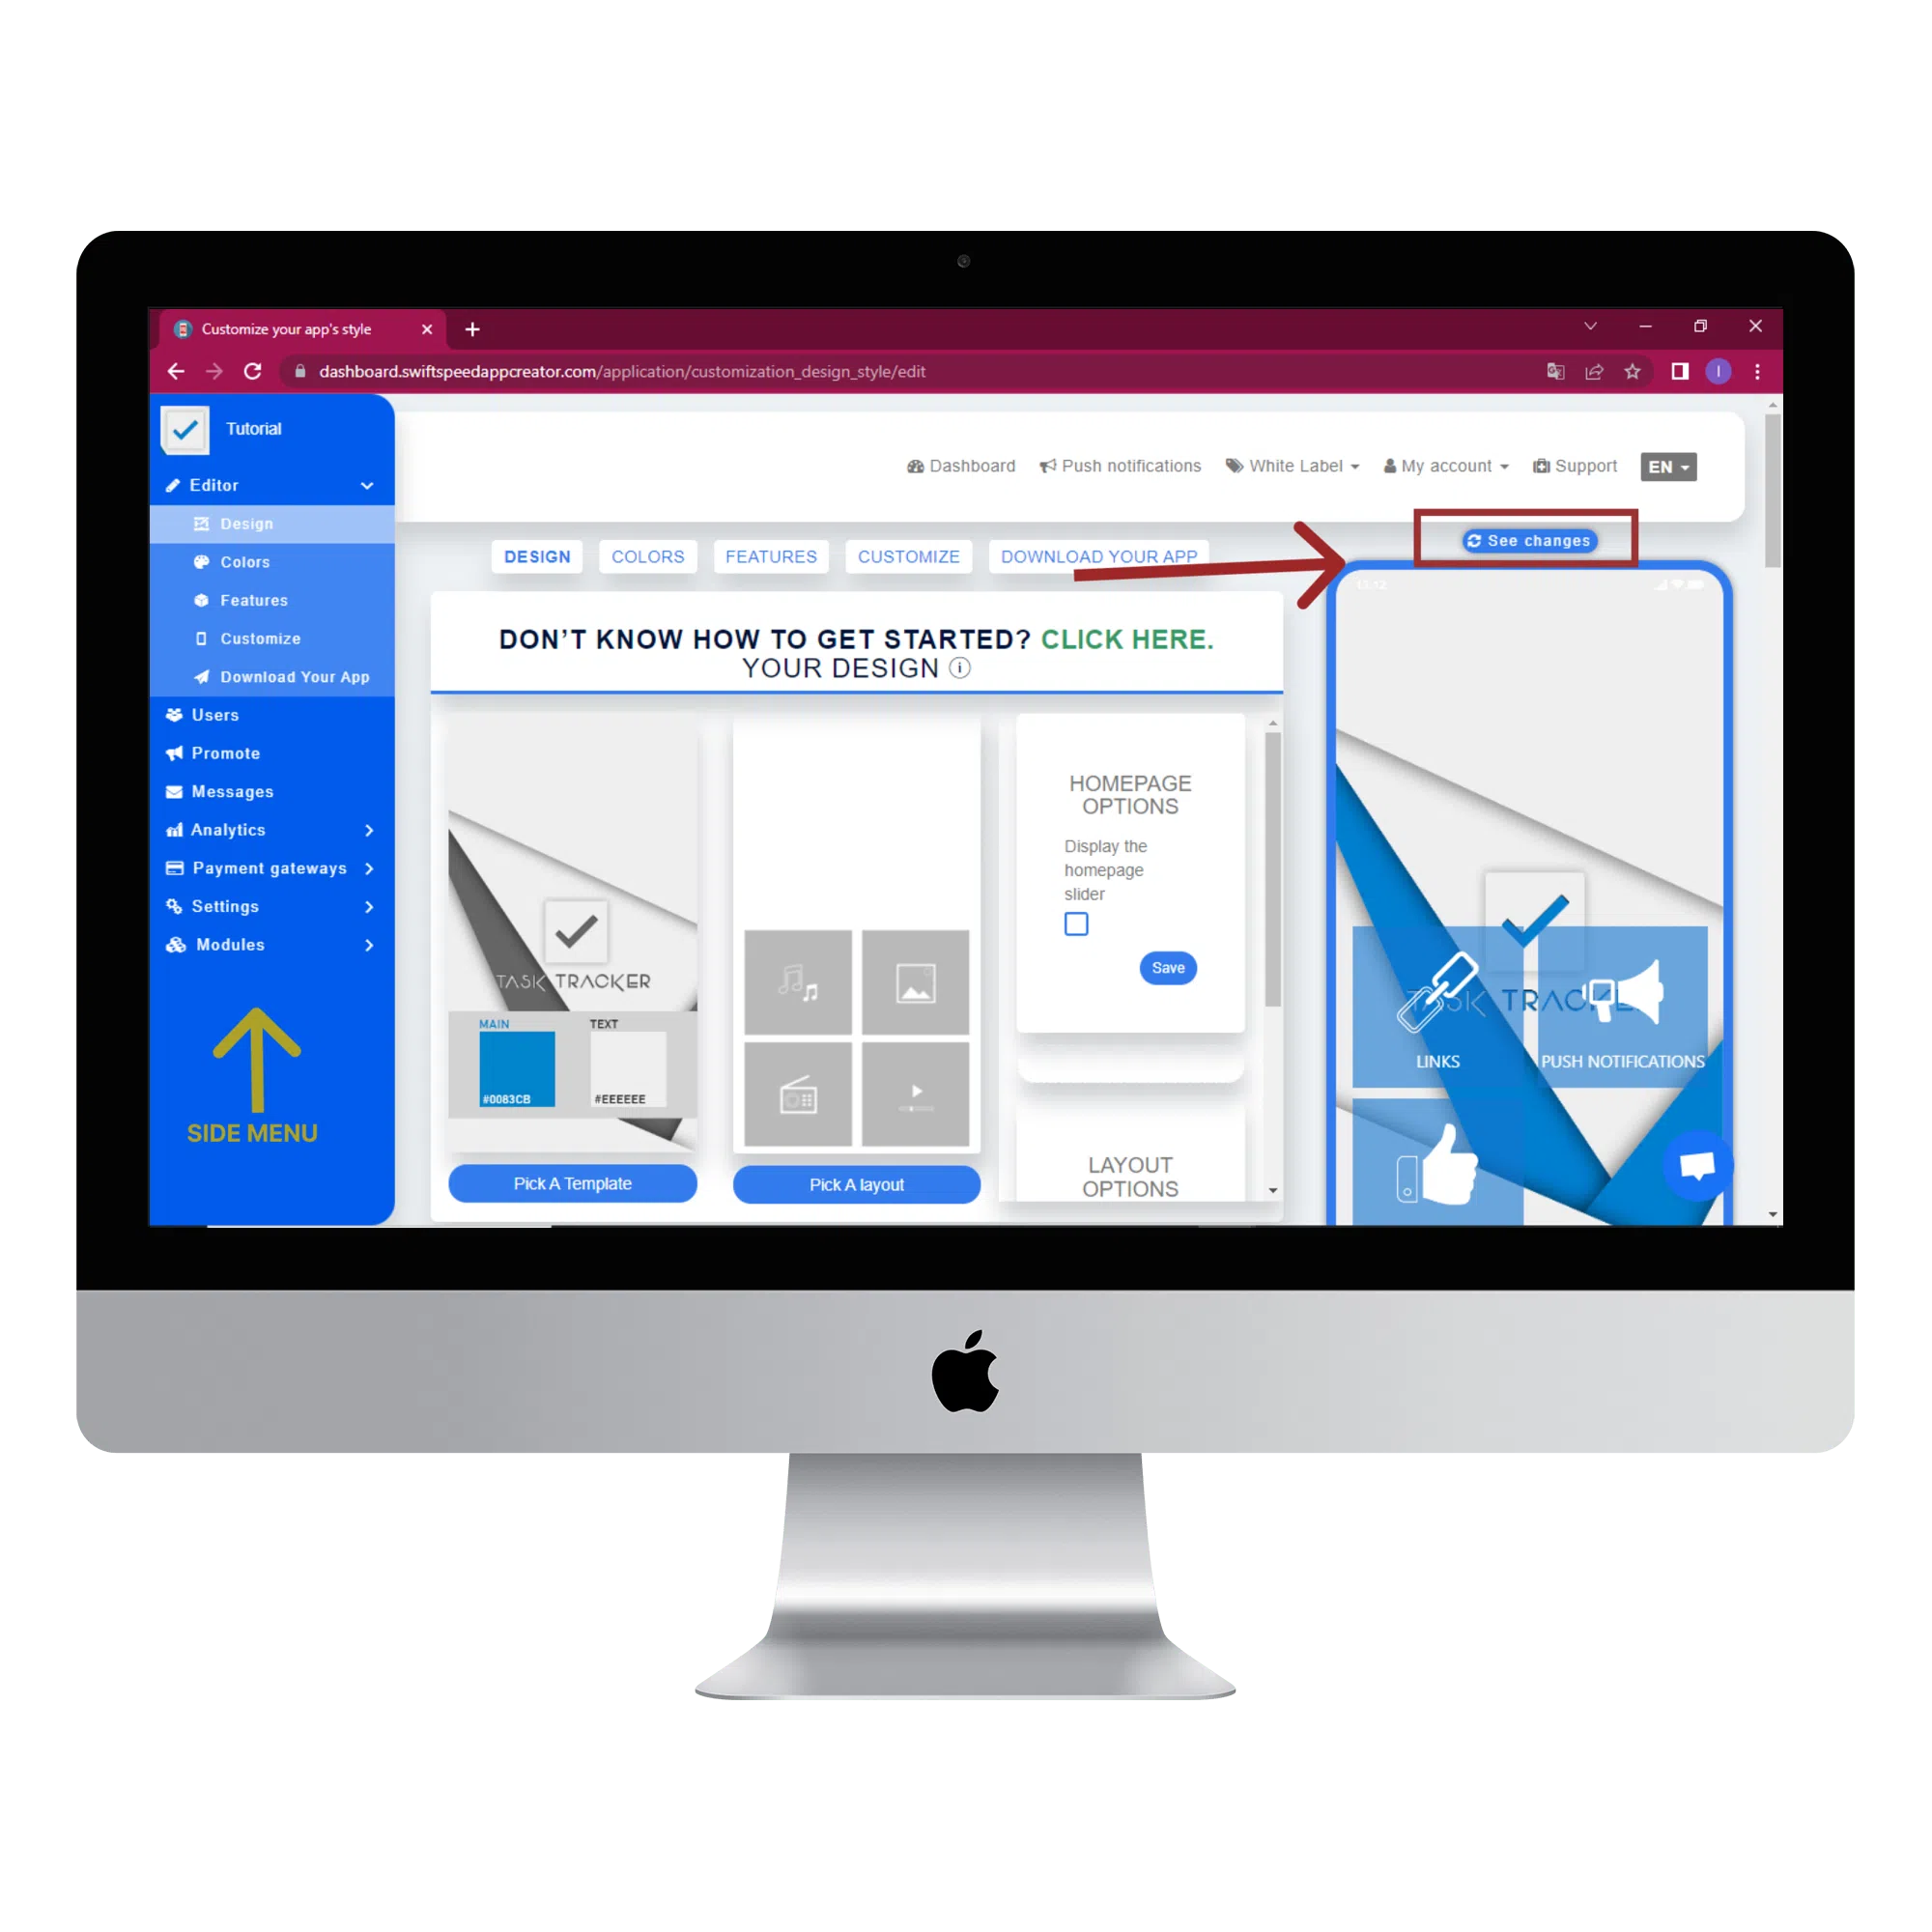
After selecting the template, you will be taken to the design page. Your app’s look and feel will now be displayed in real-time, and you can test run your edits almost immediately without having to install your app on a real device by using our virtual previewer. Just click on the “See changes” button to refresh the device anytime you make changes or add a new feature. See the image below.
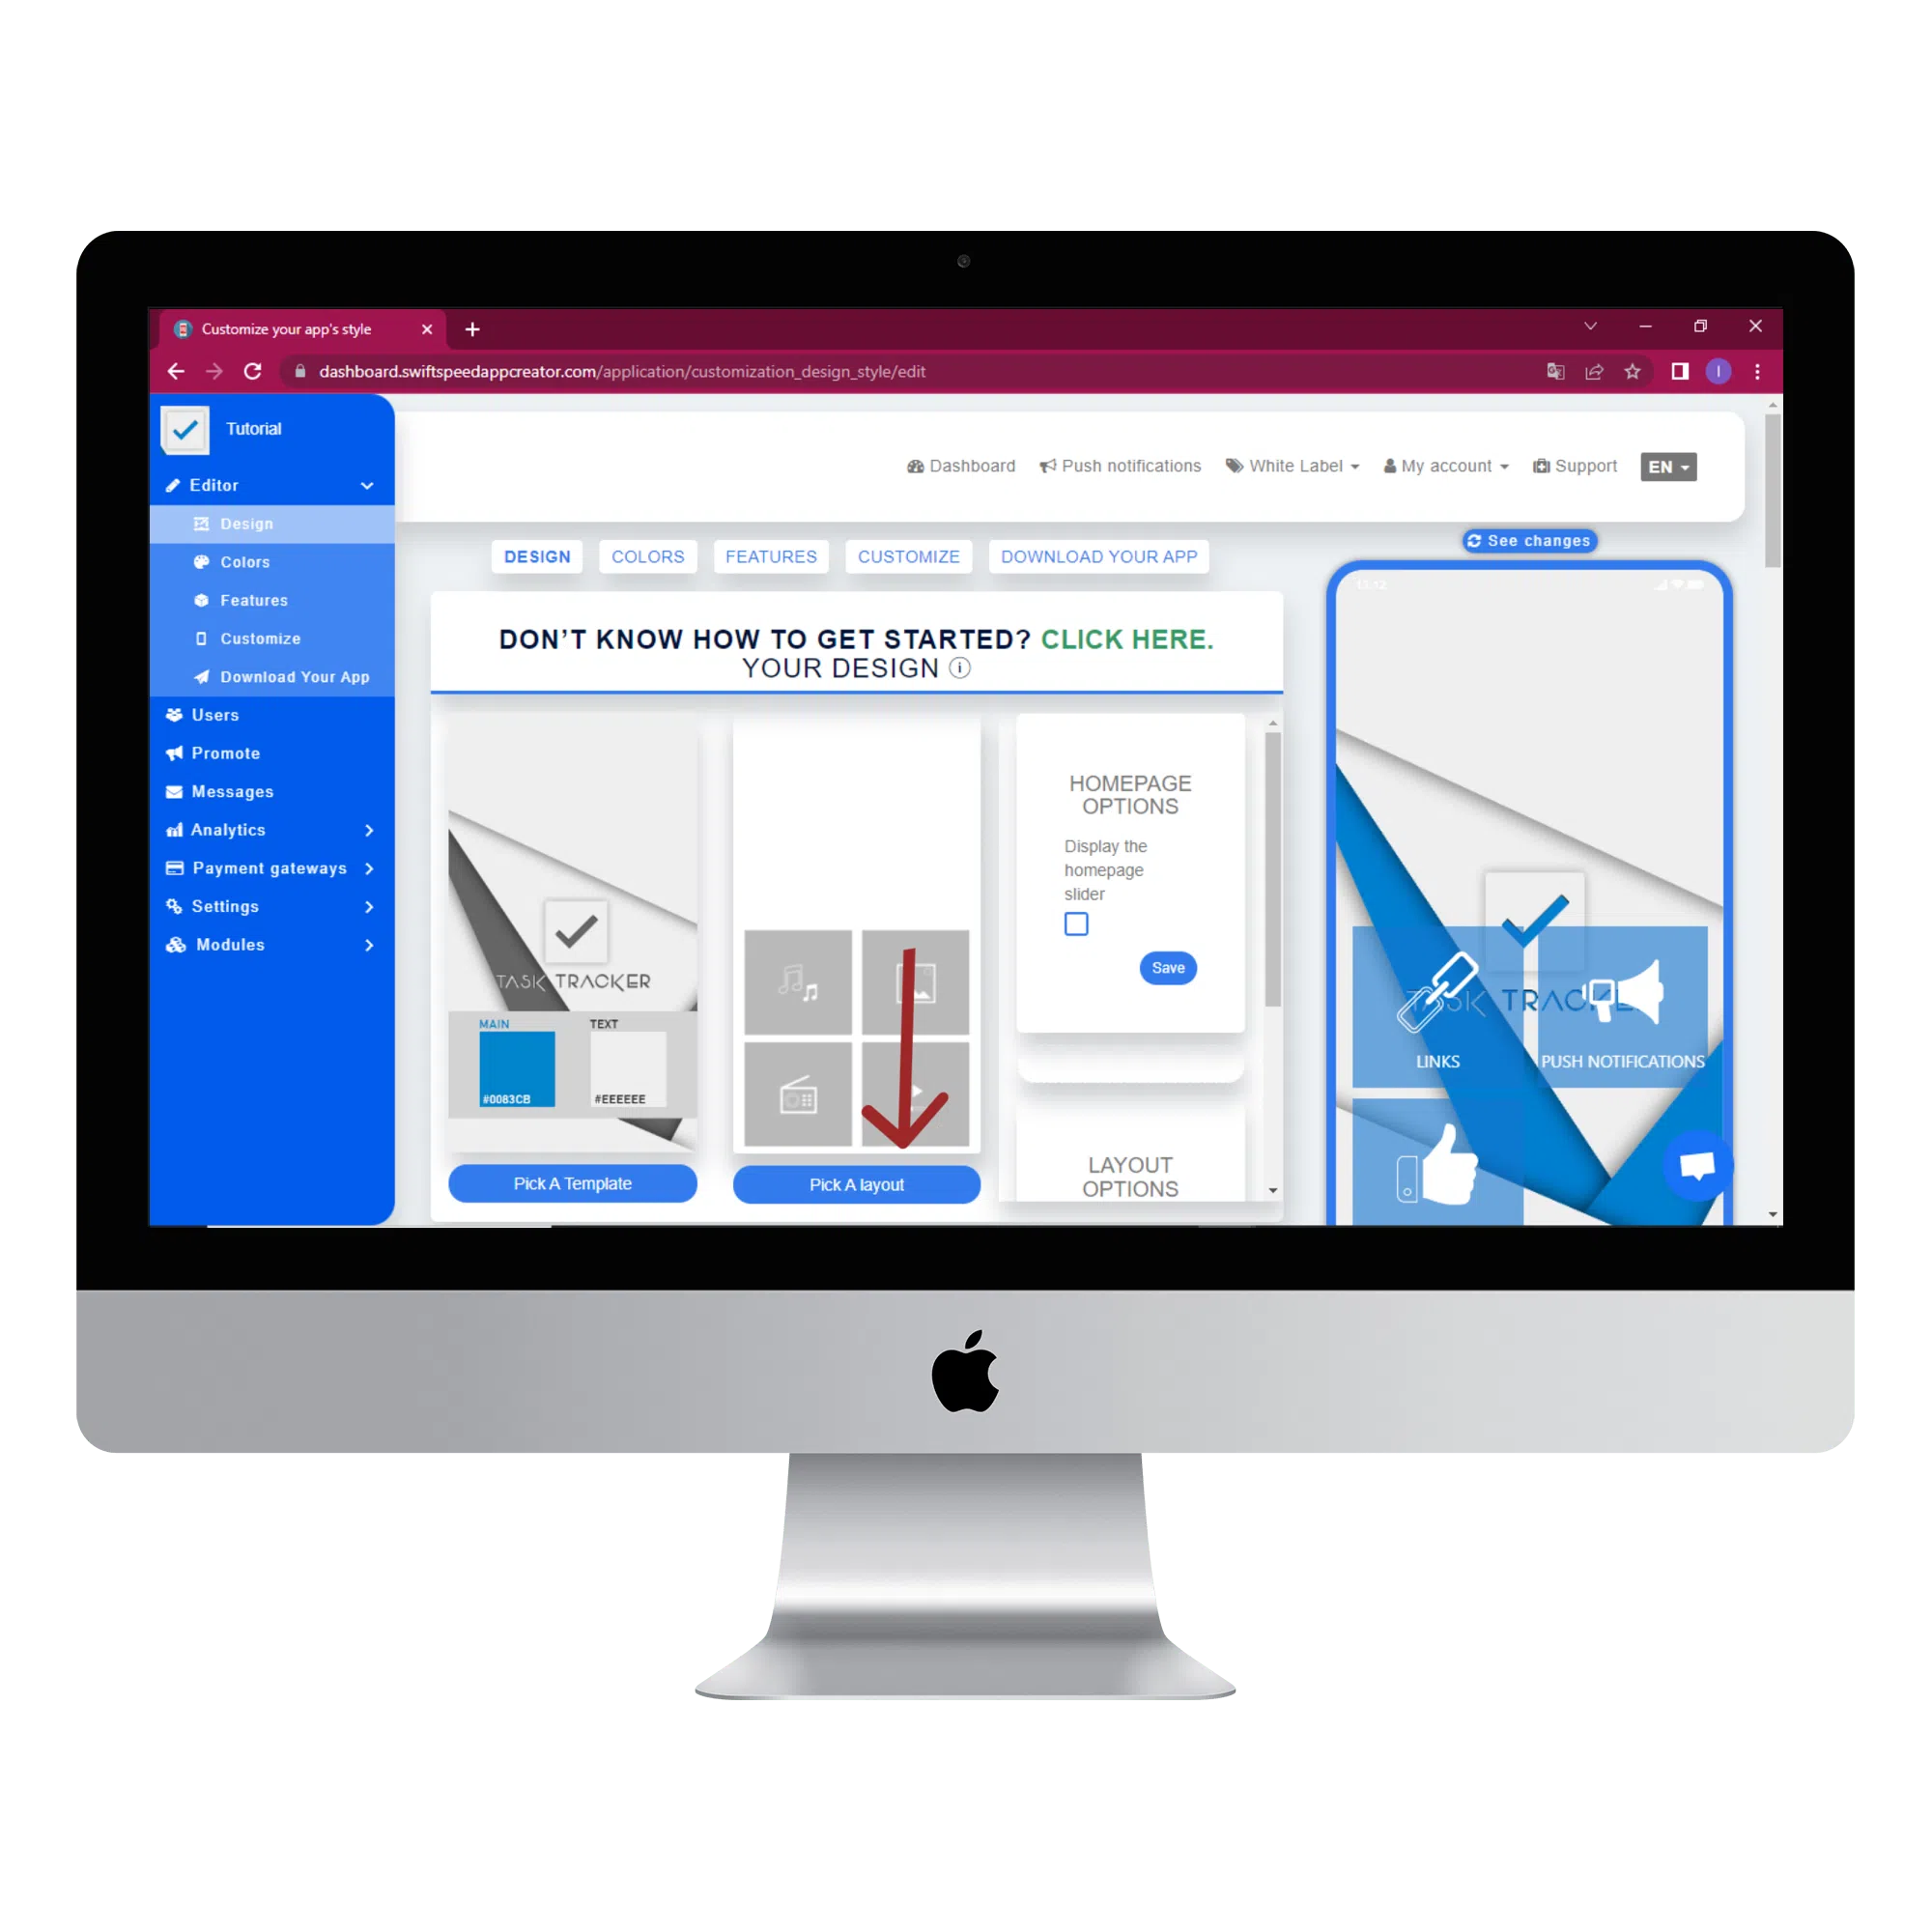
Pick a Layout design scheme by clicking on the “Pick a layout” button. Choose any layout you like from our extensive list of designs. Layouts are available on business and white-label plans.
Step 8:
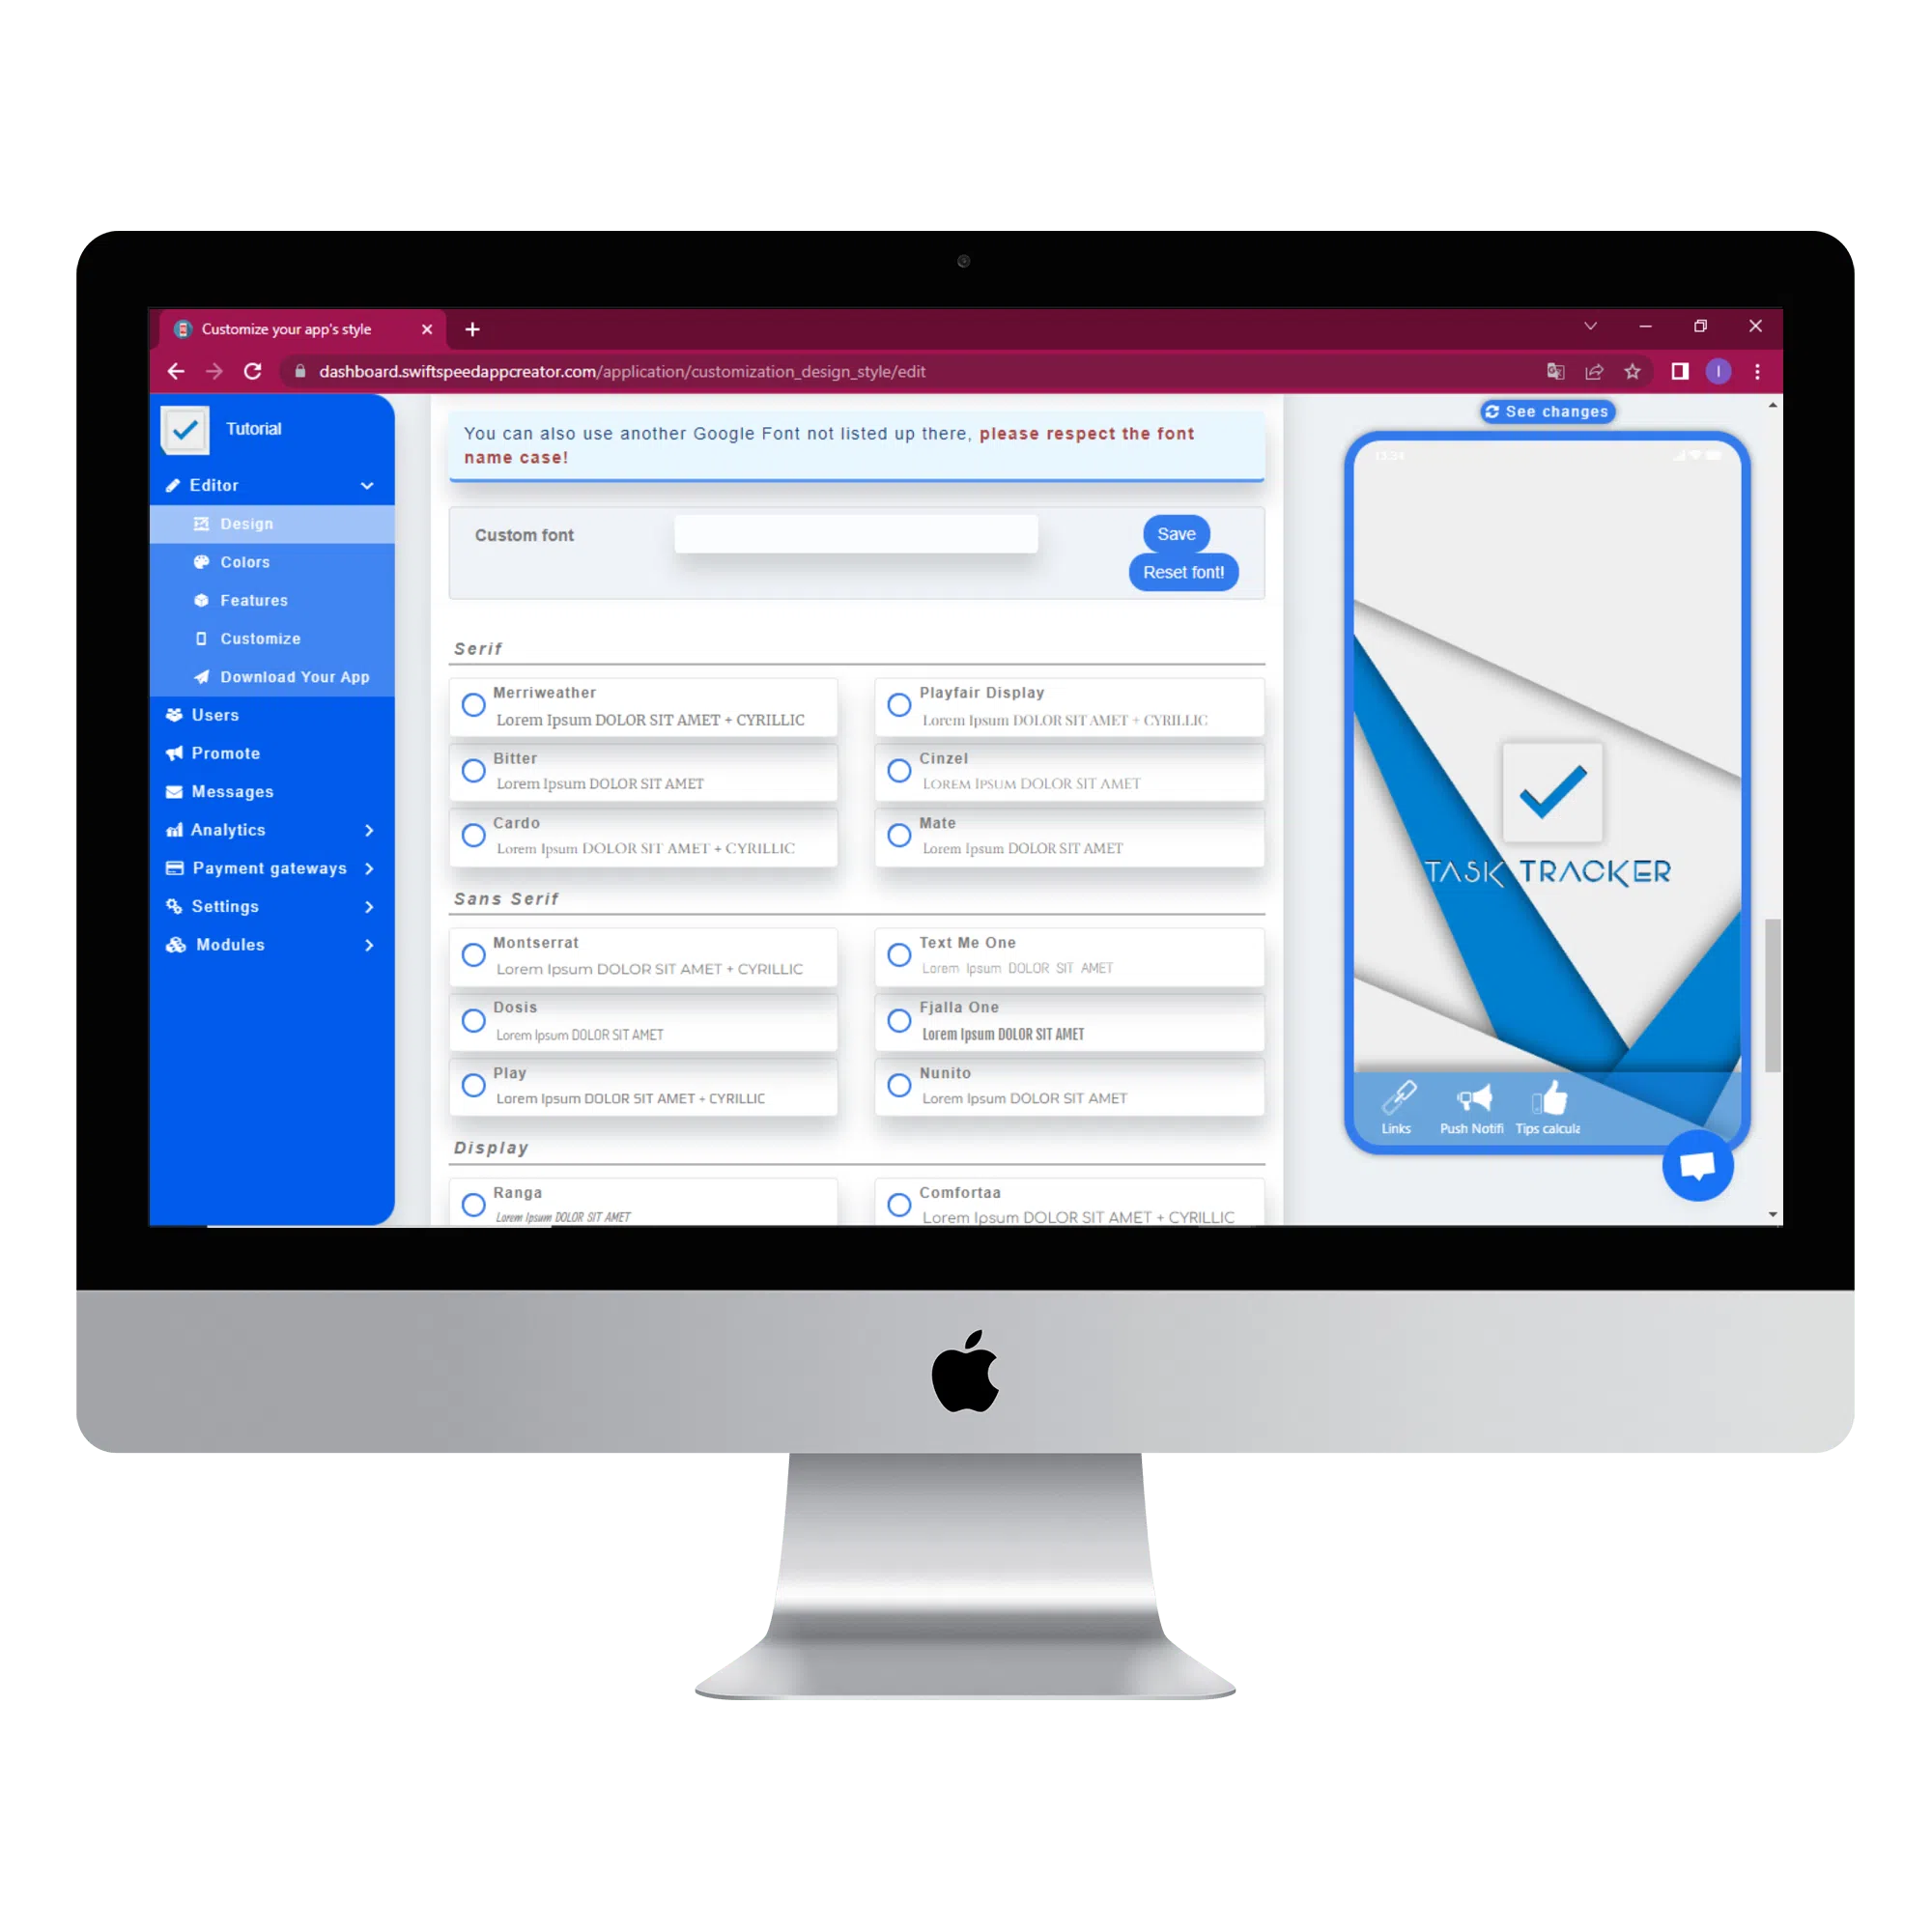
After selecting a layout, scroll down to the “Localization settings” section and choose your local currency and language. You can also choose the font family for your app or use your own custom font in the font family section, which is located below the “Localization settings” section.
Step 9:
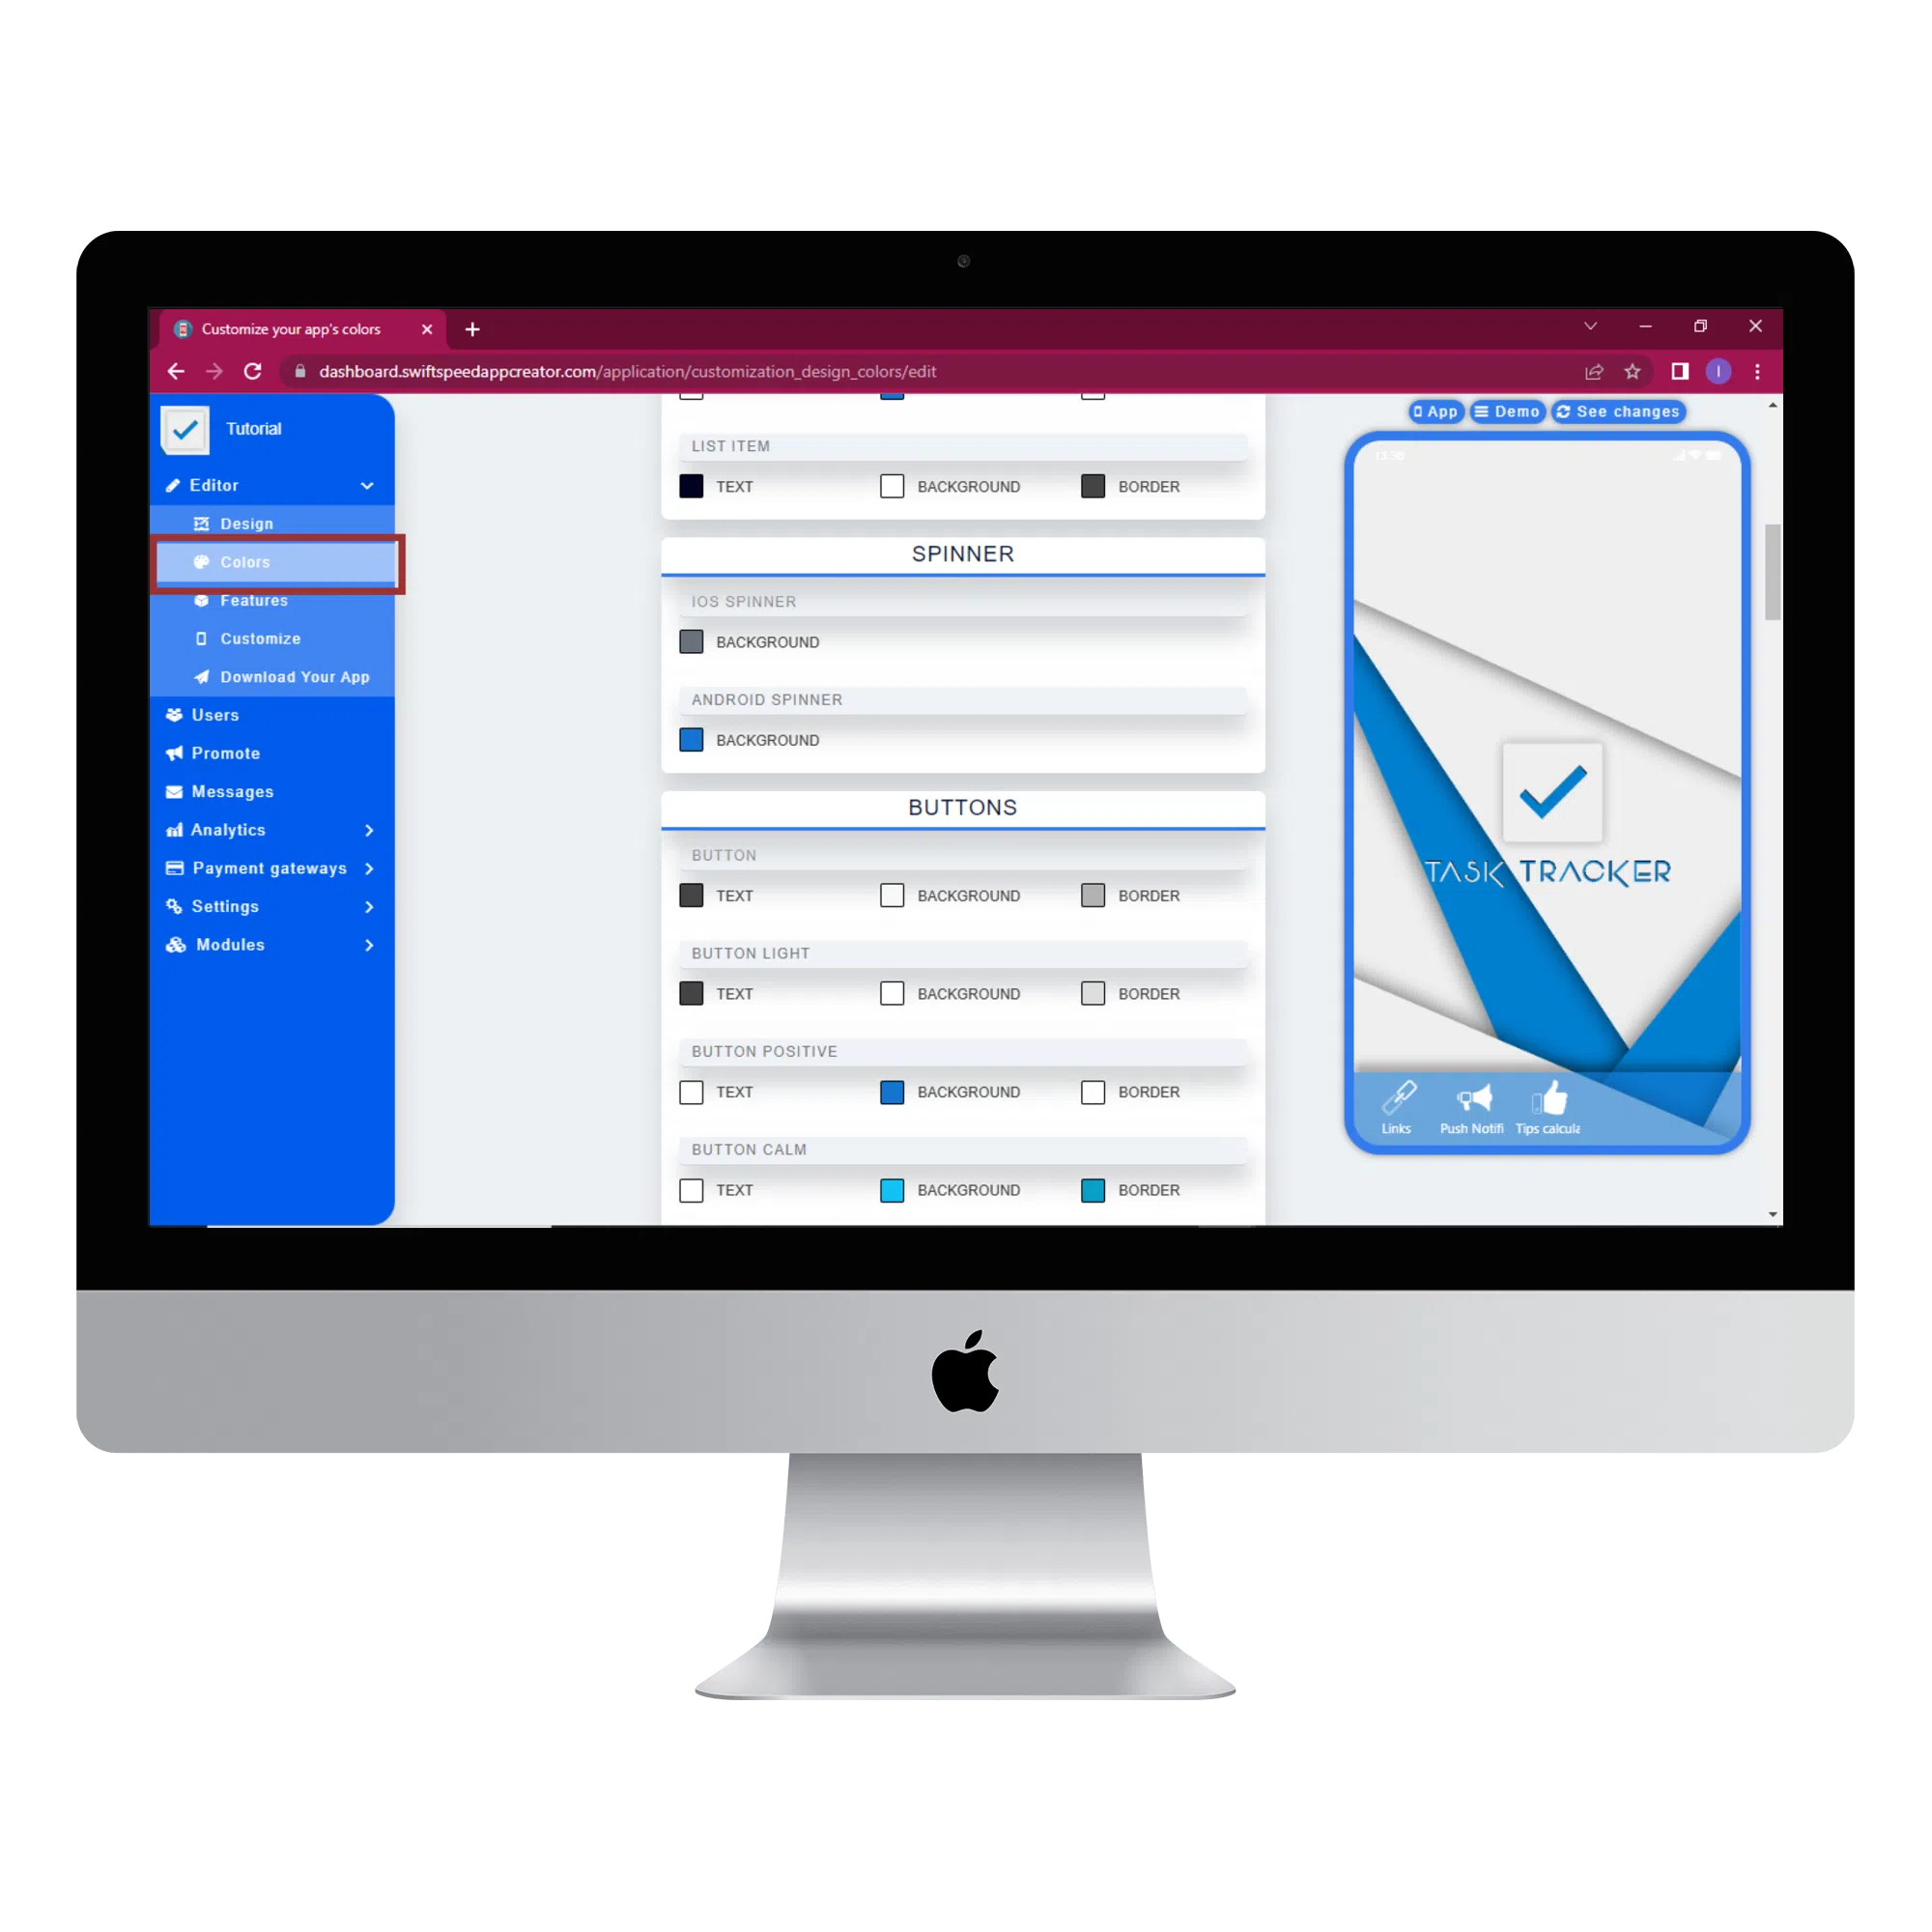
The colors in your you app can be customized according to your taste, Just click on the “colors” tab located at the top or the side menu to the left of your screen. You can now add your own colors to the different sections of your app and even add images if you like. Scroll down to see all the sections and make changes accordingly.
Step 10:
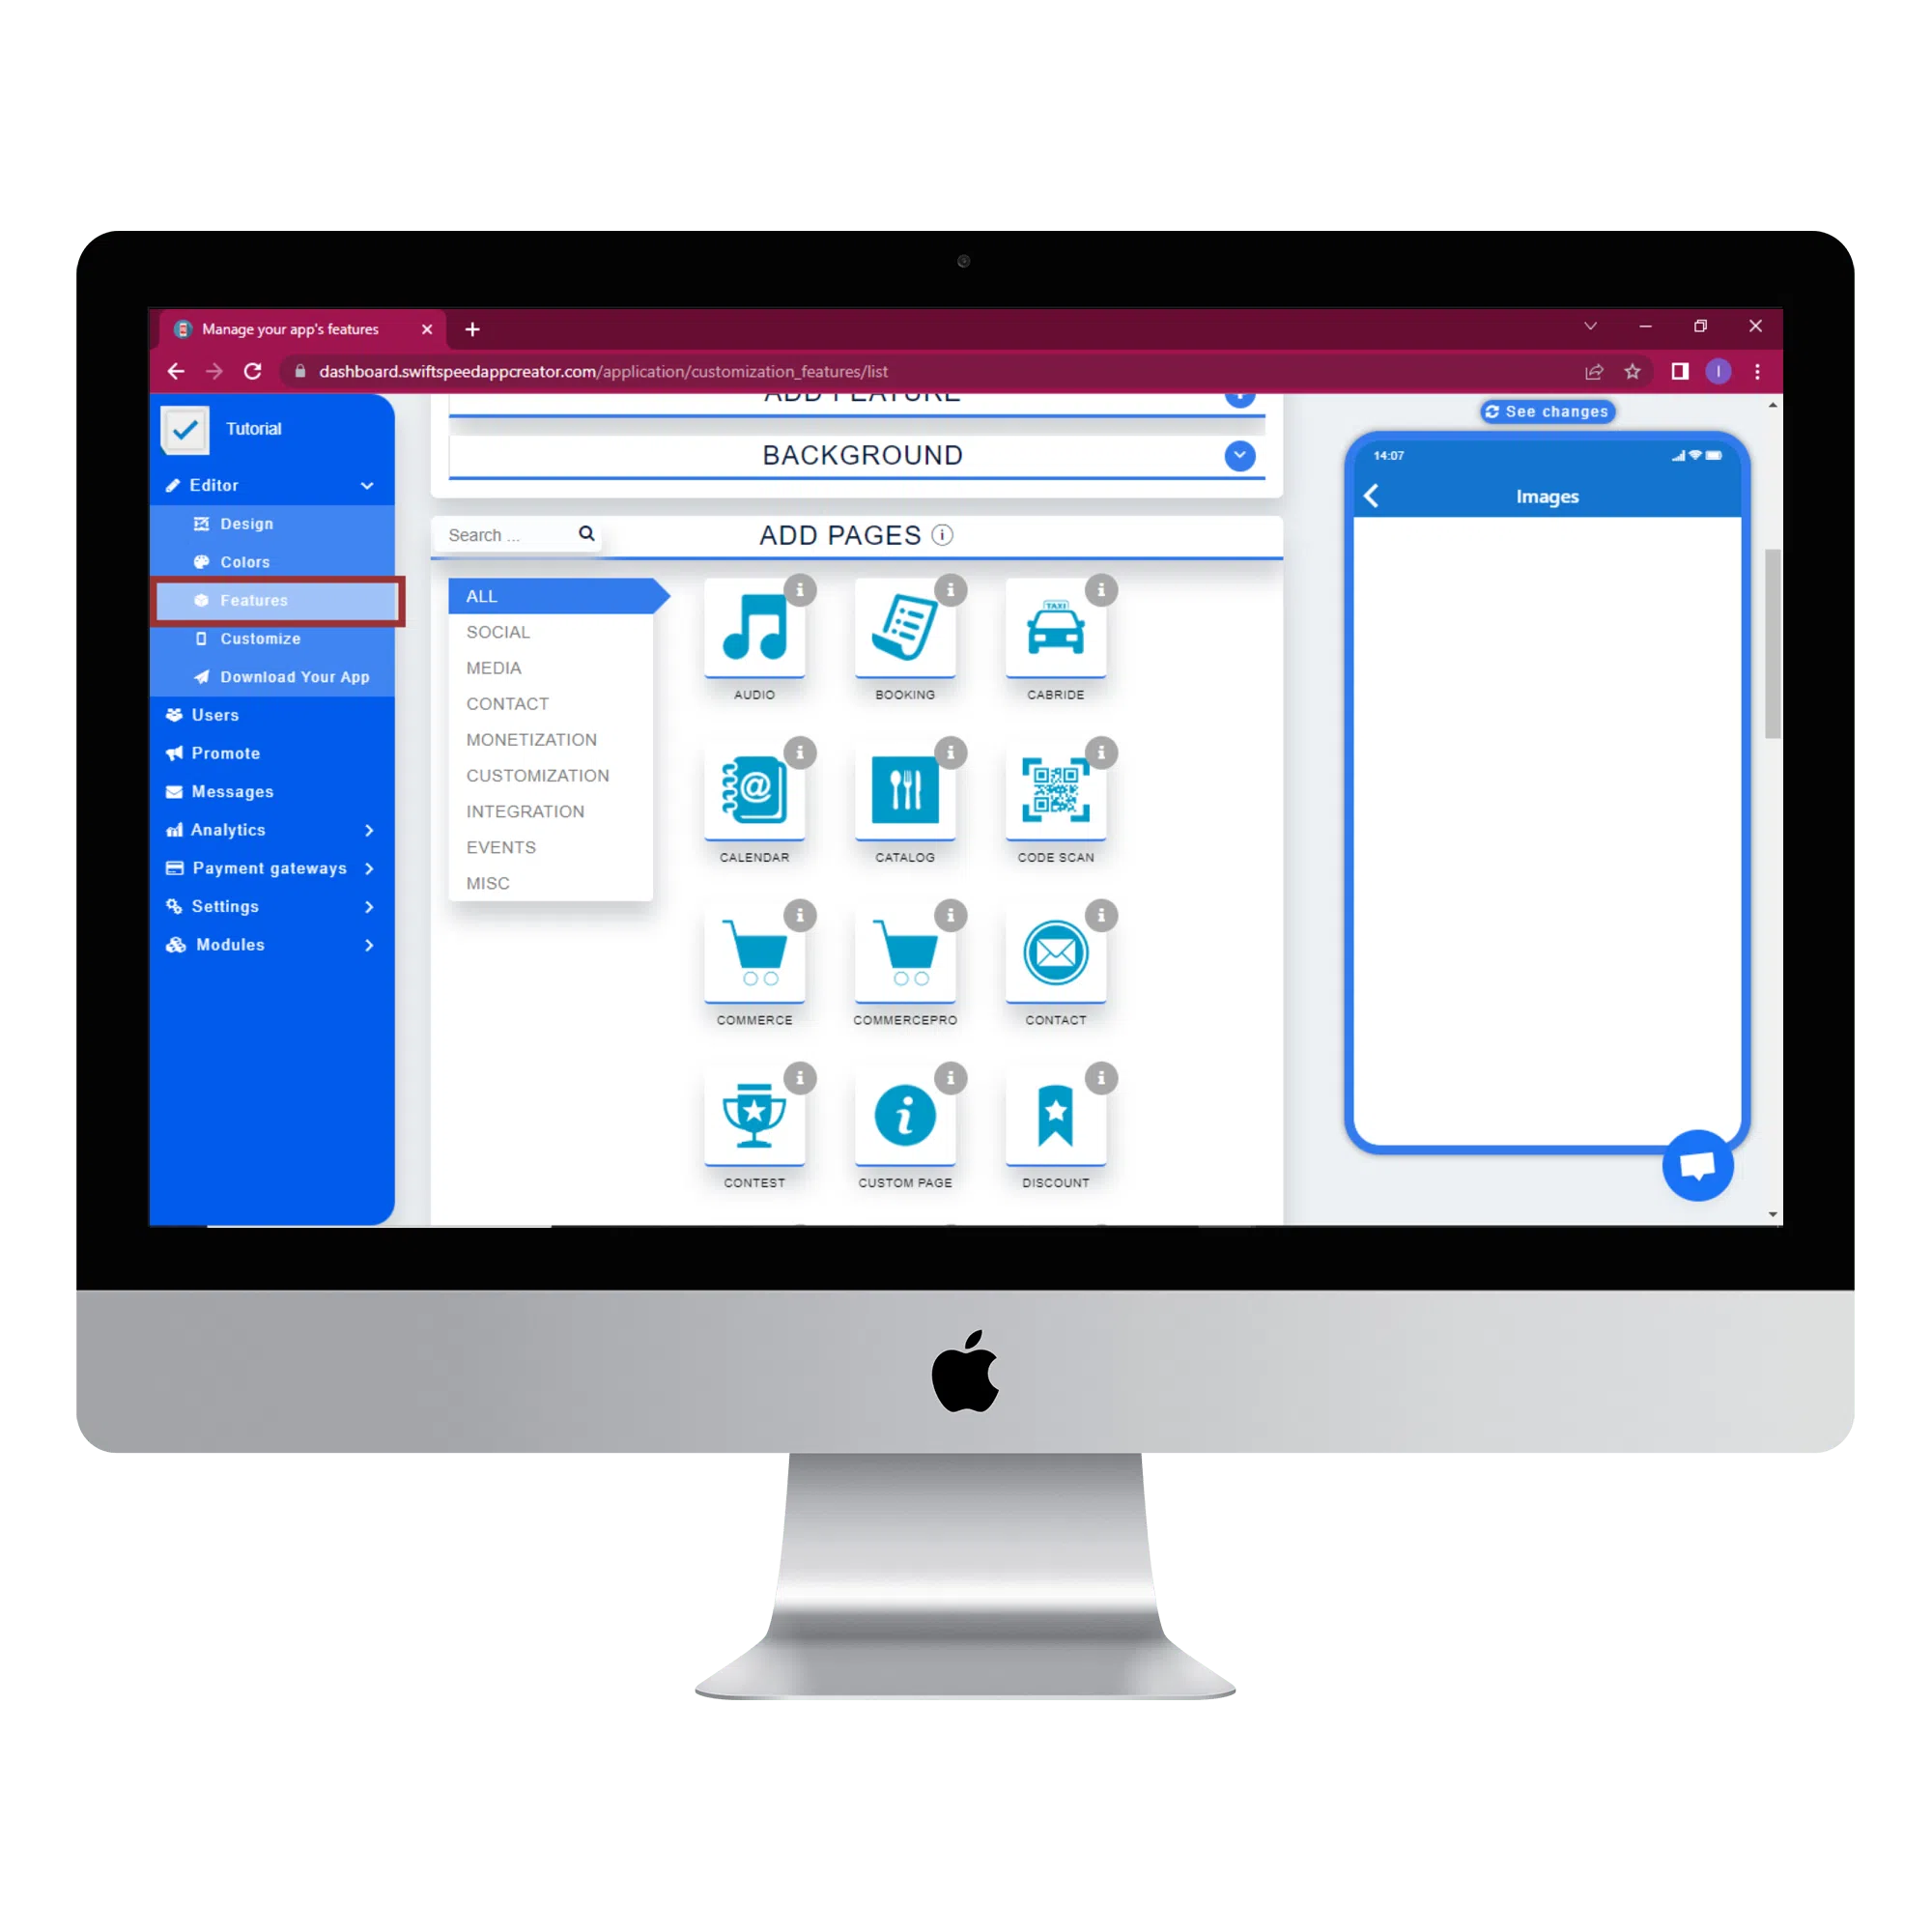
To add features to your app, click on the features button on the side menu and choose from our list of features. Click on a feature and it will be added to your app automatically. You can add as many features as you like. Visit our mobile app features page to see a full description of all our features and their capabilities. You can also refer to our documentation to learn how to implement each feature.
Step 11:
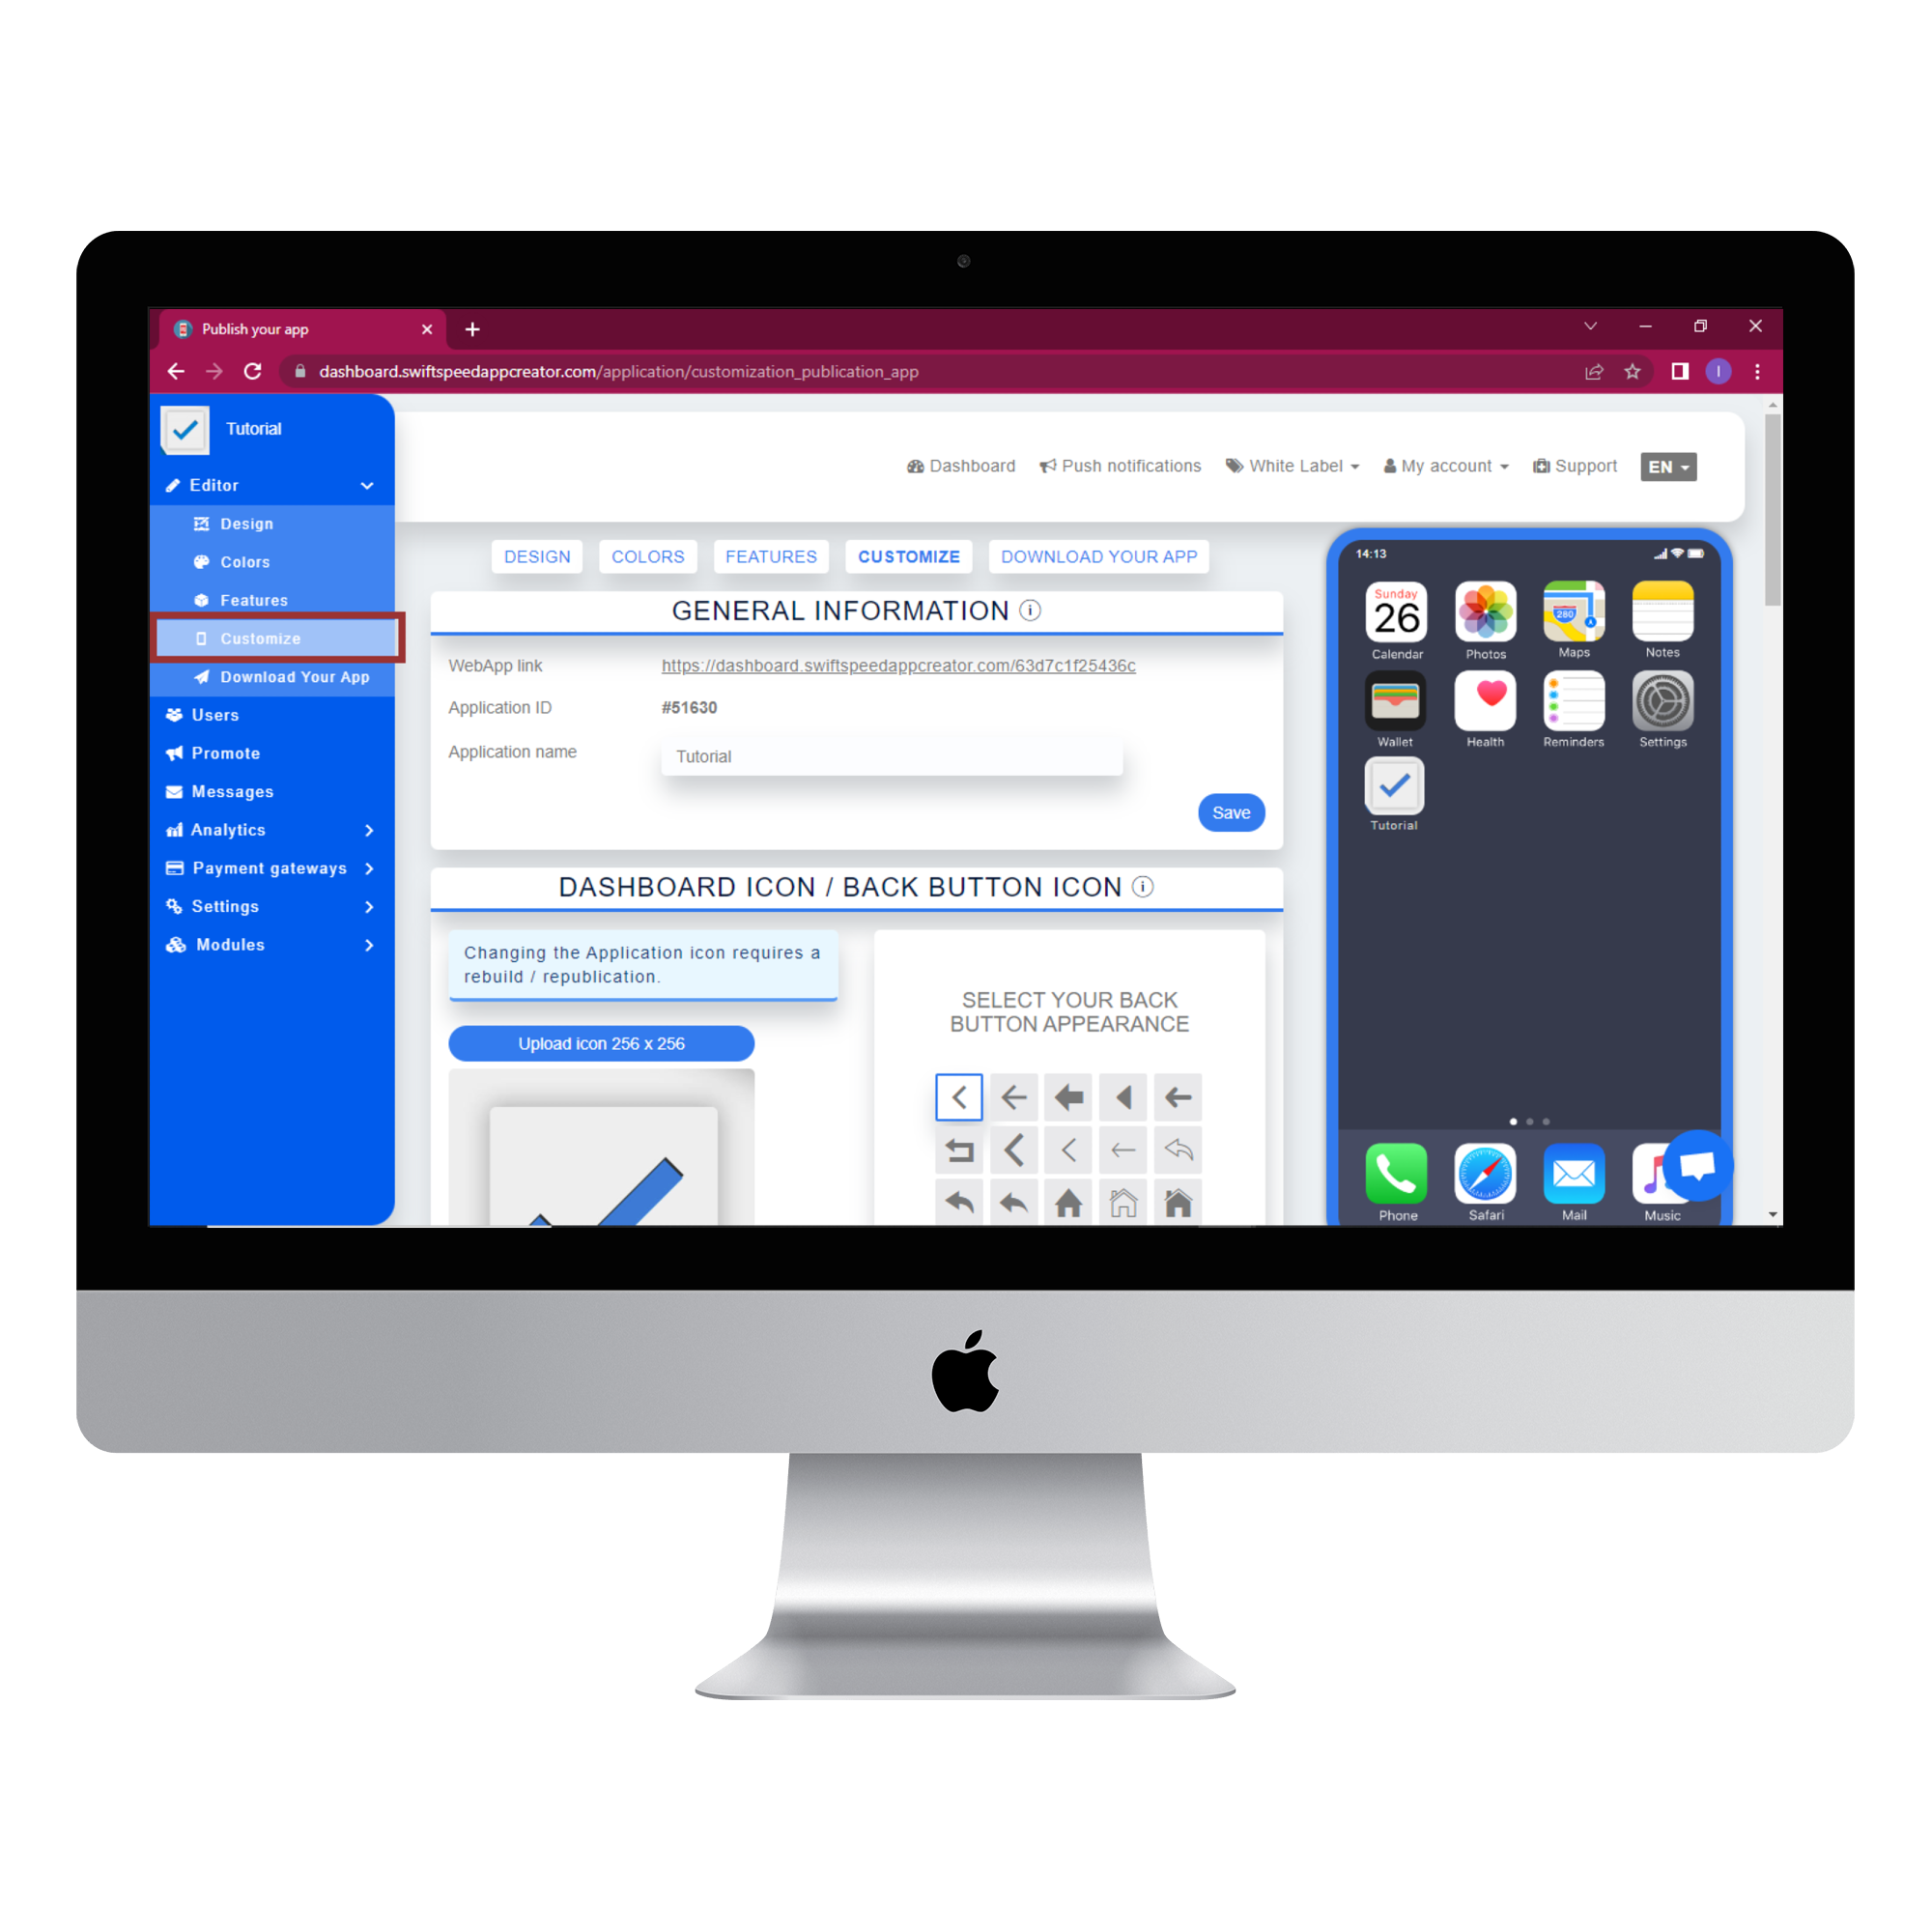
When you are done adding all the features you want in your app, click on the customise button. The “Customize” tab allows you to freely customize certain aspects of your app. The app icon, back button, and splash screen can be customized in this tab to emphasise your brand. Scroll down to see all the sections and make changes accordingly.
Step 12:
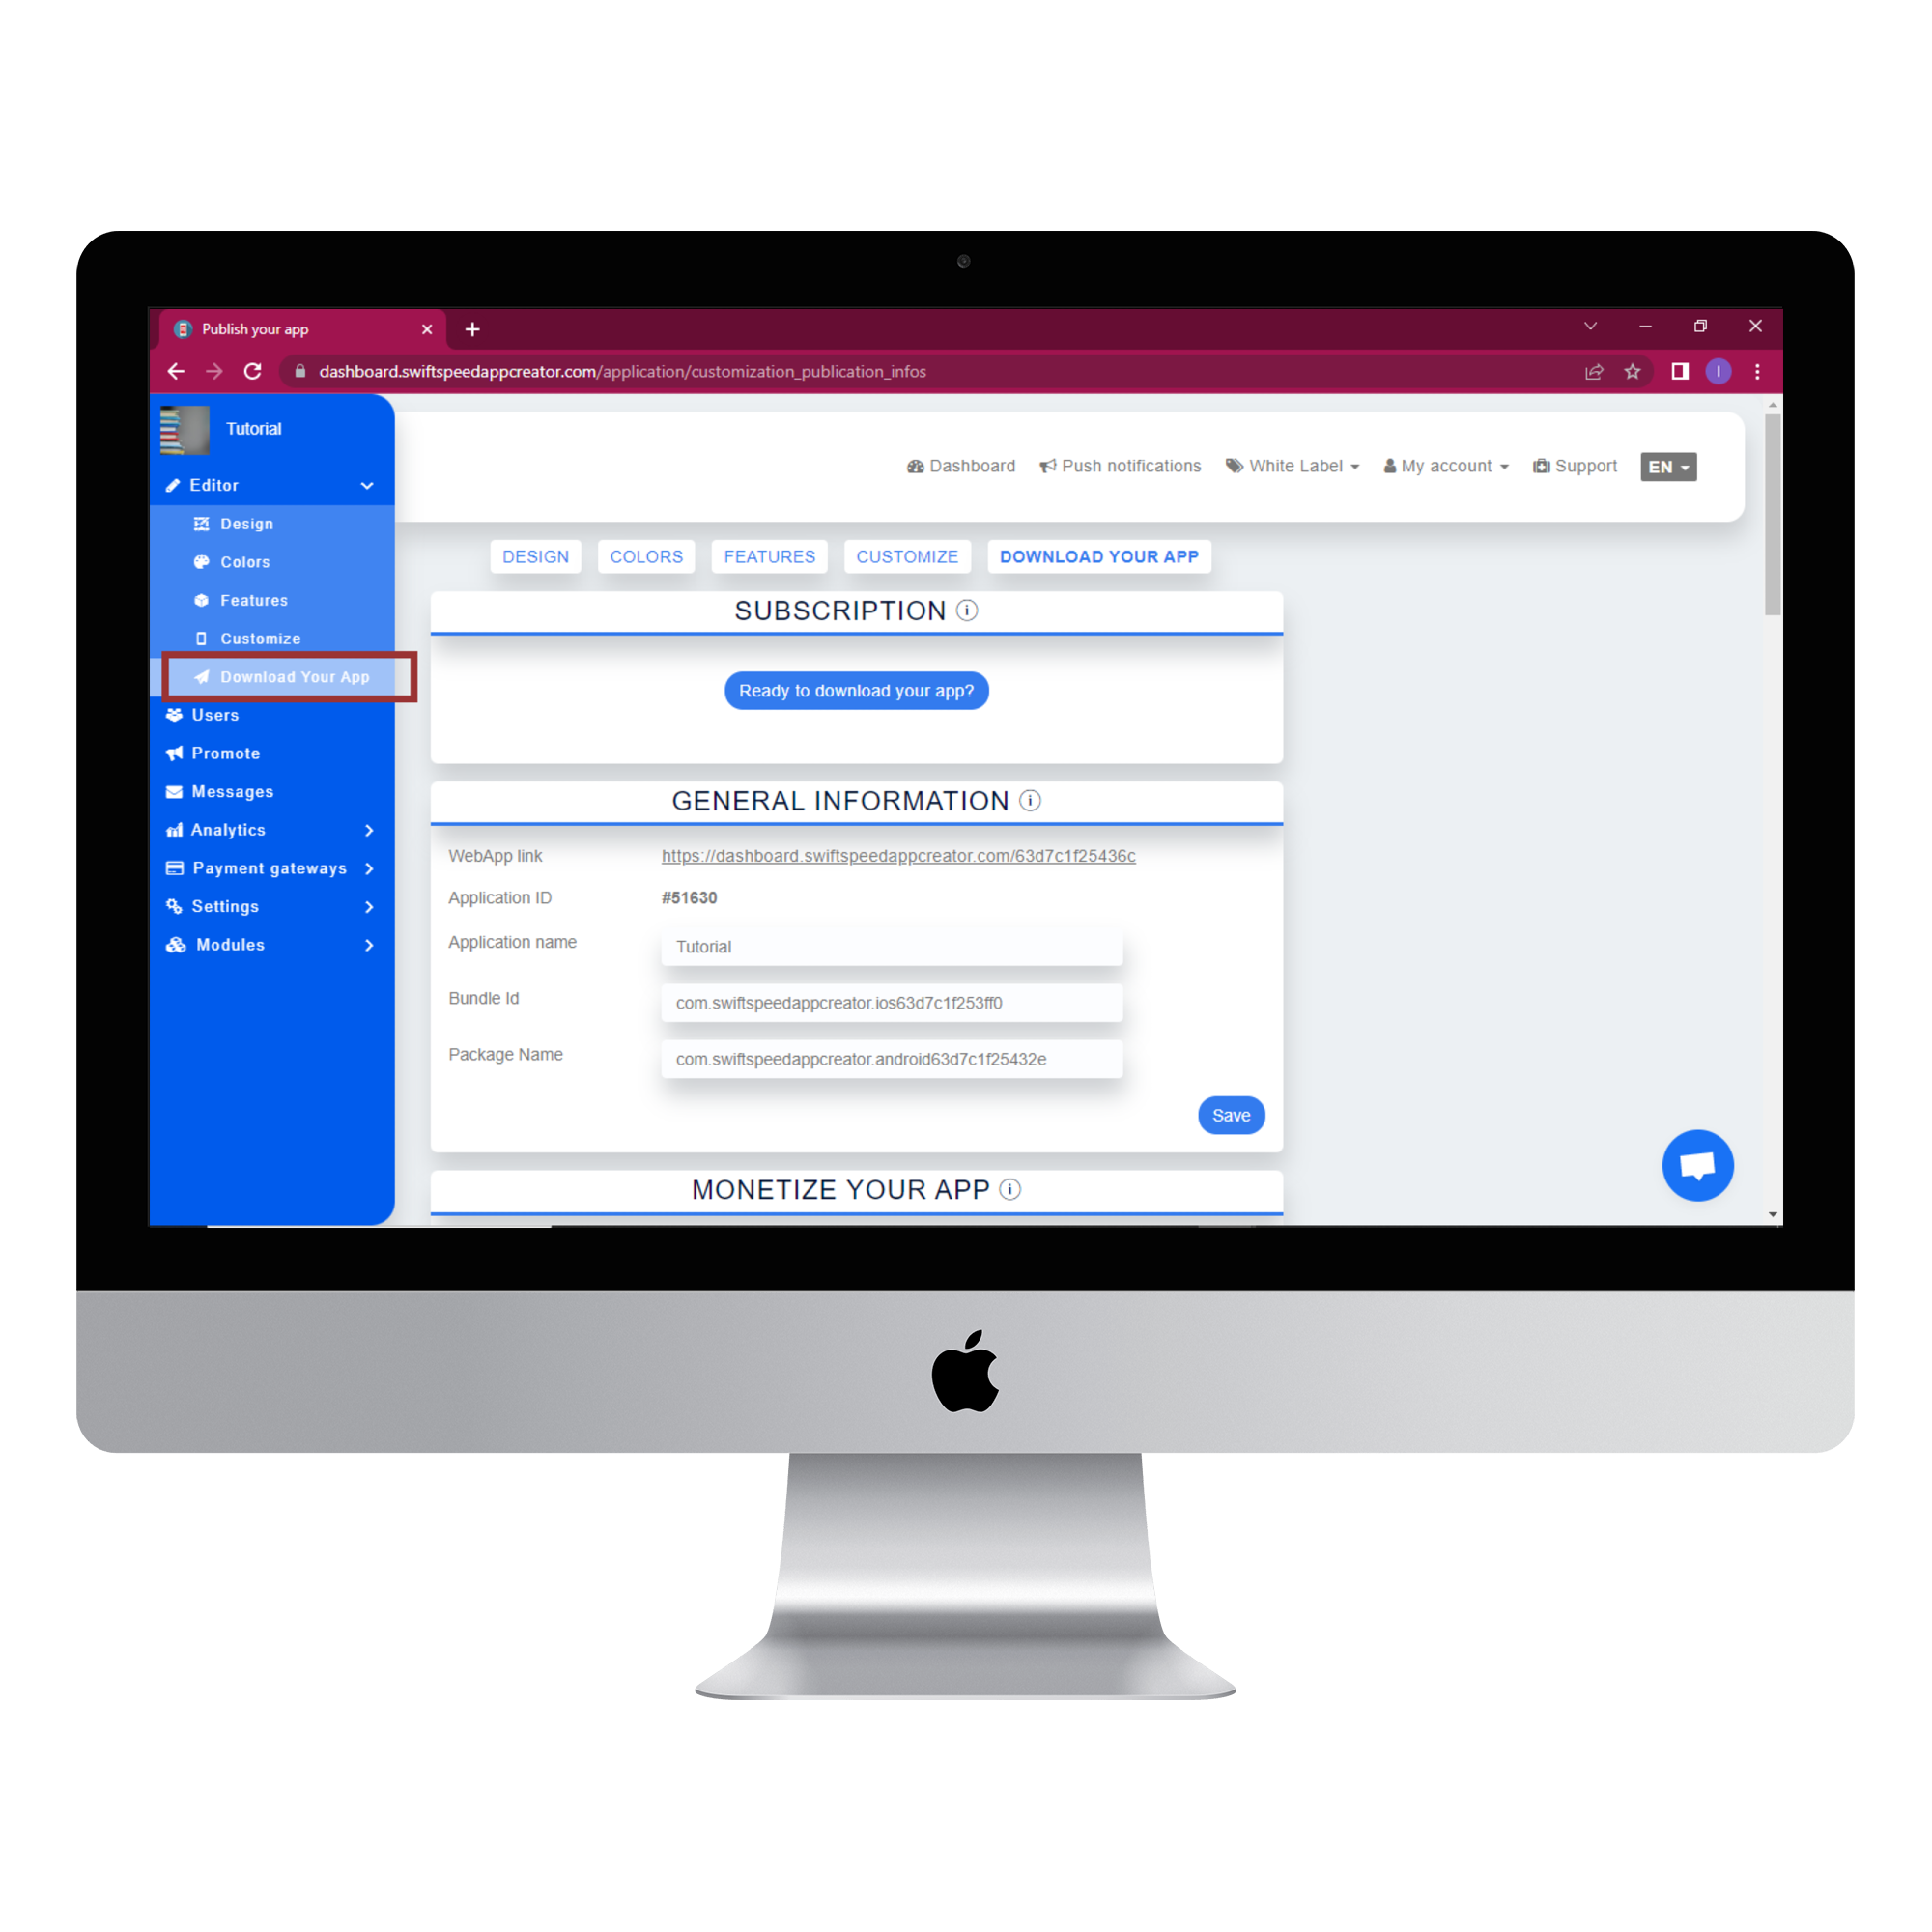
Click on the “Download your app” button to from the side menu when you are done with the customization. In the general information section, you can change the name of your app, the bundle ID and the package name. The common convention for package name is “com. ( company name). (app name)”. So here our package name will be “com.Swiftspeed.Tutorial”. Click save and scroll down to the “Monetize your app” section.
Step 13:
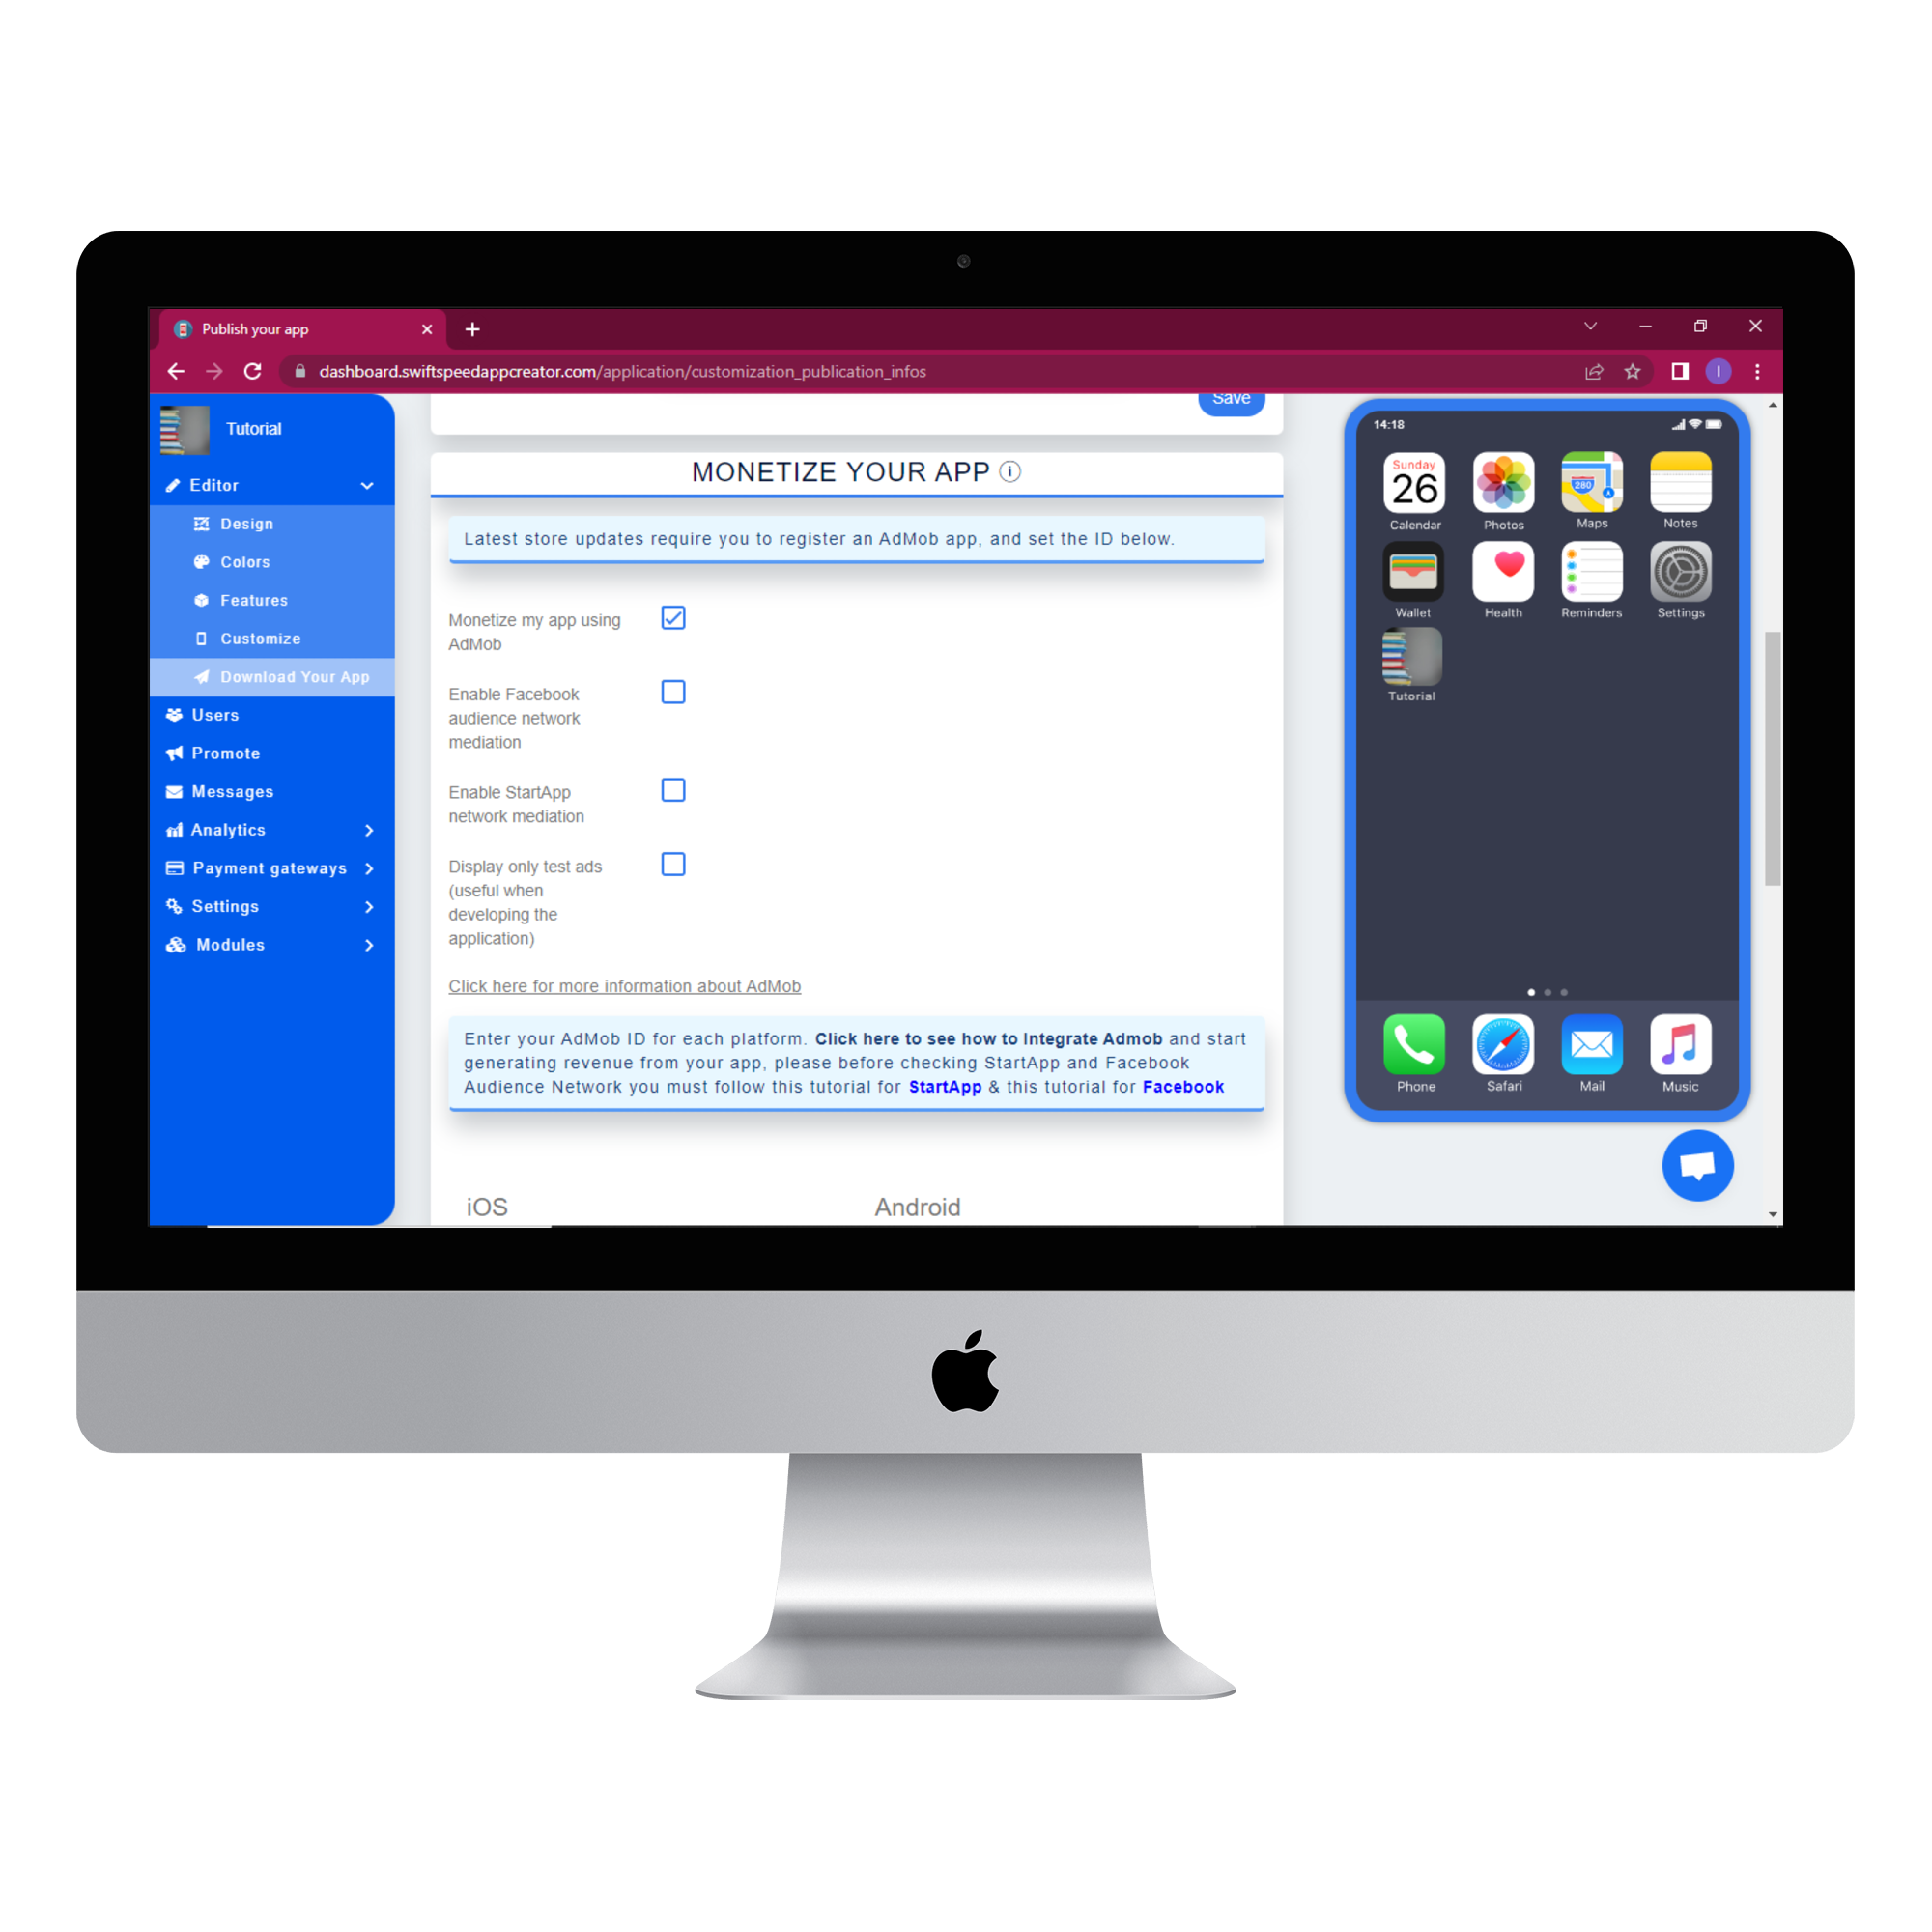
In the “Monetize your app” section, you can choose to monetize your app with AdMob. Admob is Google’s advertising platform for promoting and monetizing mobile applications. It allows developers to promote their applications and generate revenue through in-app ads. Admob is available for Android and iOS platforms. You are required to enter the App ID, Choose an ad type, and then enter the ID for whichever ad type you choose. Click “save” and scroll down to the “Download your app” section to activate your subscription.
Congratulations—you have just created your own mobile application without writing a single line of code. Remember that you do not need to republish your application every time you make changes to it, except when you change core features like the App Icon, App Name, App Package Name, or resolution. To learn how to use all features, kindly refer to our full documentation.

